✨ This article was AI edited. Editorial responsibility: Britany Marshall Beauty.
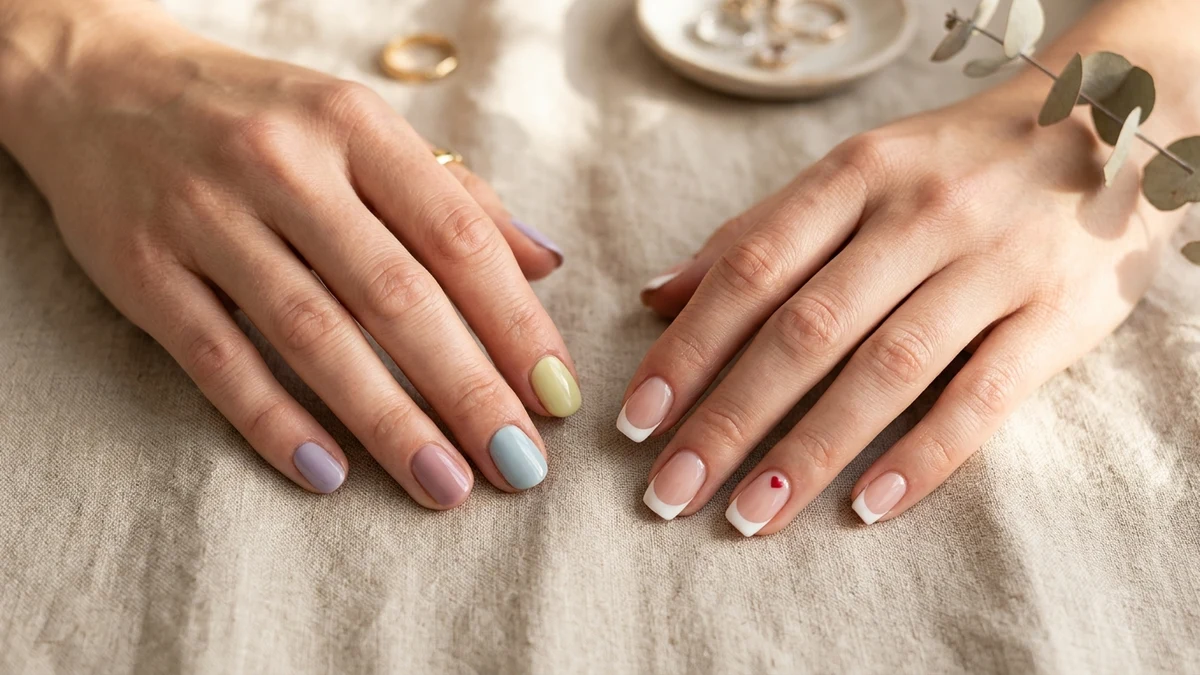
The best simple nail art designs for beginners replace shaky freehand brushwork with clever household stencils, self-leveling syrup gels, and two-second dotting tricks. We tested dozens of viral DIY manicure techniques across short squoval, round, and almond nails to curate twenty-five foolproof looks that resist chipping for weeks. Every style below pairs exact millimeter tool sizes with quick-dry layering intervals so even your non-dominant hand looks freshly stepped out of a boutique studio.
| # | Style / Name | ⏱️ Difficulty | 🎯 Best For |
|---|---|---|---|
| 1 | 1. Five-Dot Daisy Flower Nail Art on Short Pink Nails | Beginner | Short squoval & round nails |
| 2 | 2. Mismatched Pastel Skittle Manicure for Short Nails | Beginner | Zero-brushwork at-home manicures |
| 3 | 3. Cherry Red Minimalist Heart Accent on Short Almond Nails | Beginner | Short almond & oval shapes |
| 5 | 5. Negative Space Micro-French Tips with Silicone Stamper | Beginner | Ultra-short & bitten nail beds |
| 6 | 6. Translucent Peach Syrup Gel Nails with Glass Topcoat | Beginner | Streaky-polish beginners |
| 8 | 8. Toothpick Marble Swirl Drag on Short Blue Nails | Beginner | Short square & squoval nails |
| 9 | 9. Velvet Magnetic Cat-Eye Shimmer for Winter Short Nails | Beginner | Winter party & evening looks |
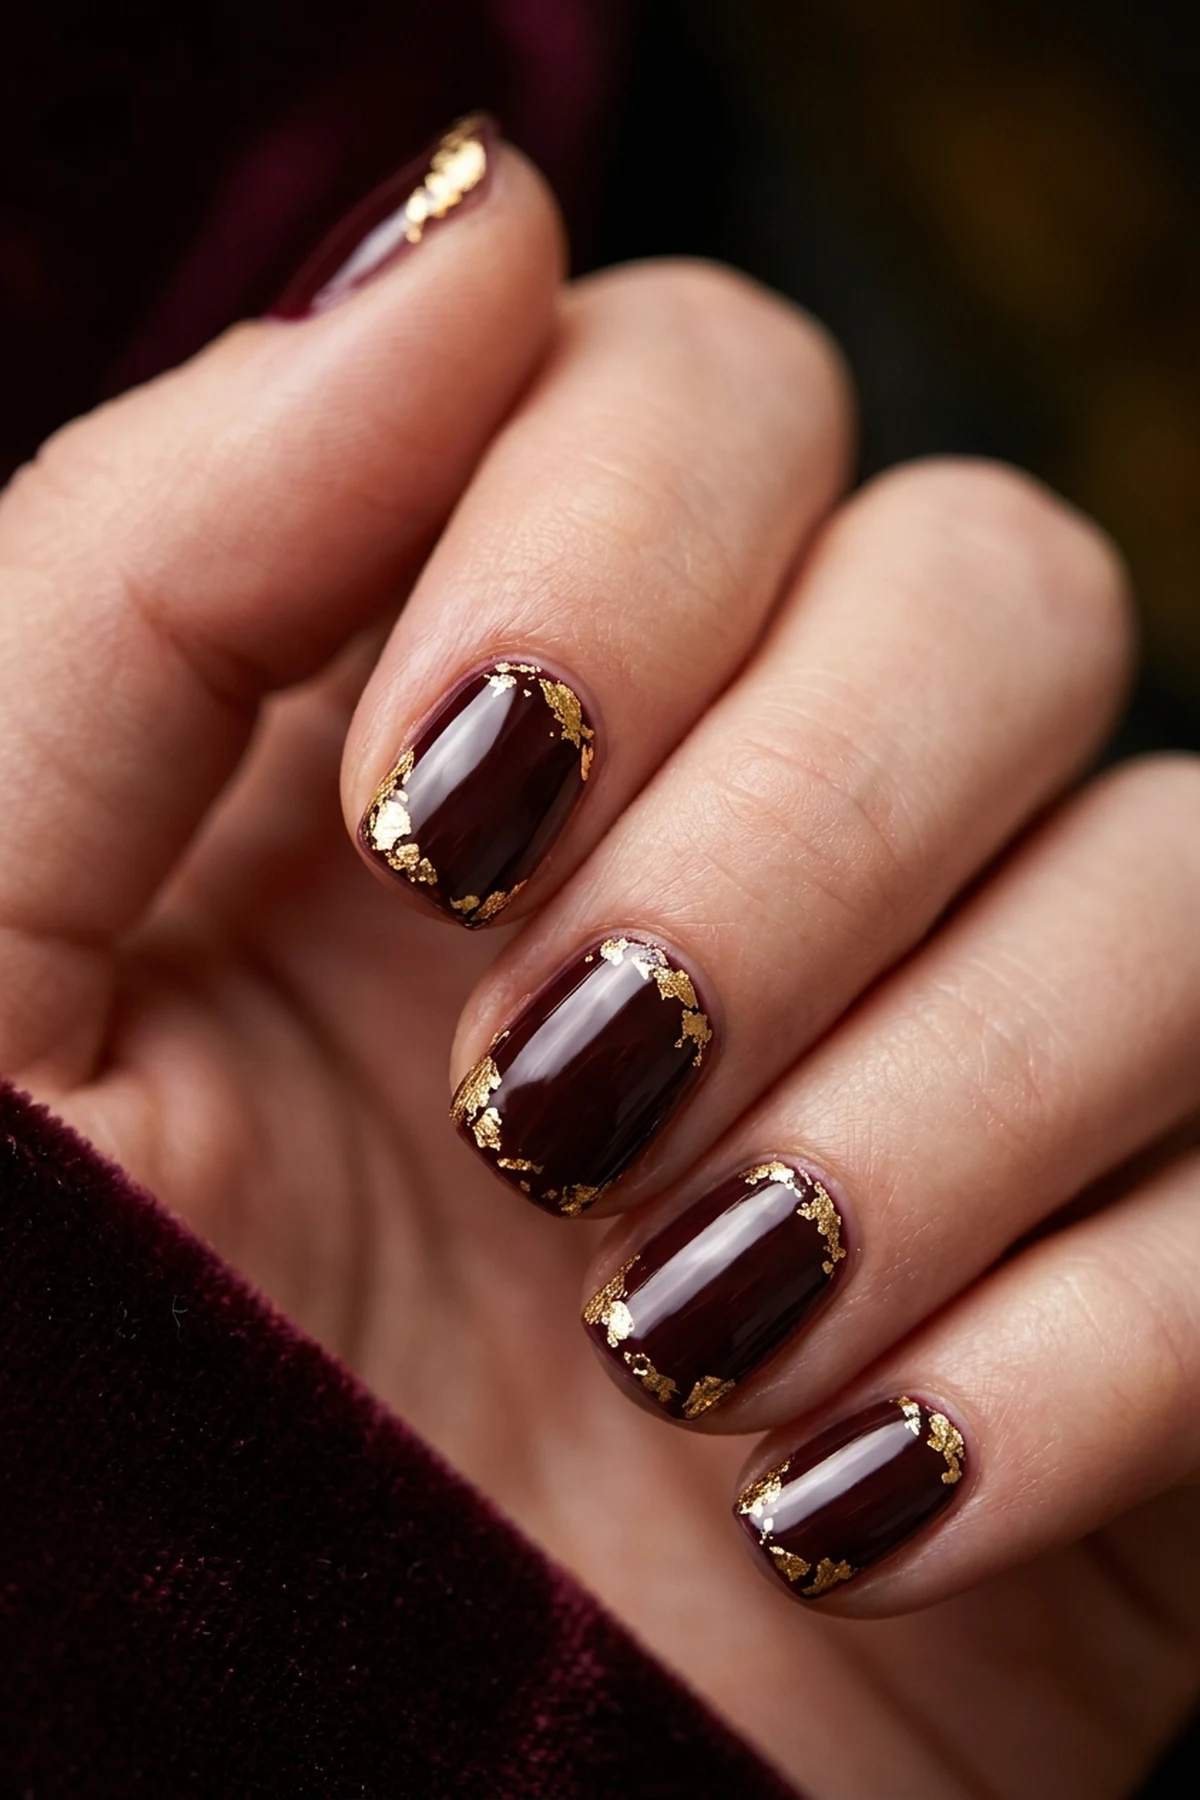
| 12 | 12. Dark Burgundy Simple Nails with Gold Leaf Flake Corners | Beginner | Autumn & holiday evening events |
| 17 | 17. Blooming Gel Watercolor Tortoiseshell Spots on Short Nails | Beginner | Organic non-symmetrical patterns |
| 19 | 19. Glazed Donut Chrome Rub over Milky Pink Builder Gel | Beginner | Bridal, work & everyday wear |
Contents of Article
- 1. Five-Dot Daisy Flower Nail Art on Short Pink Nails
- 2. Mismatched Pastel Skittle Manicure for Short Nails
- 3. Cherry Red Minimalist Heart Accent on Short Almond Nails
- 4. Monochrome Black and White Abstract Lines Without Tools
- 5. Negative Space Micro-French Tips with Silicone Stamper
- 6. Translucent Peach Syrup Gel Nails with Glass Topcoat
- 7. Glazed Pearl Aura Blush Center with Cosmetic Sponge
- 8. Toothpick Marble Swirl Drag on Short Blue Nails
- 9. Velvet Magnetic Cat-Eye Shimmer for Winter Short Nails
- 10. Glitter Gradient Ombré Cuffs on Short Purple Nails
- 11. Step-by-Step Confetti Polka Dots on Long Neutral Nails
- 12. Dark Burgundy Simple Nails with Gold Leaf Flake Corners
- 13. Simple Freehand Wave Swirls with 7mm Striper Brush
- 14. Easy Toe Nail Art Designs for Beginners: White Micro-Daisy Pedicure
- 15. Simple Christmas Candy-Cane Diagonal Stripes with Tape Stencils
- 16. Half-Moon Cuticle Windows with Binder Reinforcement Stickers
- 17. Blooming Gel Watercolor Tortoiseshell Spots on Short Nails
- 18. Diagonal Color-Block Slash with Scotch Tape Guides
- 19. Glazed Donut Chrome Rub over Milky Pink Builder Gel
- 20. Dainty Bobby Pin Berry Clusters on Short White Nails
- 21. Minimalist Cuticle Gold Pearl Studs on Short Black Nails
- 22. Butter Yellow Micro-French Smile Lines on Short Almond Nails
- 23. Vertical Center Metallic Striping Tape Spine on Nude Nails
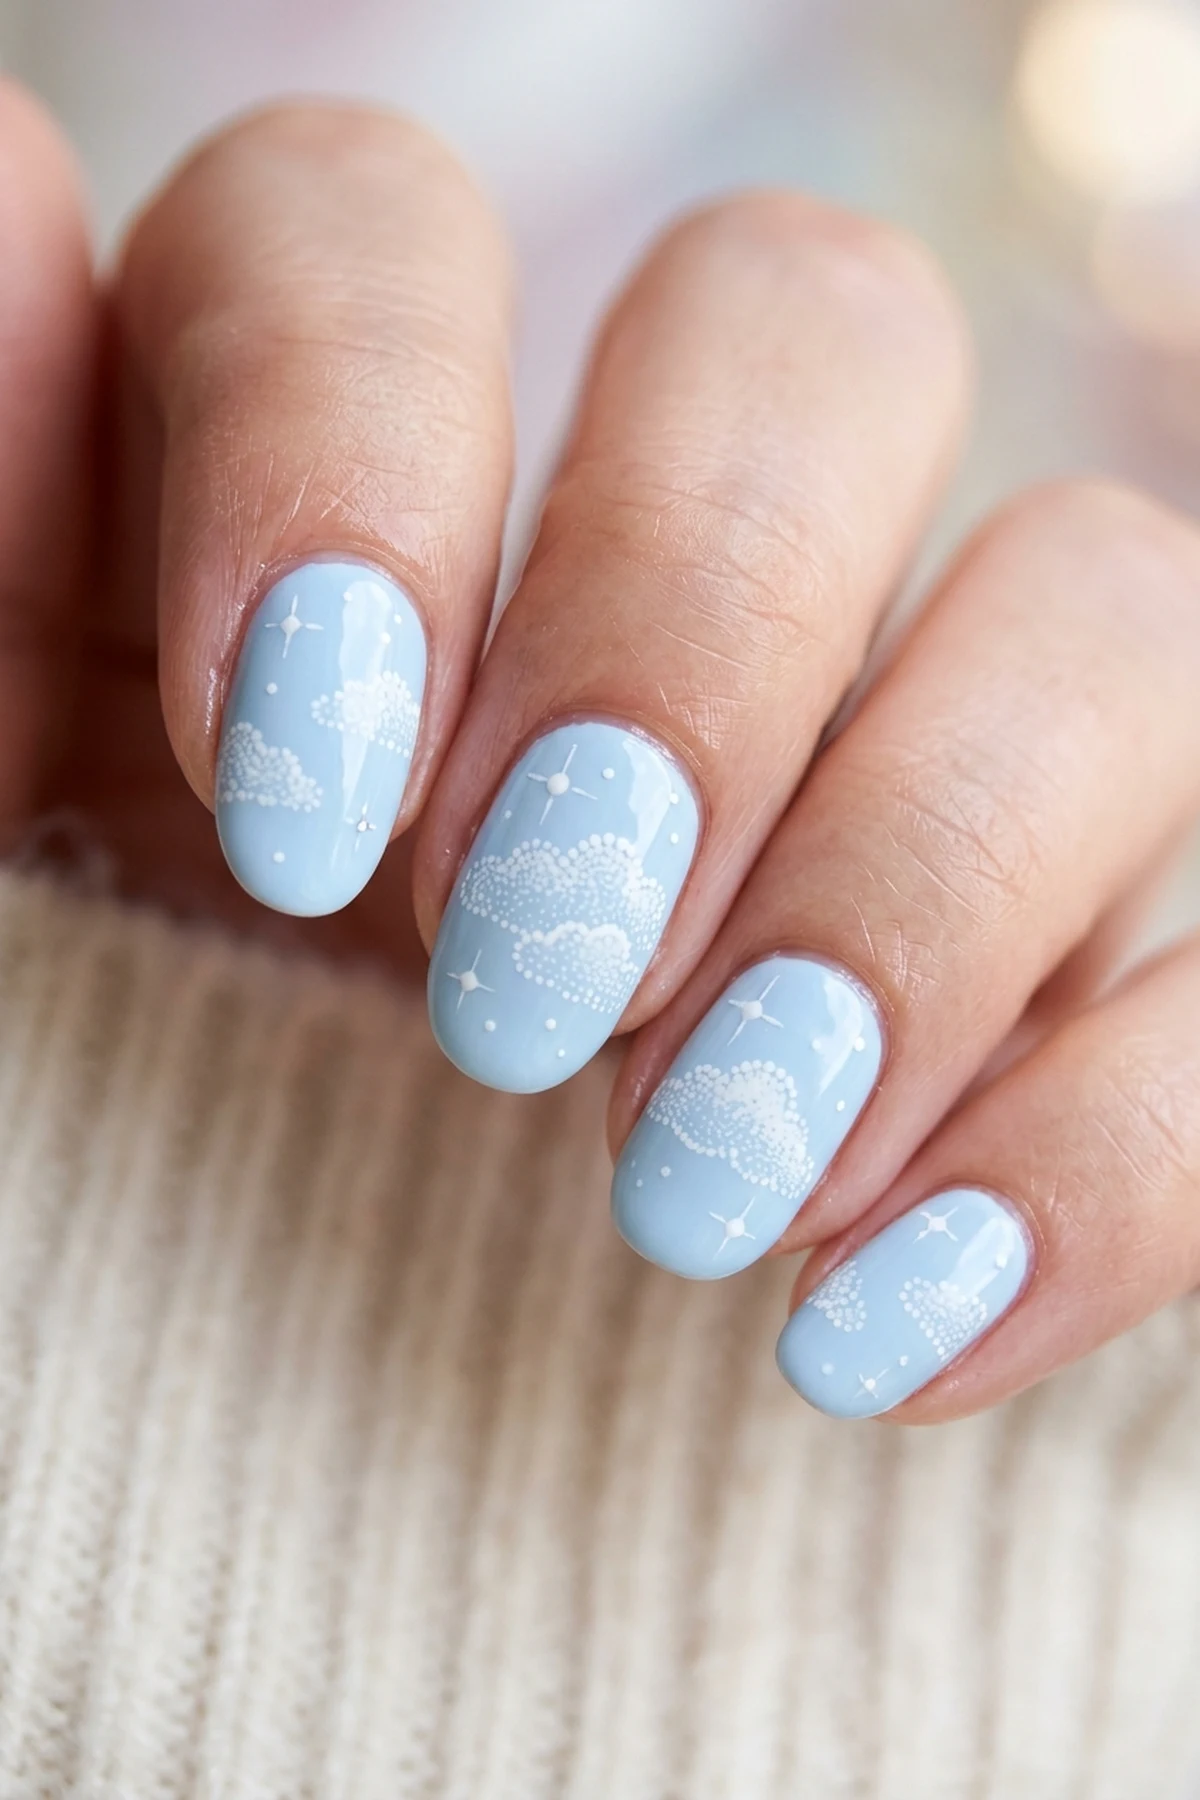
- 24. Cloud & Starburst Dotting Tool Sky on Soft Blue Nails
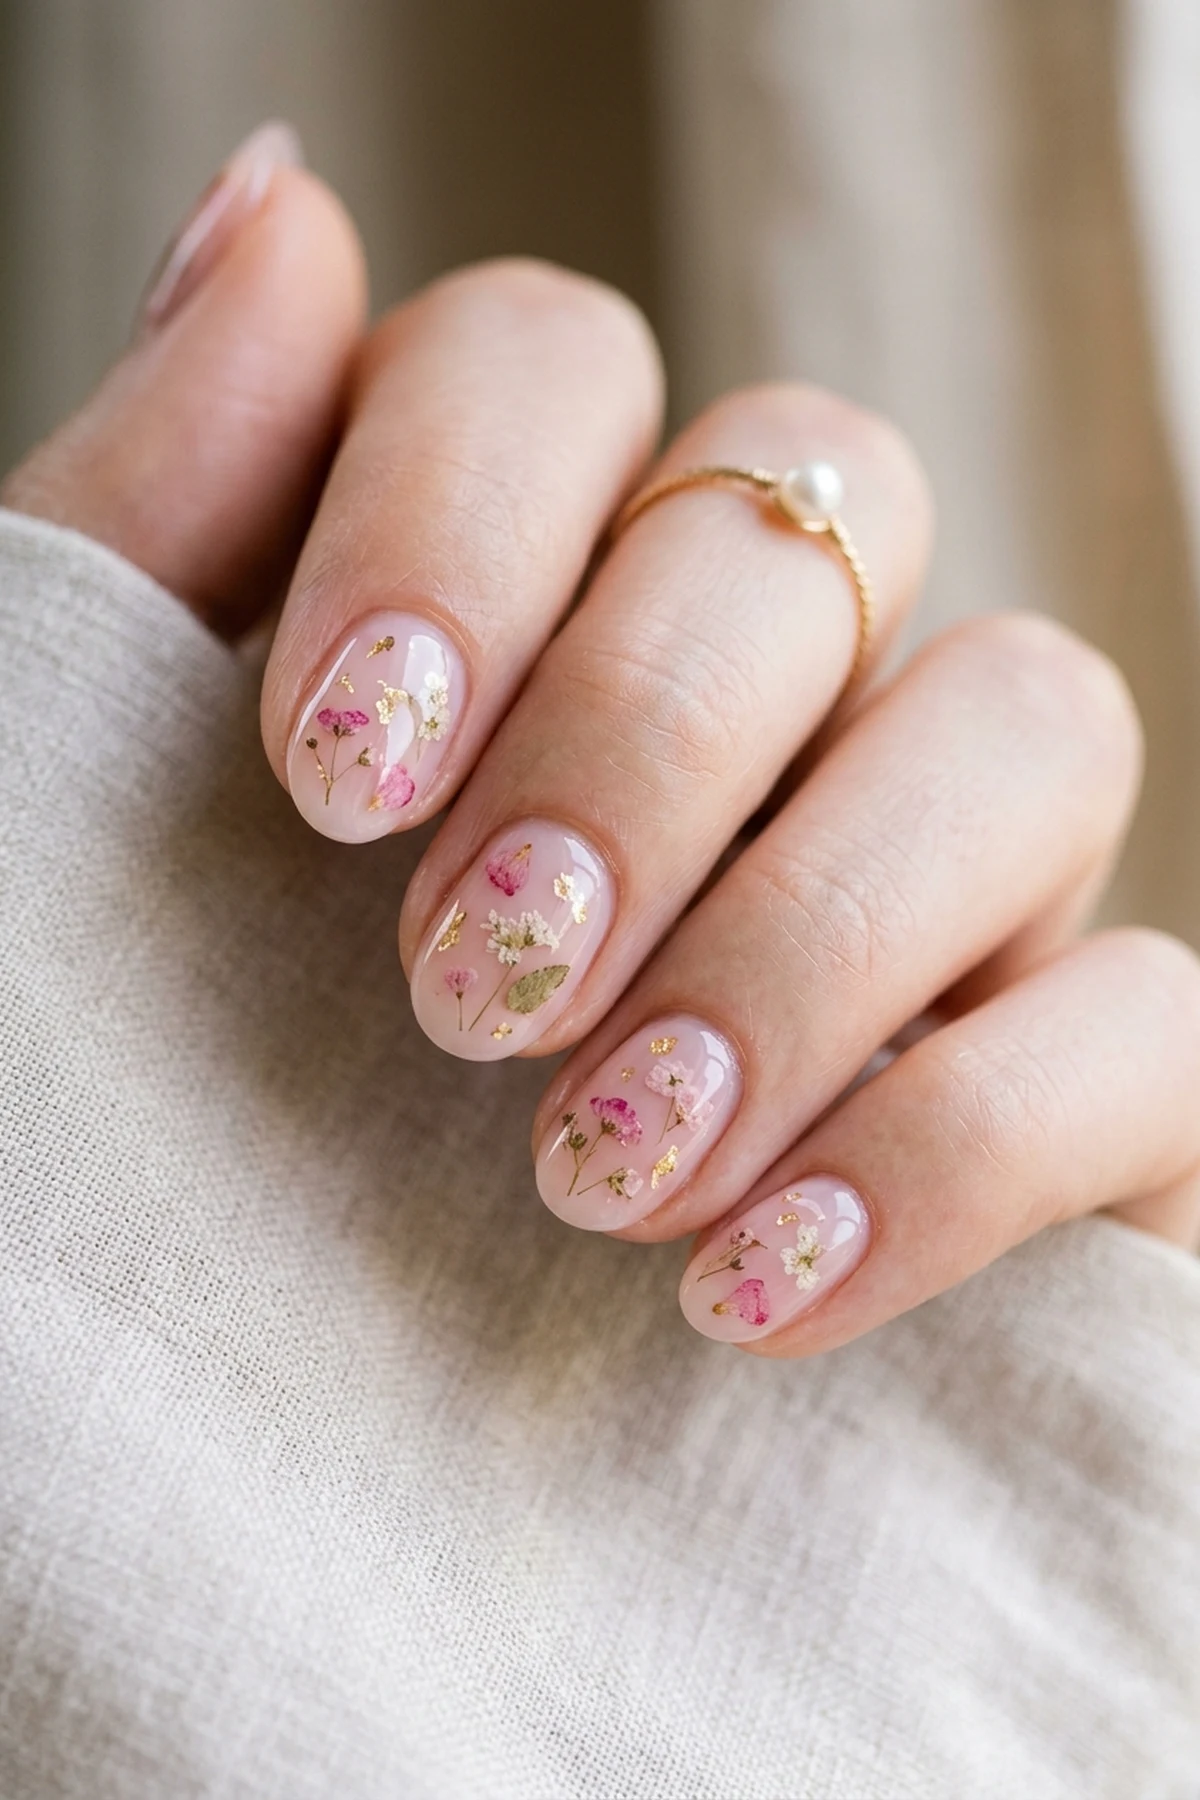
- 25. Sheer Milky Builder Overlay with Pressed Dry Mini Florals
- Frequently Asked Questions
- What household items can I use for beginner nail art without buying brushes?
- How long should I wait before applying topcoat over nail art dots or stripes?
- Which simple nail art designs look best on ultra-short or bitten nails?
- How do I keep dark or bright nail polish from flooding my cuticles?
- Is gel polish or regular air-dry lacquer easier for beginner nail art at home?
- How can I stop my DIY nail art from chipping at the tips after a few days?
1. Five-Dot Daisy Flower Nail Art on Short Pink Nails
🎯 Best For: Short squoval & round nails
✨ Vibe: Soft spring cottagecore floral
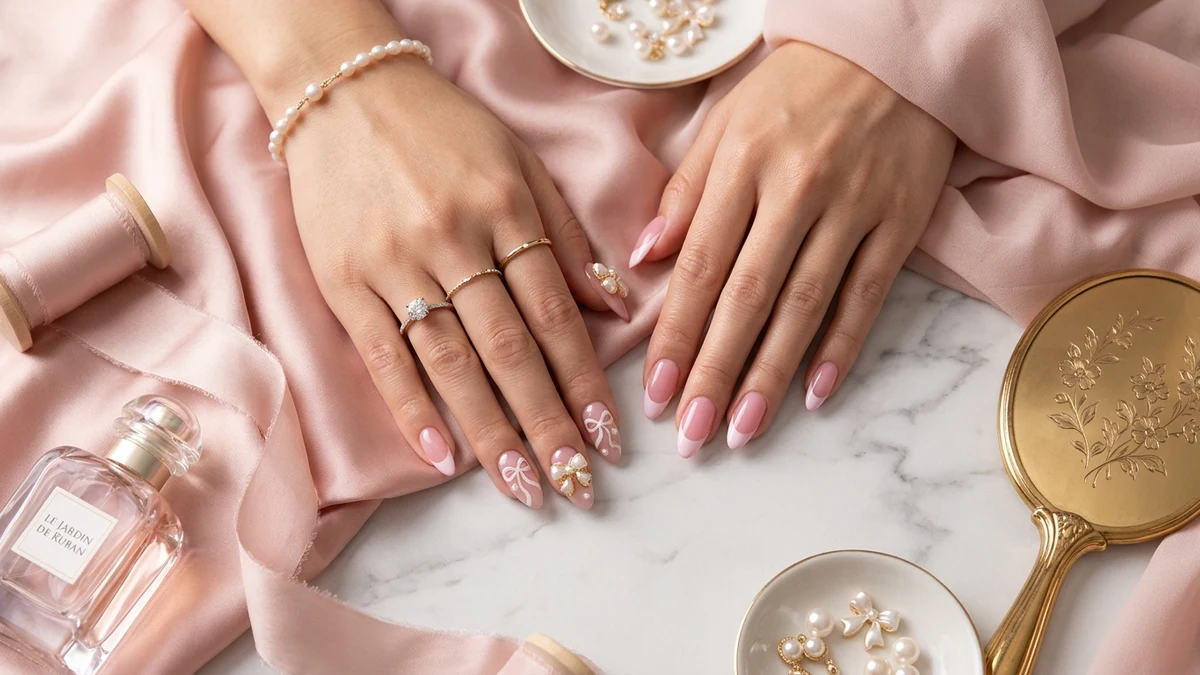
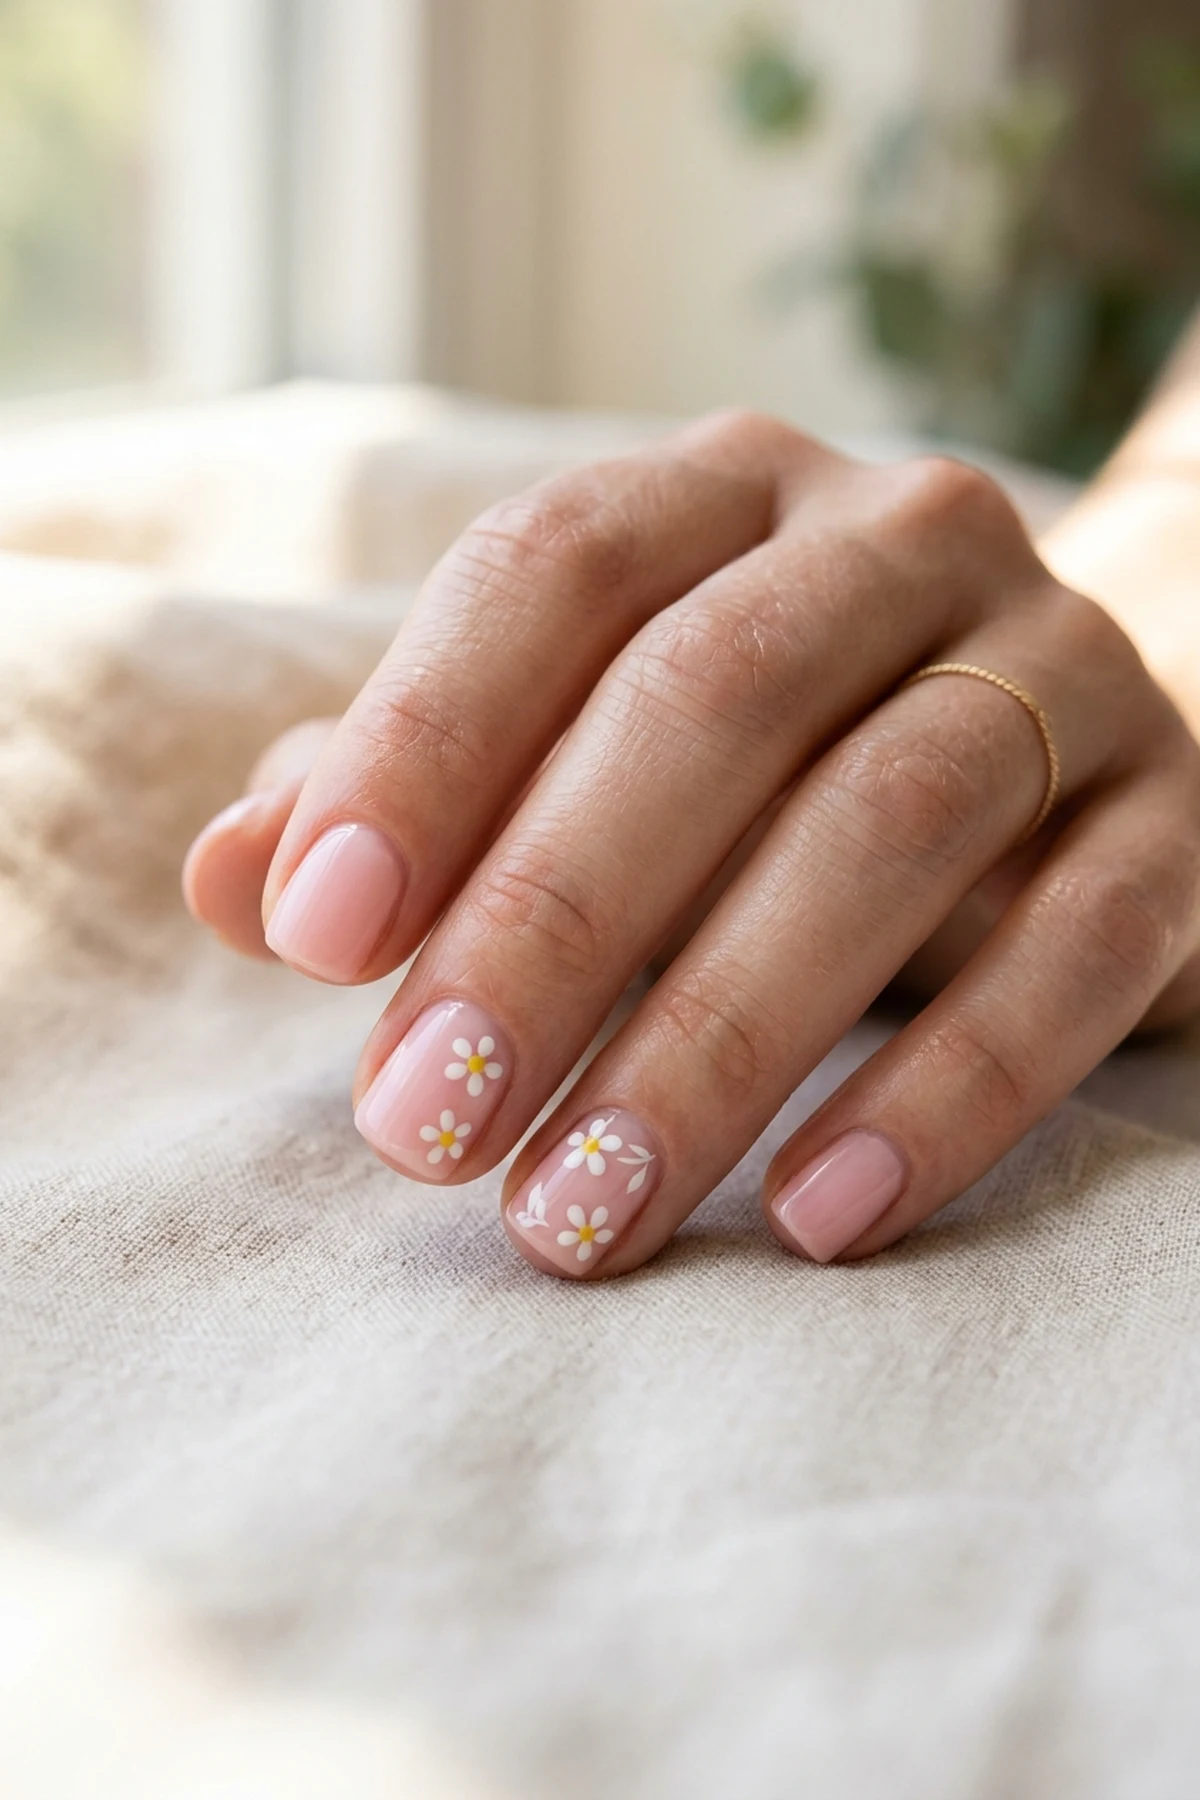
Nothing builds confidence faster for first-time nail artists than a beginner-friendly five-dot daisy floral motif painted over clean, natural nails. By starting with two thin coats of an OPI Bubble Bath sheer base, any minor brush marks disappear into a soft, healthy pink glow that flatters every skin tone.
Instead of buying expensive salon brushes, bend open a standard hair pin and dip its rounded tip into opaque white polish to stamp a symmetrical bobby pin floral dot cluster. Place five evenly spaced white dots in a circle, let them set for ninety seconds so the edges stay crisp, and drop a single warm yellow dot right in the center.
When doing this DIY manicure at home, wipe the bobby pin tip on a lint-free paper towel between every single petal to prevent oversized blobs. Float a generous bead of glossy topcoat over the cured flowers without dragging the bristles across the white pigment, locking in a chip-resistant finish that lasts all week.
2. Mismatched Pastel Skittle Manicure for Short Nails
🎯 Best For: Zero-brushwork at-home manicures
✨ Vibe: Playful tonal color-block chic
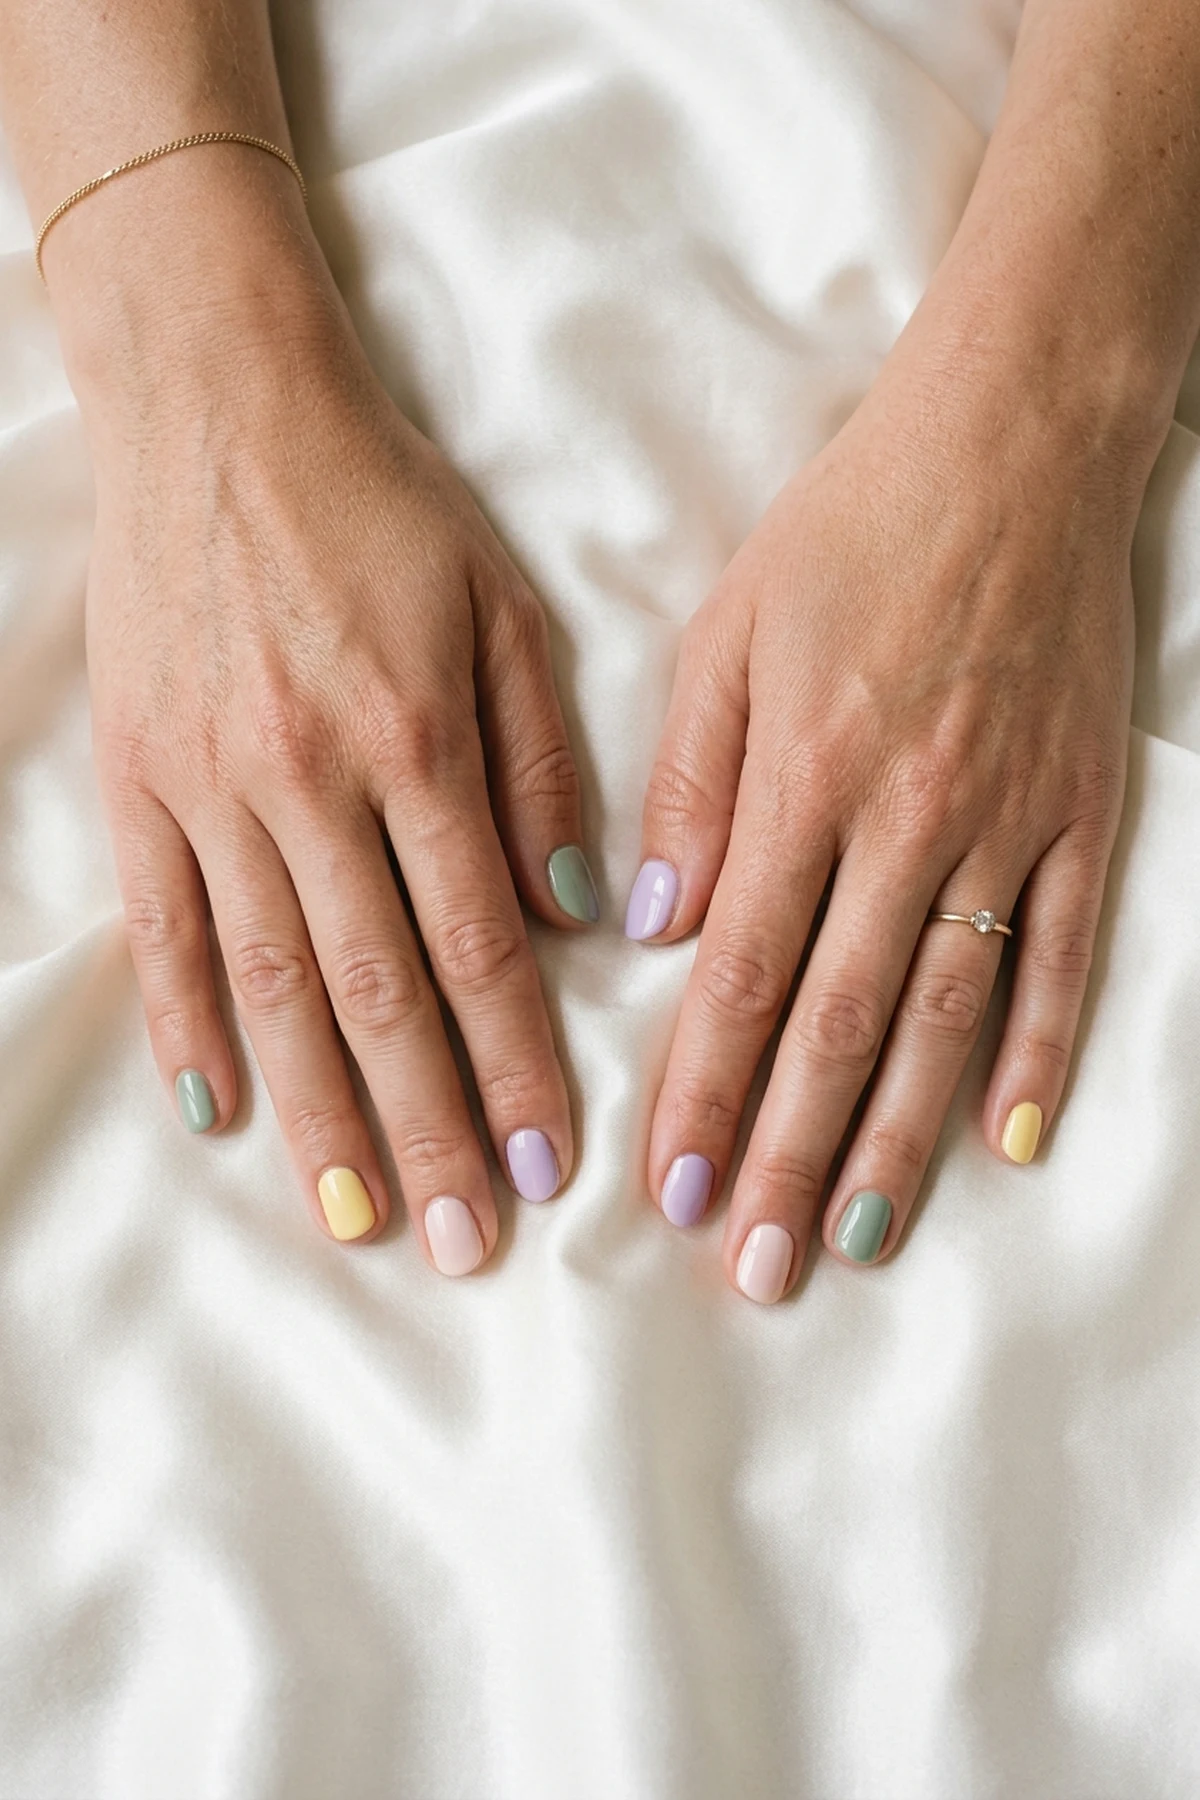
When you want an eye-catching editorial look in half the time, a time-saving mismatched pastel skittle manicure delivers instant visual impact with zero intricate hand-painting required. Painting each finger a different tonal shade turns standard solid polish application into a cohesive, studio-worthy color story.
The secret to keeping five different shades looking elevated rather than chaotic is matching their white-base saturation levels, such as pairing a creamy butter yellow pastel cream polish with soft sage, periwinkle, peach, and lilac. Smooth out natural nail ridges first with a thin self-leveling coat of sheer milky pink builder gel so chalky pastel pigments glide on without streaking.
If your natural nails tend to peel or bend under pastel enamels, check our guide to the best builder gel for beginners to build a durable, glass-smooth foundation. Keep all five nails filed to the exact same short squoval length so the minimalist multi-color palette reads crisp and intentional.
3. Cherry Red Minimalist Heart Accent on Short Almond Nails
🎯 Best For: Short almond & oval shapes
✨ Vibe: Romantic Parisian micro-art
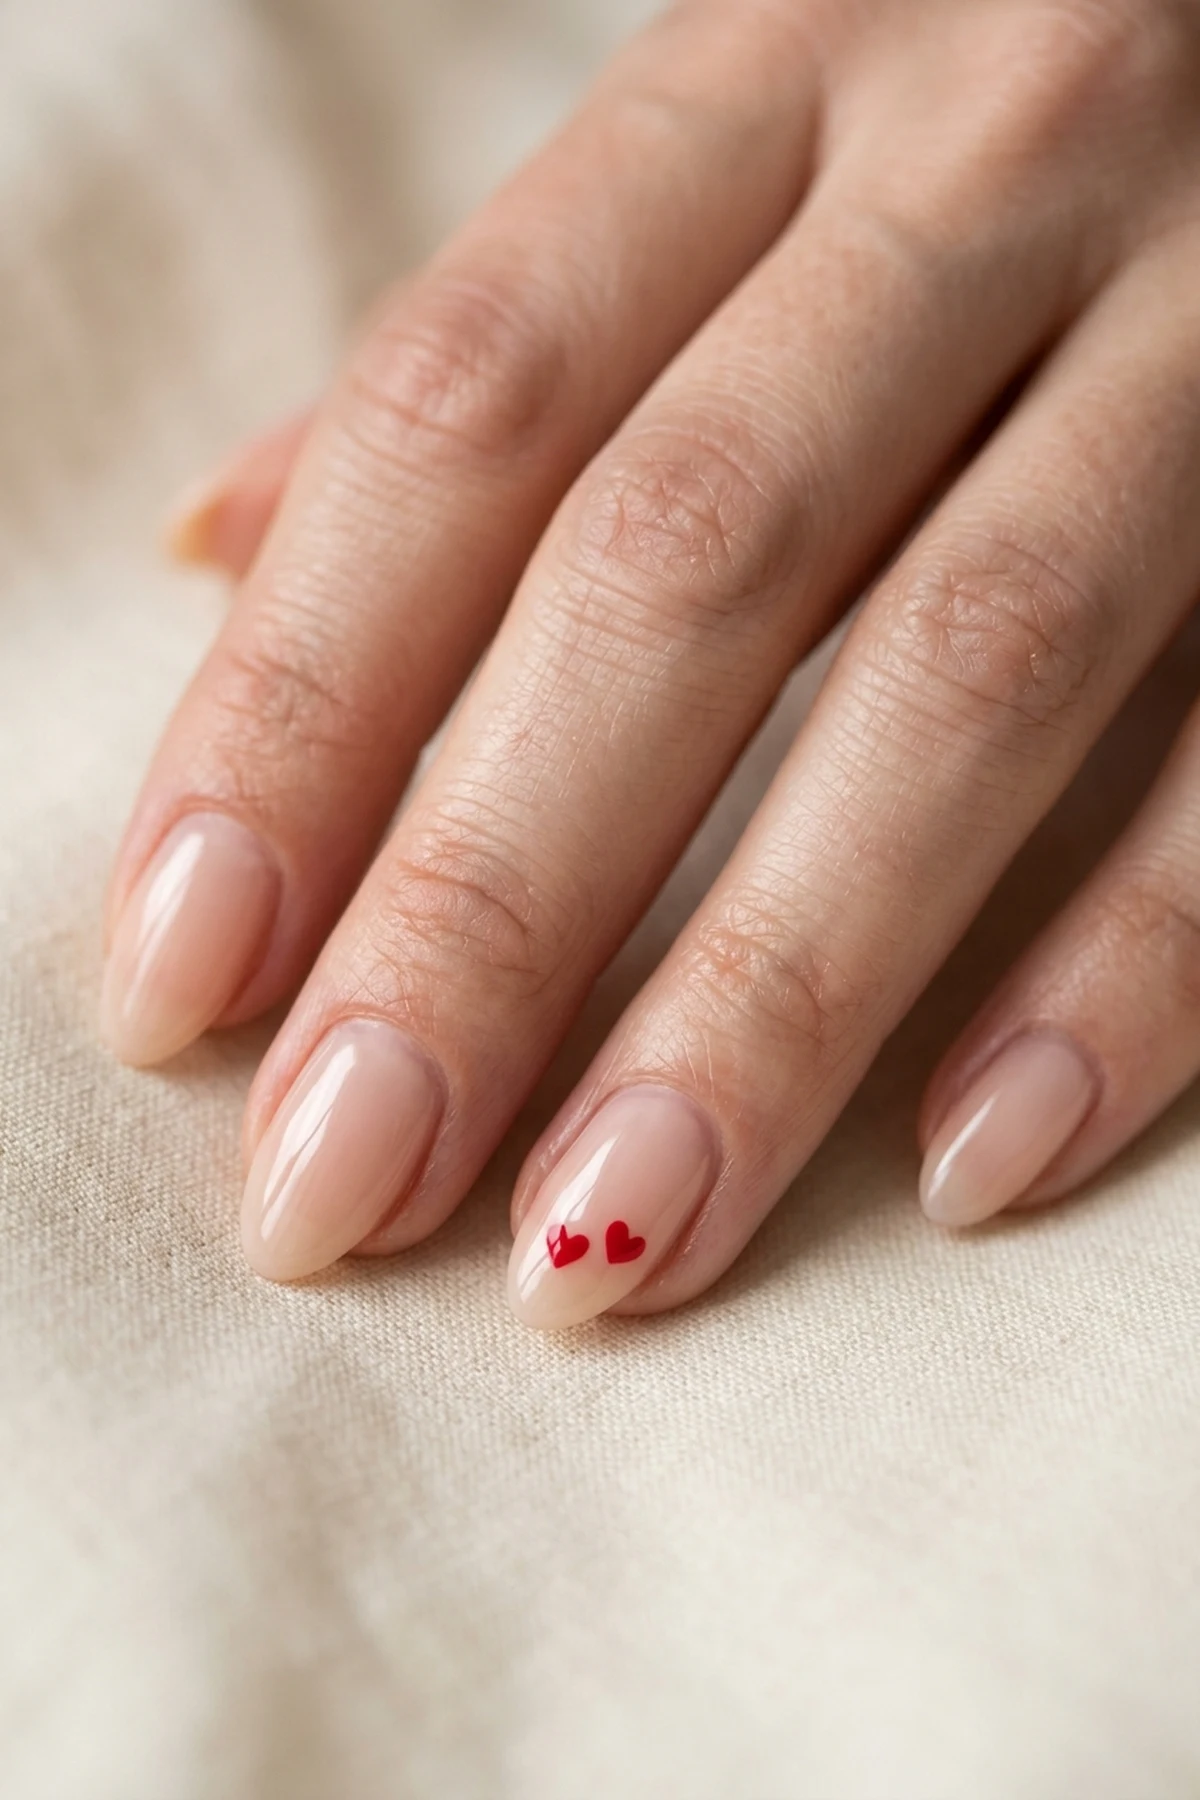
Few micro-trends capture effortless Parisian romance quite like a single cherry red minimalist heart accent floating near the center of a glossy nude nail bed. Because the tiny graphic occupies less than three millimeters of space, even complete beginners can master the placement on both hands in under five minutes.
Rather than struggling to draw symmetrical curved arches freehand, dip the smaller sphere of a dual-ended metal dotting tool into highly pigmented crimson polish and stamp two side-by-side dots just above the cuticle arch. While those two crimson beads are still wet, use the fine point of a wooden toothpick to pull both outer edges downward into a sharp V-shaped point.
This minimalist negative-space layout looks especially balanced when restricted to the ring and index fingers, leaving the remaining nails coated in sheer milky blush. Let the red heart dry for a full three minutes before sealing so the vibrant pigment never bleeds into your clear topcoat.
4. Monochrome Black and White Abstract Lines Without Tools
🎯 Best For: Shaky hands & uneven free edges
✨ Vibe: Modern art gallery editorial
If shaky hands make you nervous about detailed brushwork, budget-friendly monochrome black and white abstract lines take the pressure off by embracing asymmetrical geometry. High-contrast jet black and chalk white strokes layered over a bare gloss base turn every nail into a modern gallery canvas without requiring salon tools.
You can swipe the side of your standard bottle brush diagonally across the tip for a bold graphic block, then lay down a single strip of ultra-thin metallic striping tape or matte household tape as a crisp stencil guide. Press the tape edges firmly against your dry base coat with a silicone cuticle pusher so wet polish cannot seep underneath the border.
For a clean DIY finish, peel away any stencil tape with tweezers immediately while the black polish is still wet, preventing stringy lift marks along the line edge. Varying the angle of the lines from nail to nail hides uneven free edges and eliminates the stress of matching your left and right hands.
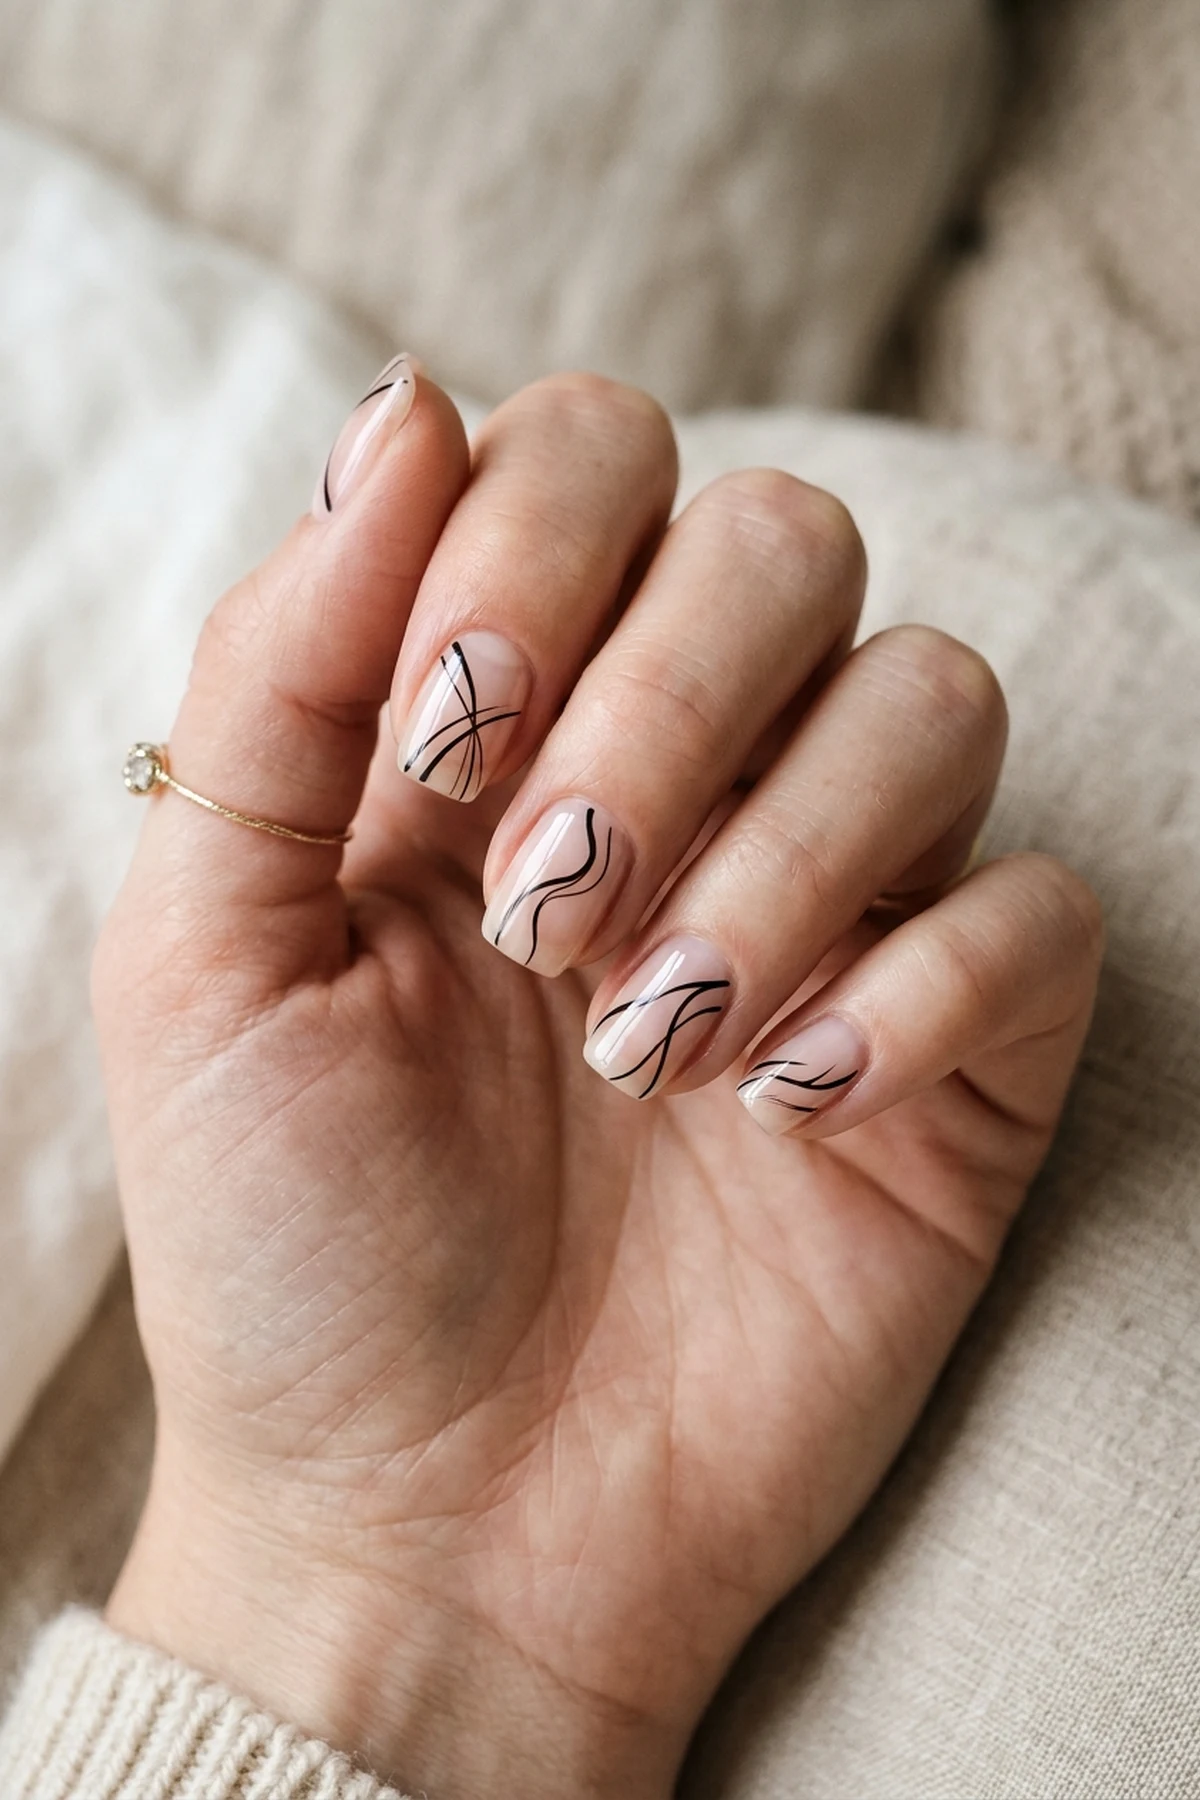
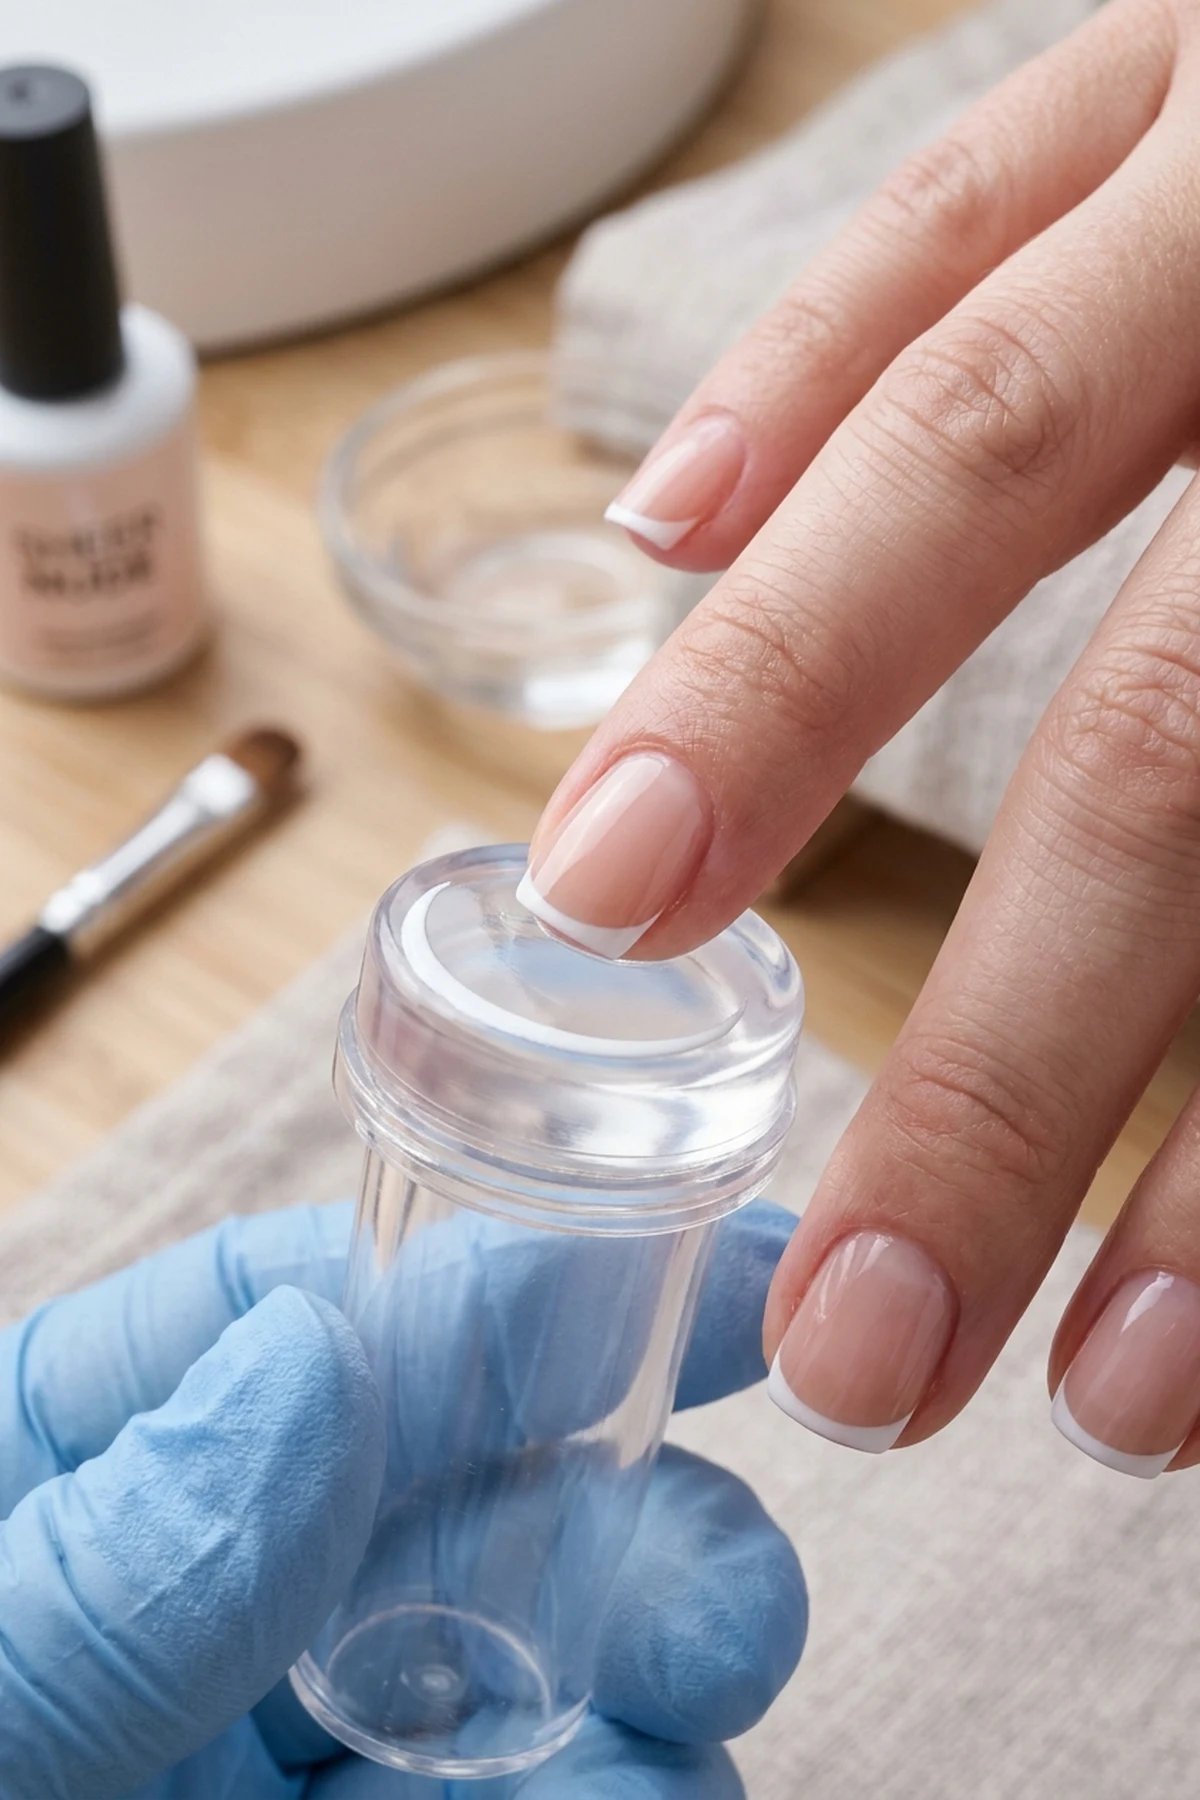
5. Negative Space Micro-French Tips with Silicone Stamper
🎯 Best For: Ultra-short & bitten nail beds
✨ Vibe: Clean-girl quiet luxury
Nail technicians consistently recommend negative space micro-French tips as the ultimate expert pick for elongating ultra-short or bitten nail beds without bulky extensions. A whisper-thin white smile line hugging the very edge of a sheer neutral nail creates the illusion of longer, slender fingers while maintaining a quiet-luxury aesthetic.
Instead of holding your breath with a liner brush, brush a thin layer of opaque white polish onto the squishy dome of a clear silicone French tip stamper and gently press your nail tip into the cushion at a forty-five-degree angle. Roll your fingertip slightly from left to right only once to transfer a uniform one-millimeter crescent, then finish with the free-edge cap sealing technique to wrap the pigment around the tip.
To keep this professional manicure looking pristine for two weeks, clean the silicone stamper head by dabbing it onto scotch tape rather than wiping it with harsh acetone, which can cloud the clear rubber. Sealing both the top surface and the underside of the free edge prevents premature tip wear from daily typing.
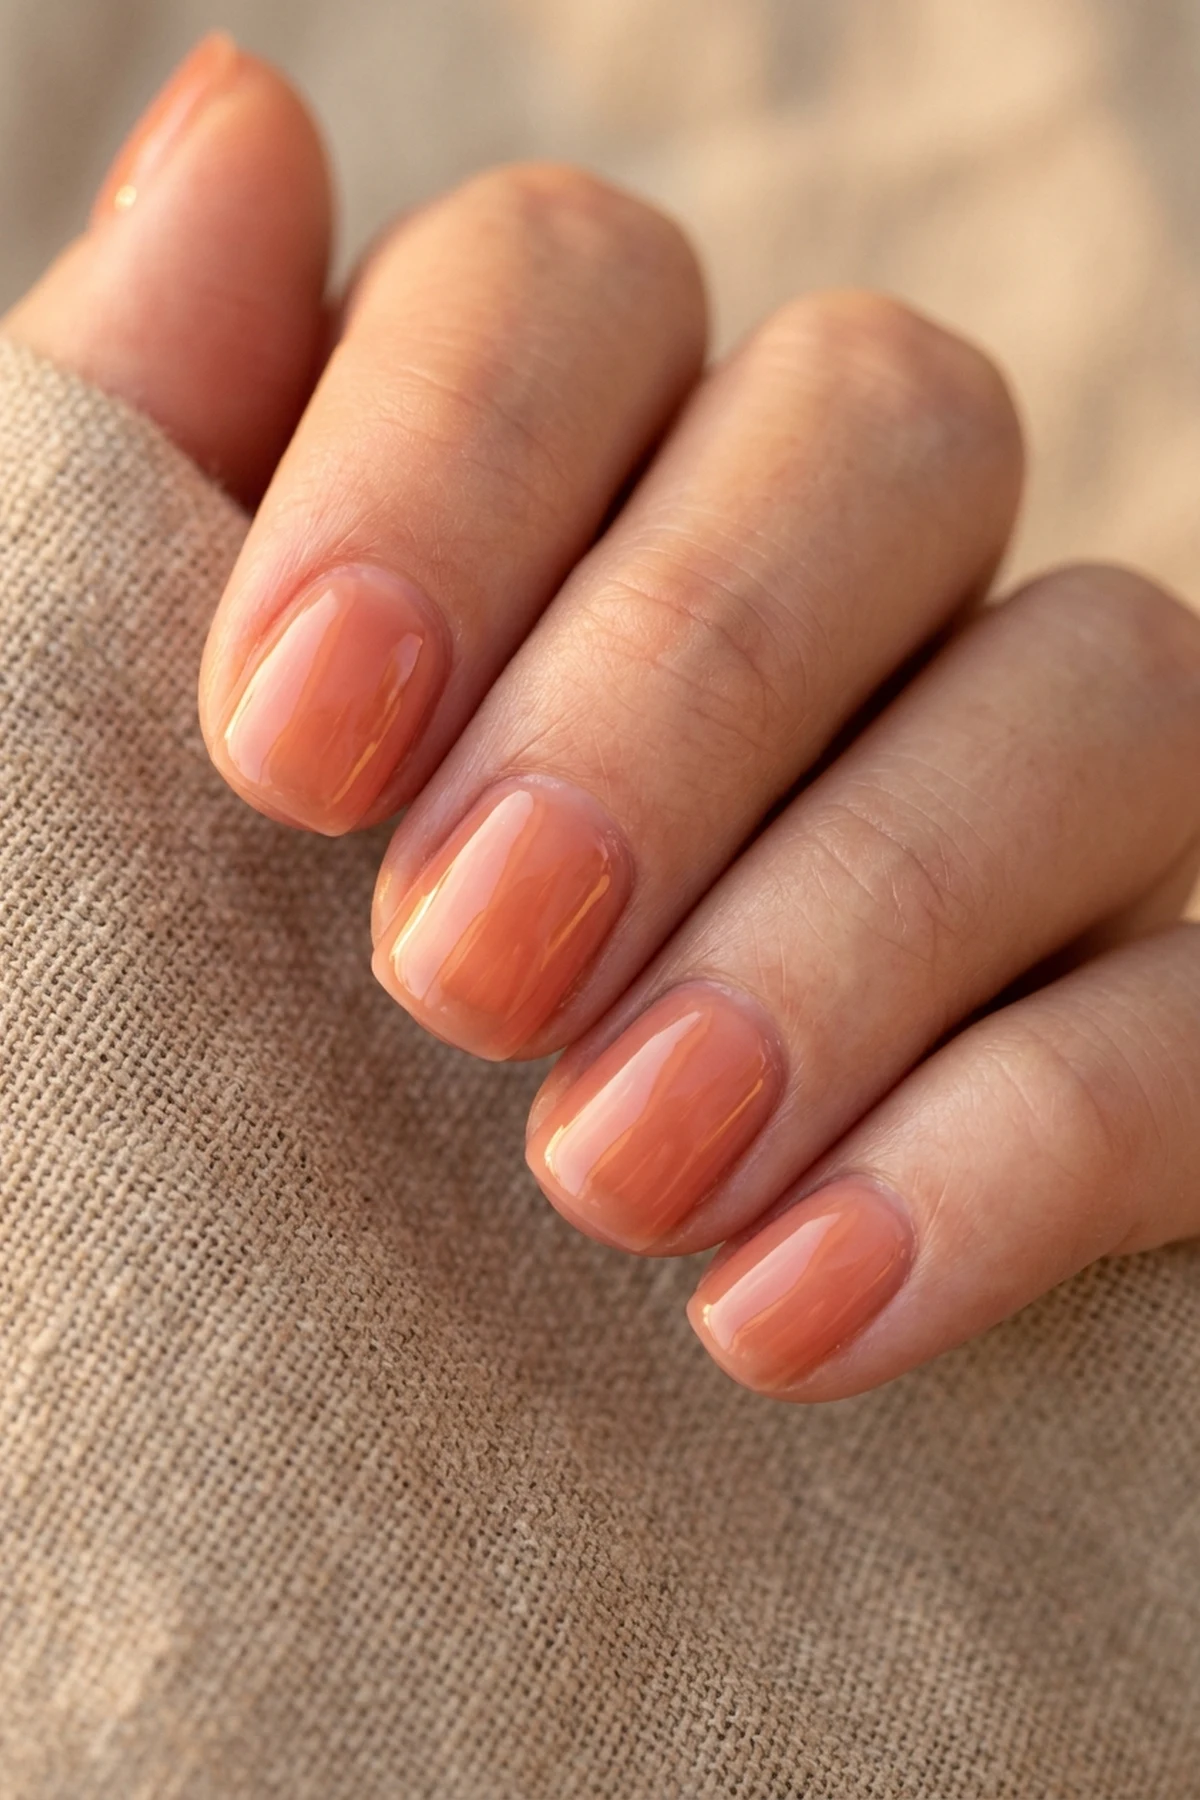
6. Translucent Peach Syrup Gel Nails with Glass Topcoat
🎯 Best For: Streaky-polish beginners
✨ Vibe: Dewy Korean syrup glass glow
Inspired by Seoul’s viral glass-skin beauty movement, translucent peach syrup gel is the ultimate trend alert for anyone who struggles with streaky opaque cream polishes. Because jelly and syrup formulas are suspended in a sheer, self-leveling resin base, each stroke melts seamlessly into the last without showing harsh overlap ridges.
To build that coveted juicy dimensional depth, apply your first coat across the entire nail plate and follow with two smaller concentric coats concentrated toward the center and free edge, locking each stage with thin two-minute flash curing layers under an LED lamp. Keeping each layer whisper-thin prevents heat spikes on sensitive nail beds and stops the syrup pigment from pooling along your lateral sidewalls.
This cultural manicure staple looks especially luminous when finished with a high-viscosity tempered glass topcoat that mimics crystal water droplets in natural sunlight. If you do not own a dedicated syrup gel bottle, simply mix one drop of coral-peach gel polish with three drops of clear base coat on a foil palette before painting.
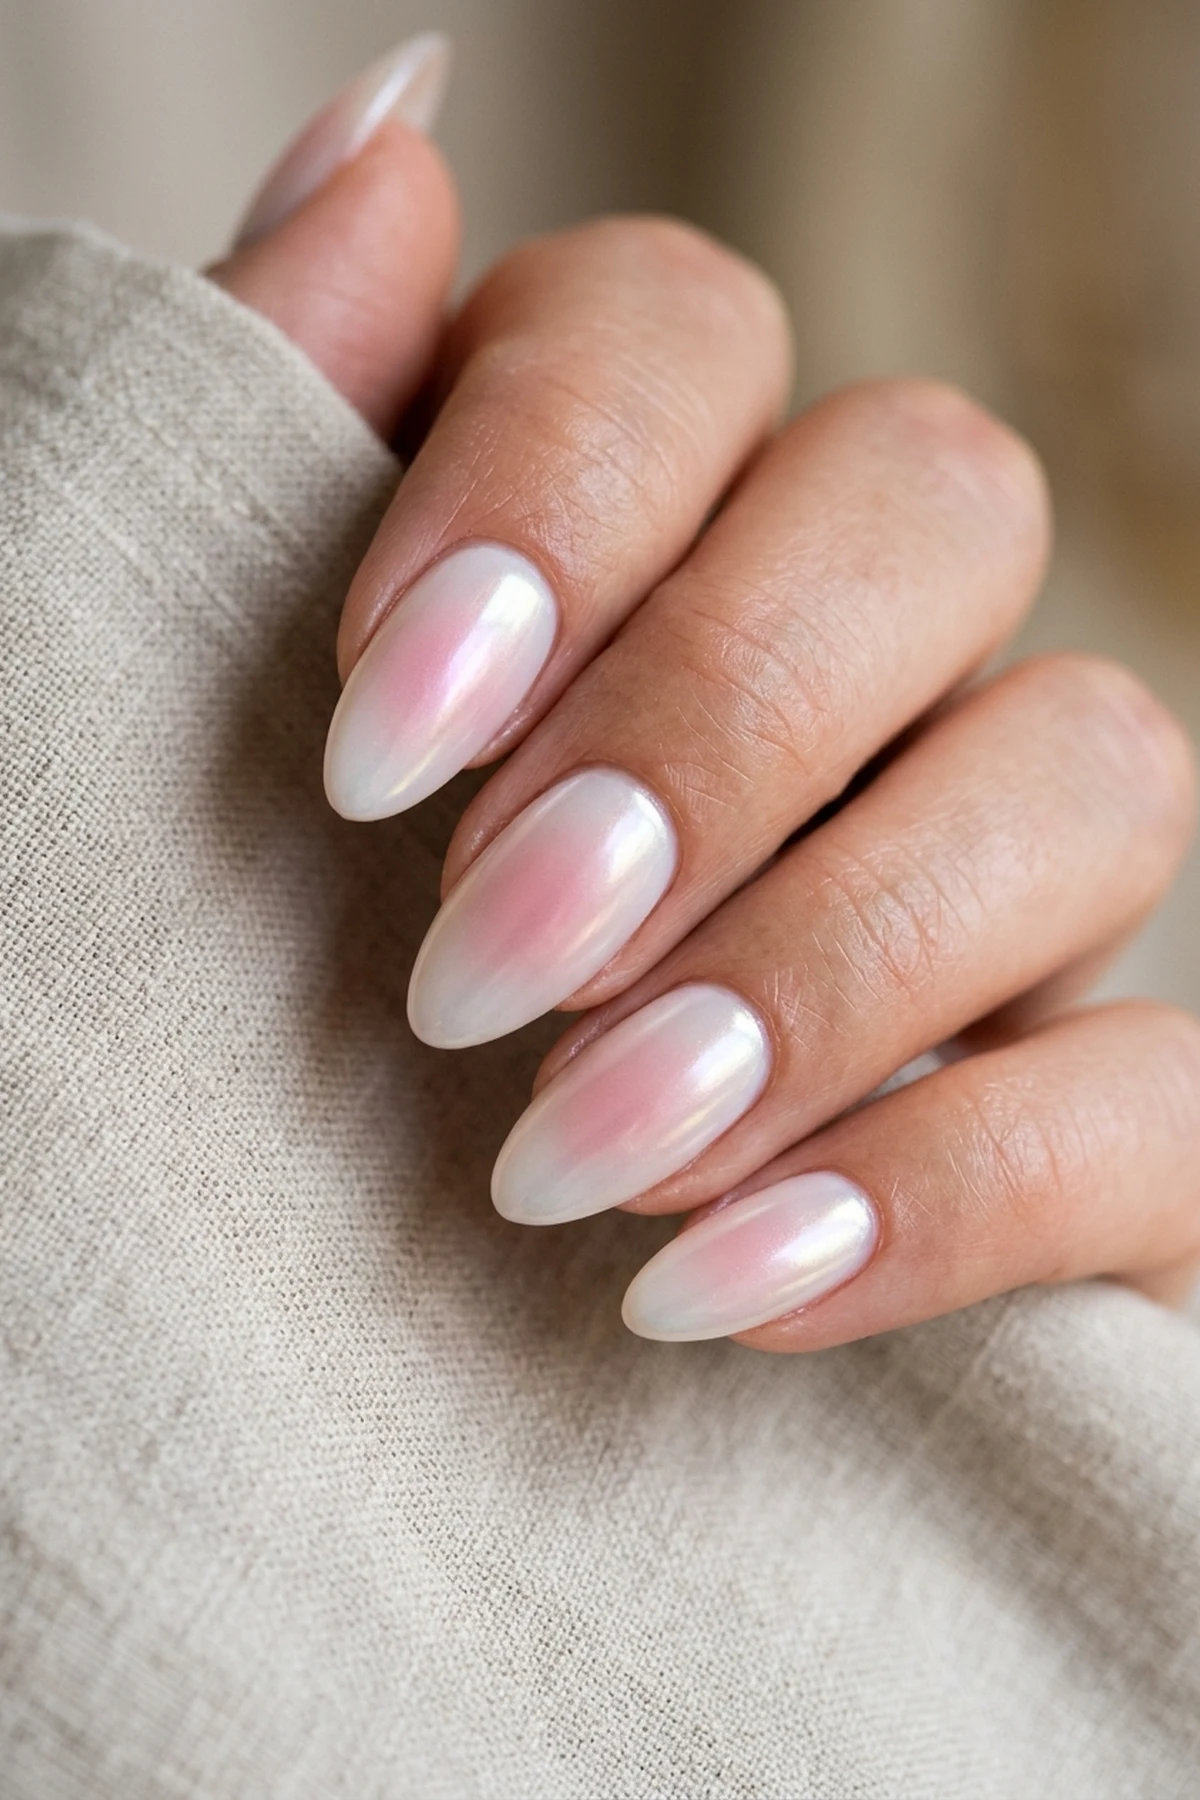
7. Glazed Pearl Aura Blush Center with Cosmetic Sponge
🎯 Best For: Almond & medium oval nails
✨ Vibe: Ethereal Y2K K-pop aura
You do not need a professional salon airbrush machine to achieve a dreamy glazed pearl aura blush center on almond or oval nails. A simple budget swap using a torn piece of a drugstore makeup sponge creates that soft-focus radial flush radiating from the middle of a milky pink base.
Paint a small dot of rose-pink polish onto the porous edge of a makeup wedge and tap it lightly onto scrap paper first, then bounce a cosmetic wedge sponge gradient directly onto the center of your cured base coat in two gentle passes. Once the diffused blush halo dries or cures, burnish a veil of non-wipe chrome glazing powder over the surface using a silicone eyeshadow applicator for a mirror-like pearlescent sheen.
Fans of K-pop aesthetics can pair this DIY blush technique with tiny silver star stickers or explore more viral NewJeans nail art designs for playful Y2K inspiration. Always dust away loose chrome particles with a fluffy fan brush before applying your final sealing topcoat so your bottle brush stays crystal clear.
8. Toothpick Marble Swirl Drag on Short Blue Nails
🎯 Best For: Short square & squoval nails
✨ Vibe: Coastal ocean watermarble
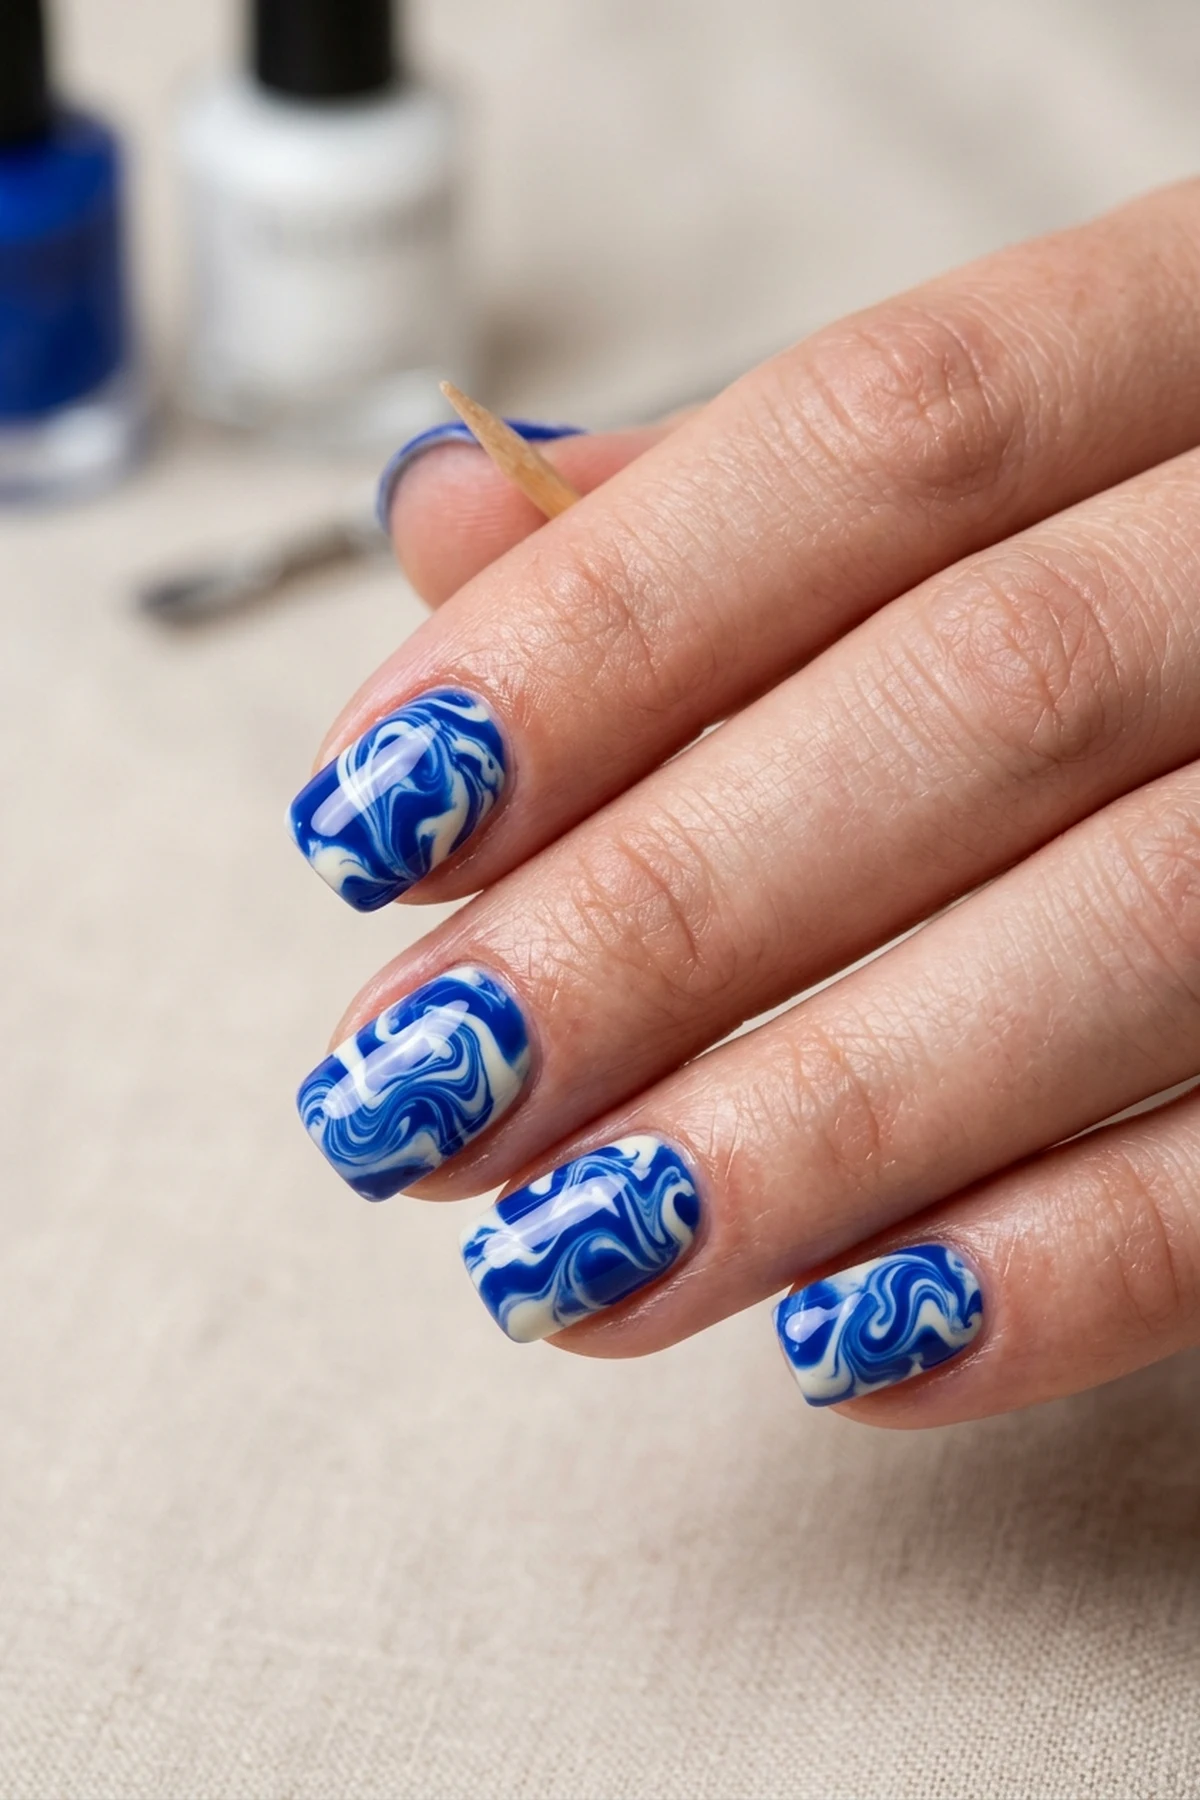
Traditional water marbling in a cup of water is notoriously messy, making the wet-on-wet toothpick marble swirl drag a true hidden gem for stress-free ocean nails. By working directly on the nail surface, you keep your skin clean while creating organic coastal veins in shades of baby blue, cobalt, and crisp seafoam white.
The secret to effortless movement is brushing on a slick slip layer of Beetles clear blooming gel and leaving it uncured while you drop three tiny beads of navy and cream polish diagonally across the nail. Lightly drag the tip of a wooden toothpick through the centers of those wet droplets in a slow figure-eight motion, allowing the blooming gel to softly feather the edges like natural stone.
When executing this DIY swirl on short square nails, resist the urge to over-stir the colors more than twice, or the distinct marble ribbons will muddy into a solid slate tone. Cure each nail immediately for sixty seconds as soon as the swirl reaches your desired coastal wave pattern.
9. Velvet Magnetic Cat-Eye Shimmer for Winter Short Nails
🎯 Best For: Winter party & evening looks
✨ Vibe: 3D crushed velvet glass
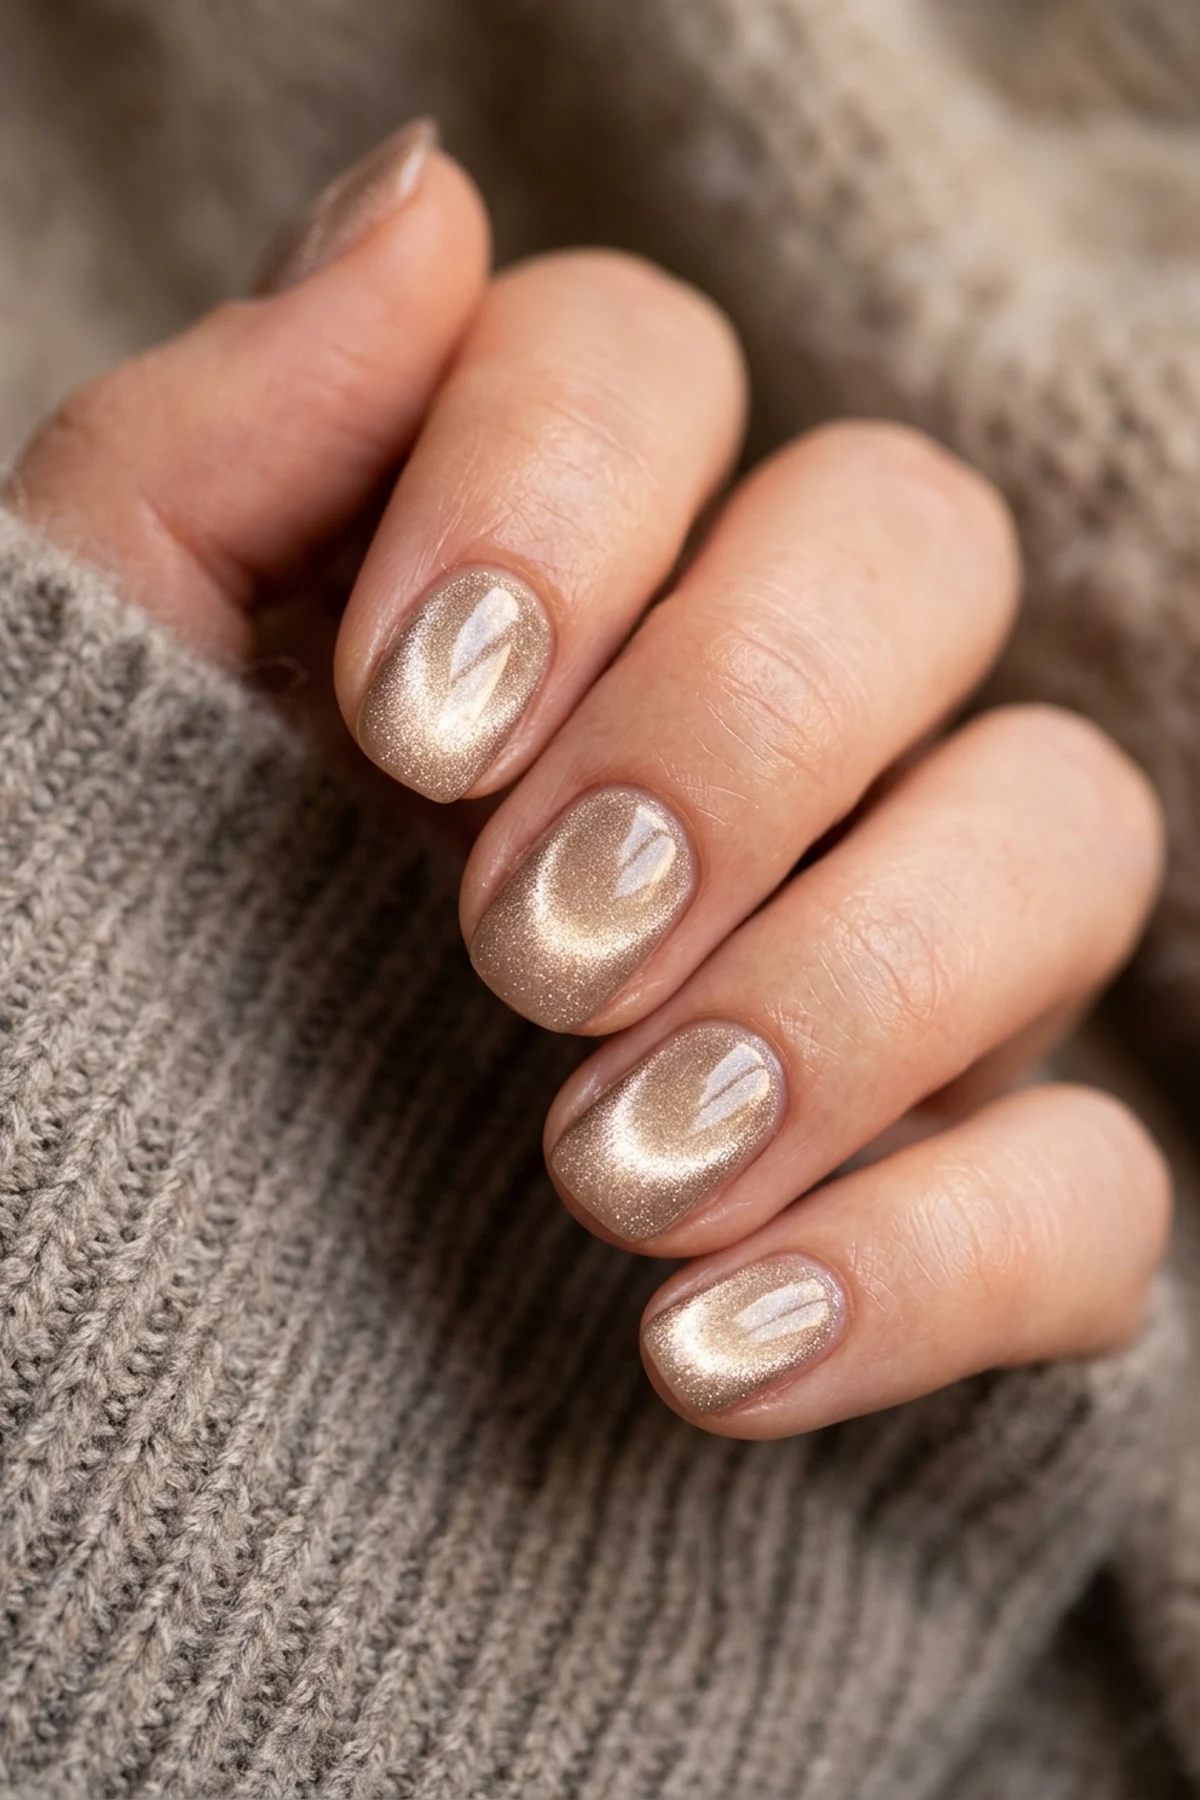
When winter party invitations stack up and you only have twenty minutes to spare, velvet magnetic cat-eye polish delivers a mesmerizing 3D crushed-glass illusion with zero hand-drawn art. Fine ferromagnetic shimmer particles suspended inside the polish respond instantly to a handheld magnet wand, shifting from champagne taupe to liquid silver as you move your fingers.
Apply one even coat of magnetic gel, then hold the cylindrical magnet wand parallel to the left sidewall for five seconds, the right sidewall for five seconds, and just above the free edge to push all metallic particles toward the center before locking them in with thin two-minute flash curing layers. Working one finger at a time is critical because uncured magnetic pigments slowly drift back into a flat metallic finish within fifteen seconds if left waiting.
This seasonal winter manicure looks remarkably plush on short round or squoval nails, where the concentrated velvet glow catches indoor candlelight from every angle. Seal with a high-gloss gel topcoat to amplify the glass-like depth and prevent cold-weather chipping.
10. Glitter Gradient Ombré Cuffs on Short Purple Nails
🎯 Best For: Hiding nail growth & ridges
✨ Vibe: Starlight lilac sparkle fade
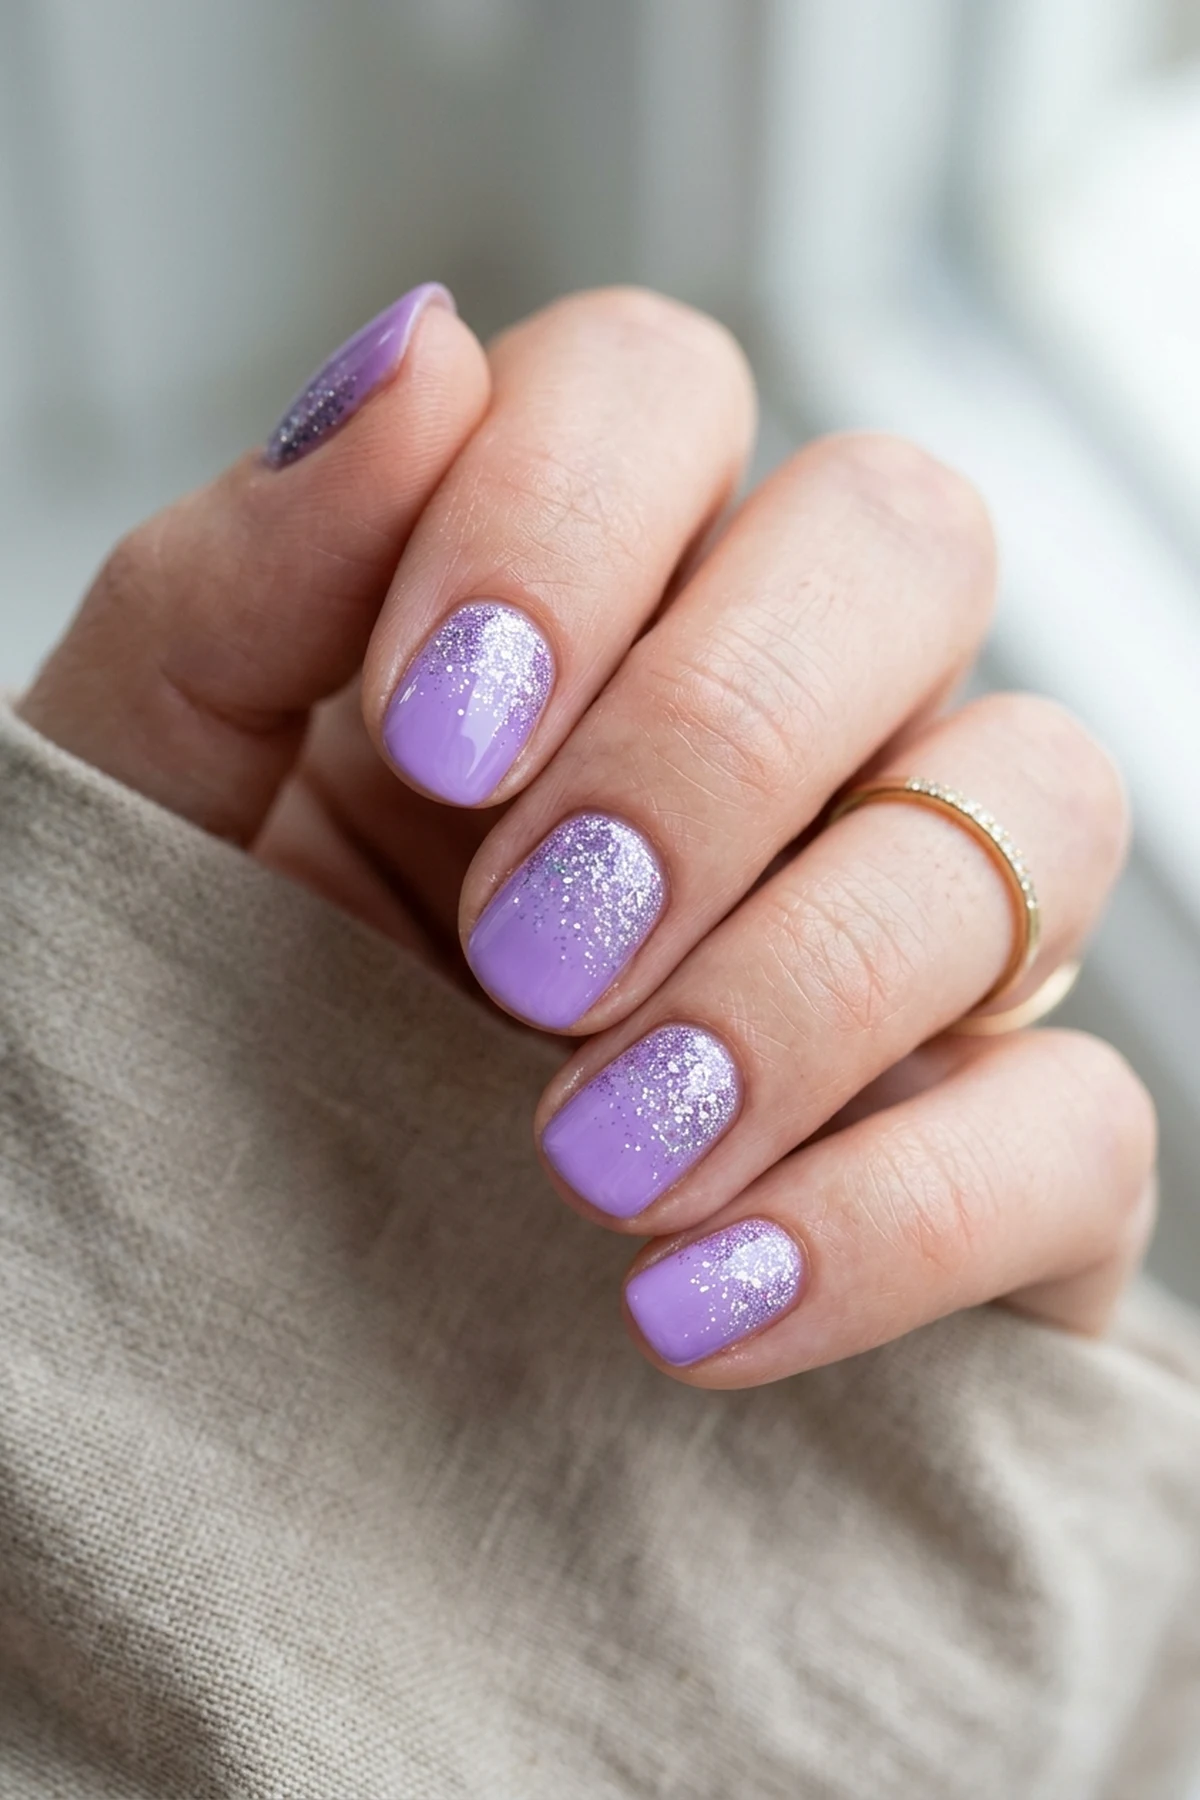
Glitter ombré cuffs are the most forgiving beginner-friendly entry point into maximalist nail art because sparkling hexagonal flakes naturally disguise uneven brush pressure and natural nail ridges. Fading silver-lilac glitter from the cuticle arch toward a soft lavender tip also masks weeks of grow-out between touch-ups.
Instead of brushing glitter directly from the bottle—which deposits too much clear suspension base and sparse, clumpy flakes—paint your glitter polish onto a dampened makeup wedge so the foam absorbs the excess liquid before you dab a concentrated cosmetic wedge sponge gradient along the lower third of the nail. Once the cascaded sparkle is dry to the touch, encapsulate the textured flakes under two plush coats of Essie Gel Couture platinum topcoat for a smooth, snag-free glass finish.
To dial up the maximalist starlight effect, use the tip of an orangewood stick to nudge two or three larger holographic flakes slightly higher toward the middle of the nail bed before the polish sets. Removing the manicure later is effortless if you soak a cotton pad in remover and hold it over the nail for sixty seconds prior to wiping.
11. Step-by-Step Confetti Polka Dots on Long Neutral Nails
🎯 Best For: Long oval & coffin extensions
✨ Vibe: Retro playful terrazzo
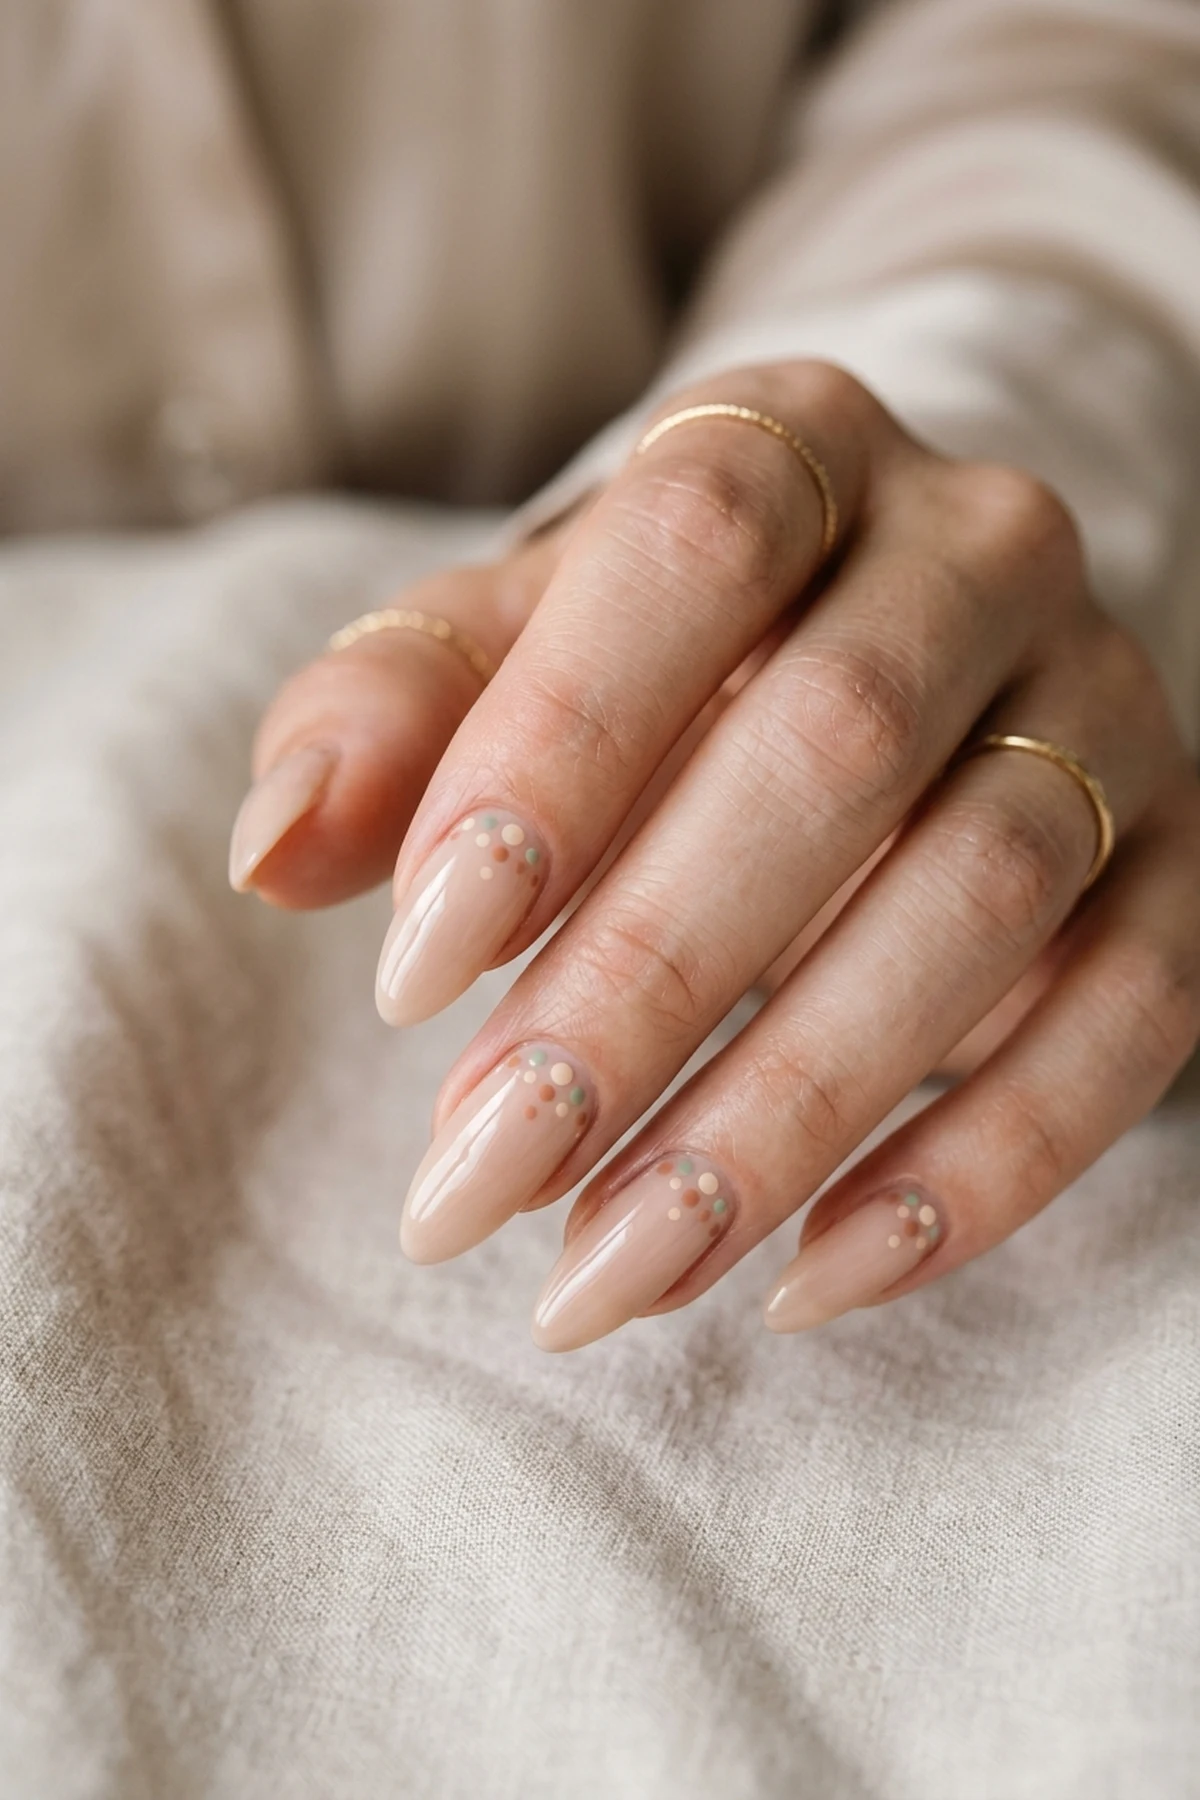
Long oval and coffin nail extensions offer generous vertical real estate, making scattered confetti polka dots a time-saving design that feels both retro and fresh. Clustering warm terracotta, sage green, and cream dots asymmetrically along one side of a sheer almond nail creates a modern terrazzo look without requiring strict grid alignment.
Alternate between the large and micro spheres of a dual-ended metal dotting tool to vary the dot diameters, pressing straight down at a ninety-degree angle so each circle stays perfectly round. Wait two full minutes for the thickest terracotta beads to set before floating a quick-dry glossy sealing topcoat across the surface, ensuring the brush bristles never touch or drag the raised dots.
When creating this DIY manicure at home, let three or four dots get partially cropped along the lateral nail edge so the pattern looks like continuous printed fabric. Keeping the upper tips mostly bare preserves a breathable negative-space balance across longer nail lengths.
12. Dark Burgundy Simple Nails with Gold Leaf Flake Corners
🎯 Best For: Autumn & holiday evening events
✨ Vibe: Old-money wine & gold luxe
Deep vamp shades often intimidate novices because dark pigments highlight every slip along the skin, yet burgundy simple nails topped with gold leaf flakes remain an undisputed expert pick for autumn elegance. Leaving a hair-thin cuticle flooding prevention margin of about half a millimeter around the base creates the optical illusion of a salon-perfect Russian manicure.
If your brush accidentally grazes the proximal fold, dip an angled flat cleanup brush into pure acetone cleanup solution, blot the bristles once on a paper towel so acetone does not flood the wet polish, and sweep a razor-sharp crescent around the cuticle line. While your second coat of dark merlot polish is still slightly tacky, use slanted tweezers to press two tiny fragments of imitation gold leaf into the upper corner of each ring finger.
If you love rich seasonal palettes that transition effortlessly from October dinners to December parties, browse our curated trending fall nail art designs for more jewel-toned inspiration. Flatten any lifted gold foil corners gently with a clean fingertip before sealing everything under two coats of high-shine topcoat.
13. Simple Freehand Wave Swirls with 7mm Striper Brush
🎯 Best For: Practicing wrist-pivot brush control
✨ Vibe: 70s retro Scandinavian wave
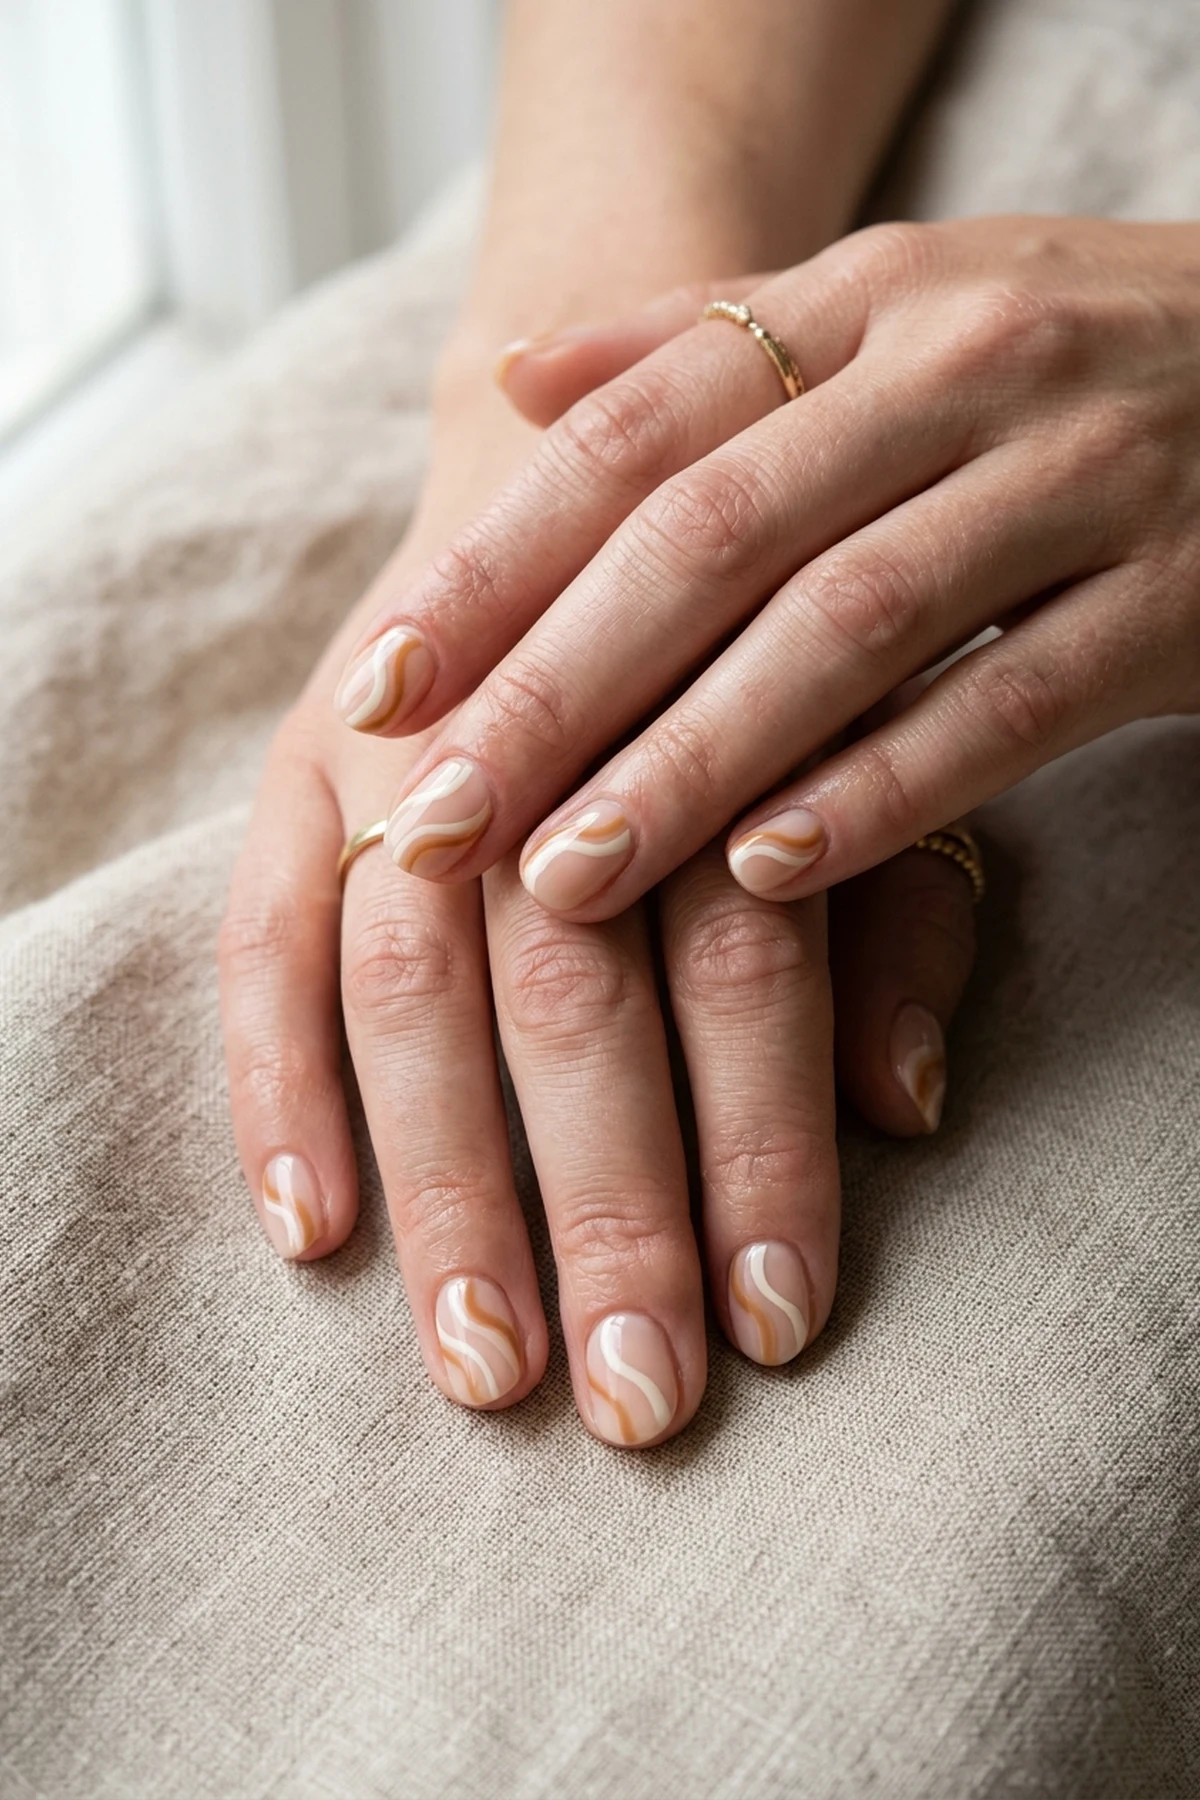
Learning to paint smooth S-curve ribbons is a major milestone for at-home manicurists, and retro Scandinavian wave swirls offer a forgiving trend alert for practicing freehand control. Because organic waves vary in thickness and curvature, minor wobbles blend naturally into the groovy seventies silhouette.
Coat the full length of a 7mm micro-detail striper brush in creamy DND DC high-pigment liner gel, then spin the brush tip on a palette to remove any heavy bead at the end of the bristles. Instead of dragging the tiny brush through the air with an unsupported hand, anchor both pinkies firmly against the tabletop and slowly roll the finger being painted from left to right while holding the brush nearly stationary.
Pair a warm caramel ribbon with a parallel chalk-white line separated by a sliver of sheer negative space to maximize visual contrast on short minimalist nails. Flash cure each wave for ten seconds immediately after pulling the stroke so the crisp edges stay locked in place.
14. Easy Toe Nail Art Designs for Beginners: White Micro-Daisy Pedicure
🎯 Best For: Big toe accent pedicures
✨ Vibe: Fresh vacation sandal-ready
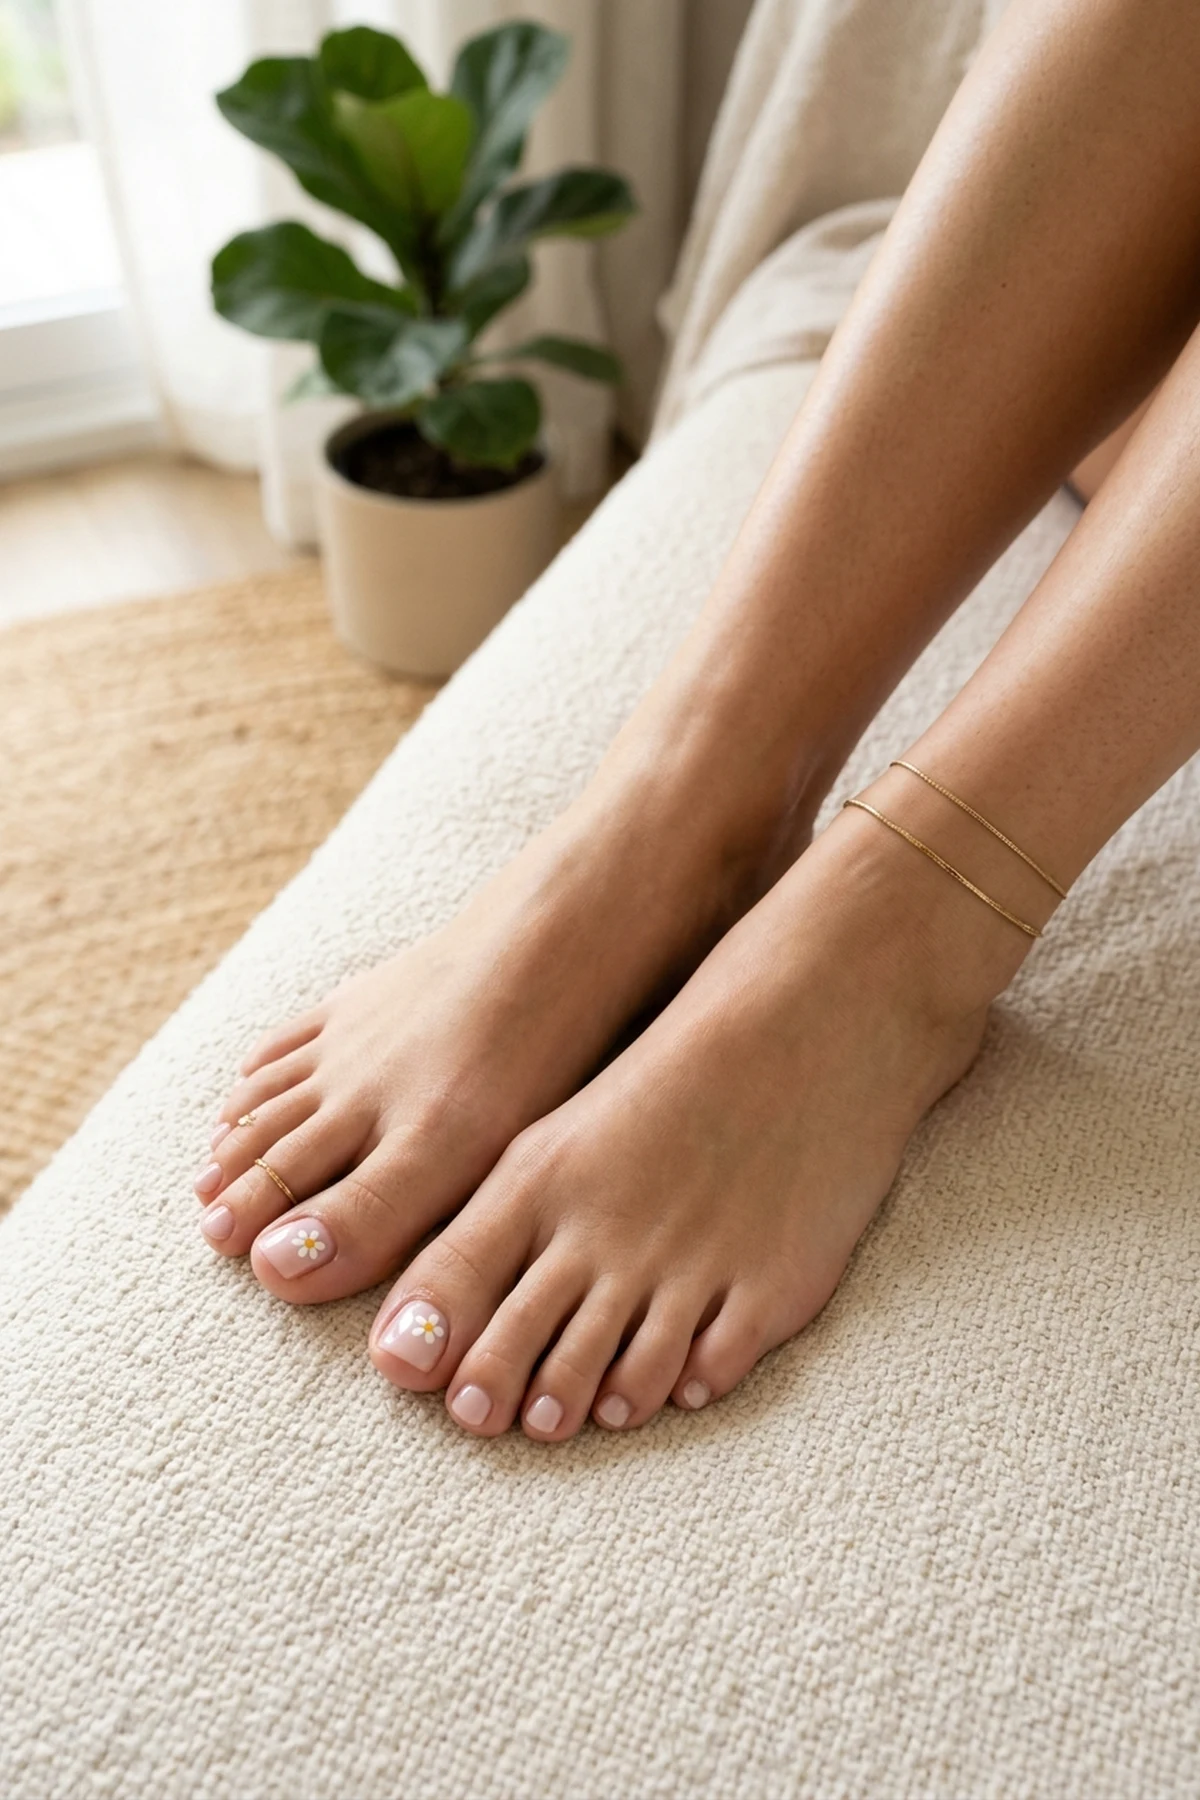
At-home pedicures are a hidden gem for practicing simple nail art because you can use your dominant hand for all ten toes while working on the wide, flat canvas of the big toenail. Stamping a crisp five-dot daisy floral motif in the upper corner of a milky pink big toe instantly elevates a basic summer pedicure into a boutique resort look.
Because toenails develop thicker keratin ridges from closed-toe shoes, lightly refine the surface first with a 180-grit natural nail buffer and wipe away dust with isopropyl alcohol so your sheer base adheres evenly. After dotting five white petals and a sunny gold center on each big toe, paint the smaller four toes in solid milky white and lock every tip using the free-edge cap sealing technique.
To prevent sandal straps or bedsheets from denting your seasonal pedicure, apply a drop of jojoba cuticle drying oil over your topcoat after waiting five minutes. Keep toenails trimmed straight across rather than deeply curved at the corners to prevent uncomfortable ingrown edges.
15. Simple Christmas Candy-Cane Diagonal Stripes with Tape Stencils
🎯 Best For: Festive December manicures
✨ Vibe: Minimalist holiday peppermint
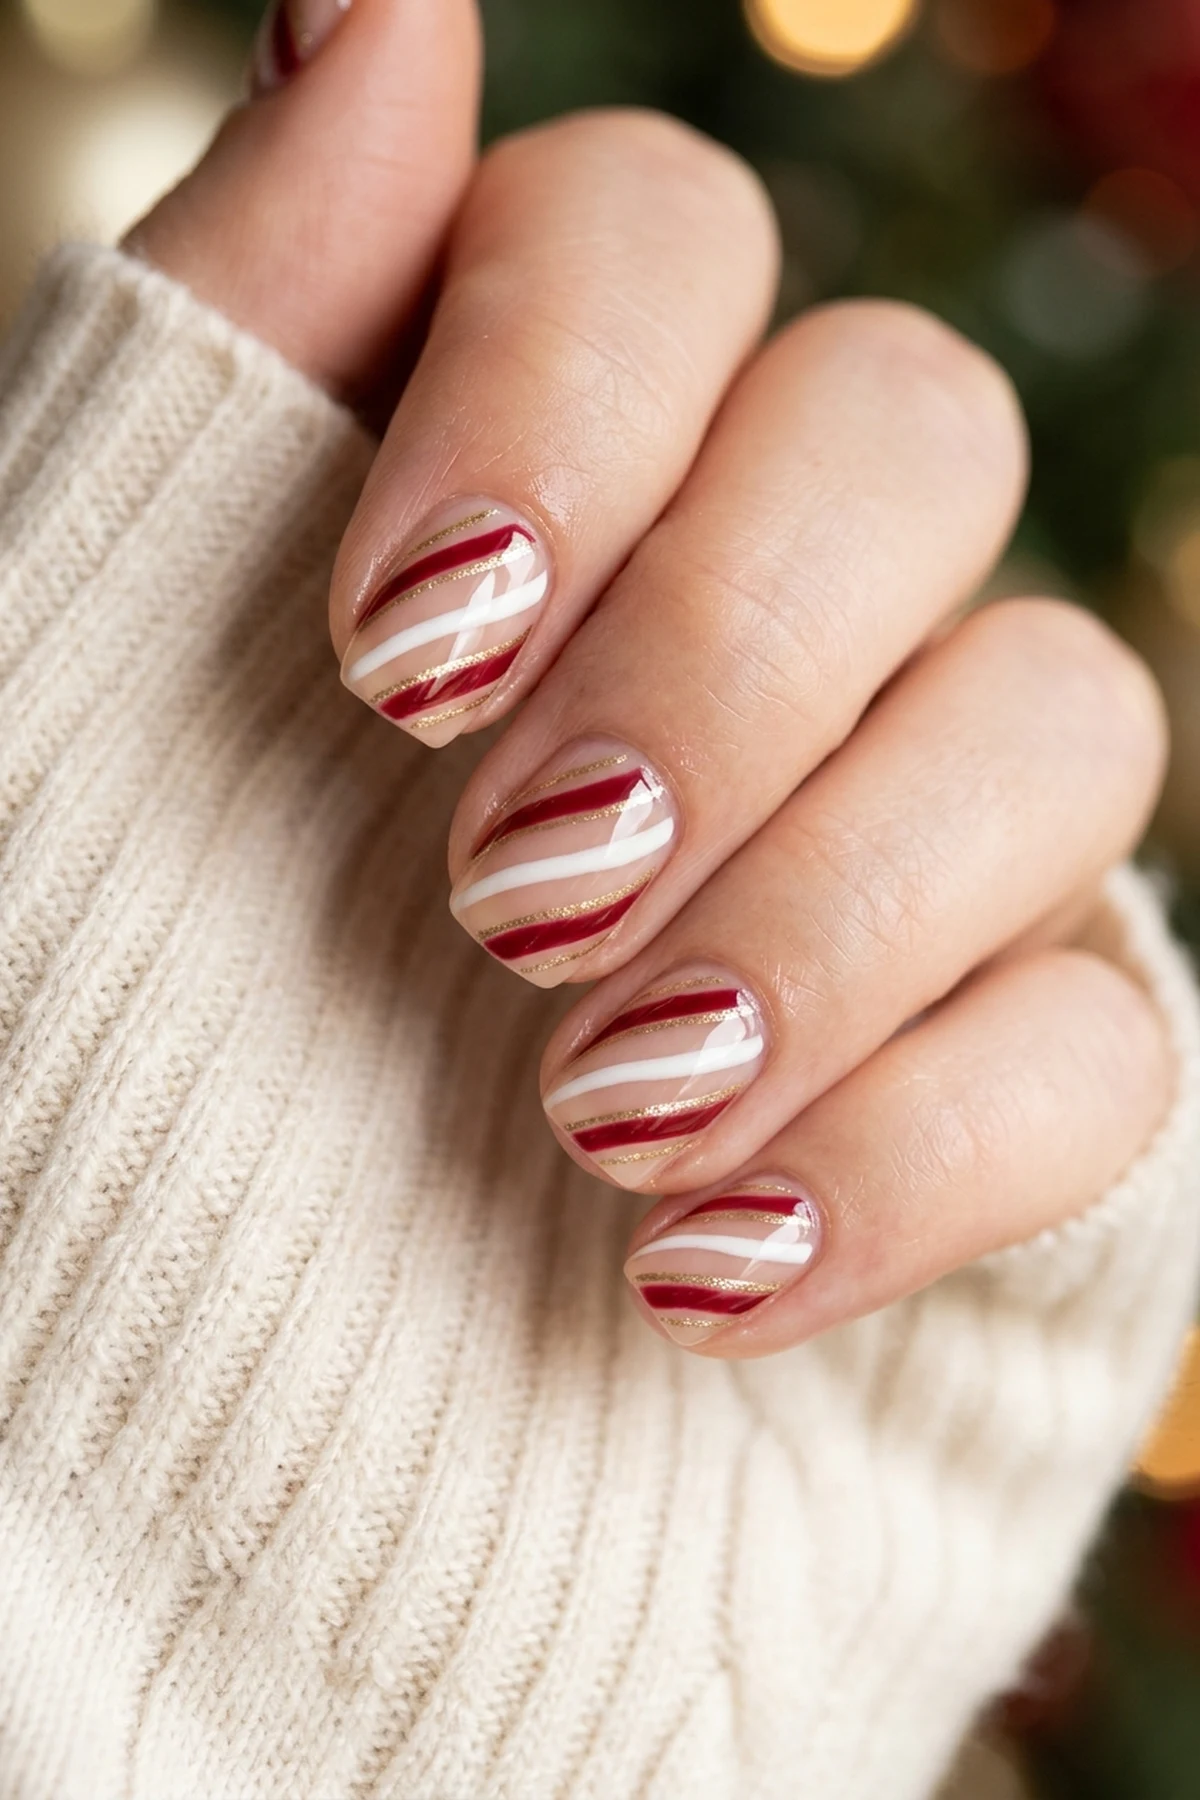
Holiday nail art does not require painting miniature reindeer when diagonal peppermint stripes deliver instant festive charm on a budget swap. Alternating cherry red, snow white, and metallic gold bands across the upper corner of a sheer nail gives classic candy-cane stripes a sleek minimalist makeover.
Rather than painting parallel lines freehand, lay two diagonal strips of ultra-thin metallic striping tape across a dry crimson corner accent, leaving one gold strip permanently attached as a glittering pinstripe border. Trim the overhanging gold tape half a millimeter inside the lateral nail edge with sharp cuticle nippers so the metallic foil never catches on winter knitwear, then encapsulate the entire design under a generous layer of quick-dry glossy sealing topcoat.
For a cohesive seasonal set that takes less than fifteen minutes, apply the diagonal candy-cane stripes only to the ring and middle fingers while painting the remaining nails solid crimson or sheer shimmer white. Reapplying a fresh coat of glossy topcoat every three days keeps the metallic tape edges sealed flat through holiday gift wrapping and dishwashing.
16. Half-Moon Cuticle Windows with Binder Reinforcement Stickers
🎯 Best For: Extending time between touch-ups
✨ Vibe: Vintage Hollywood negative space
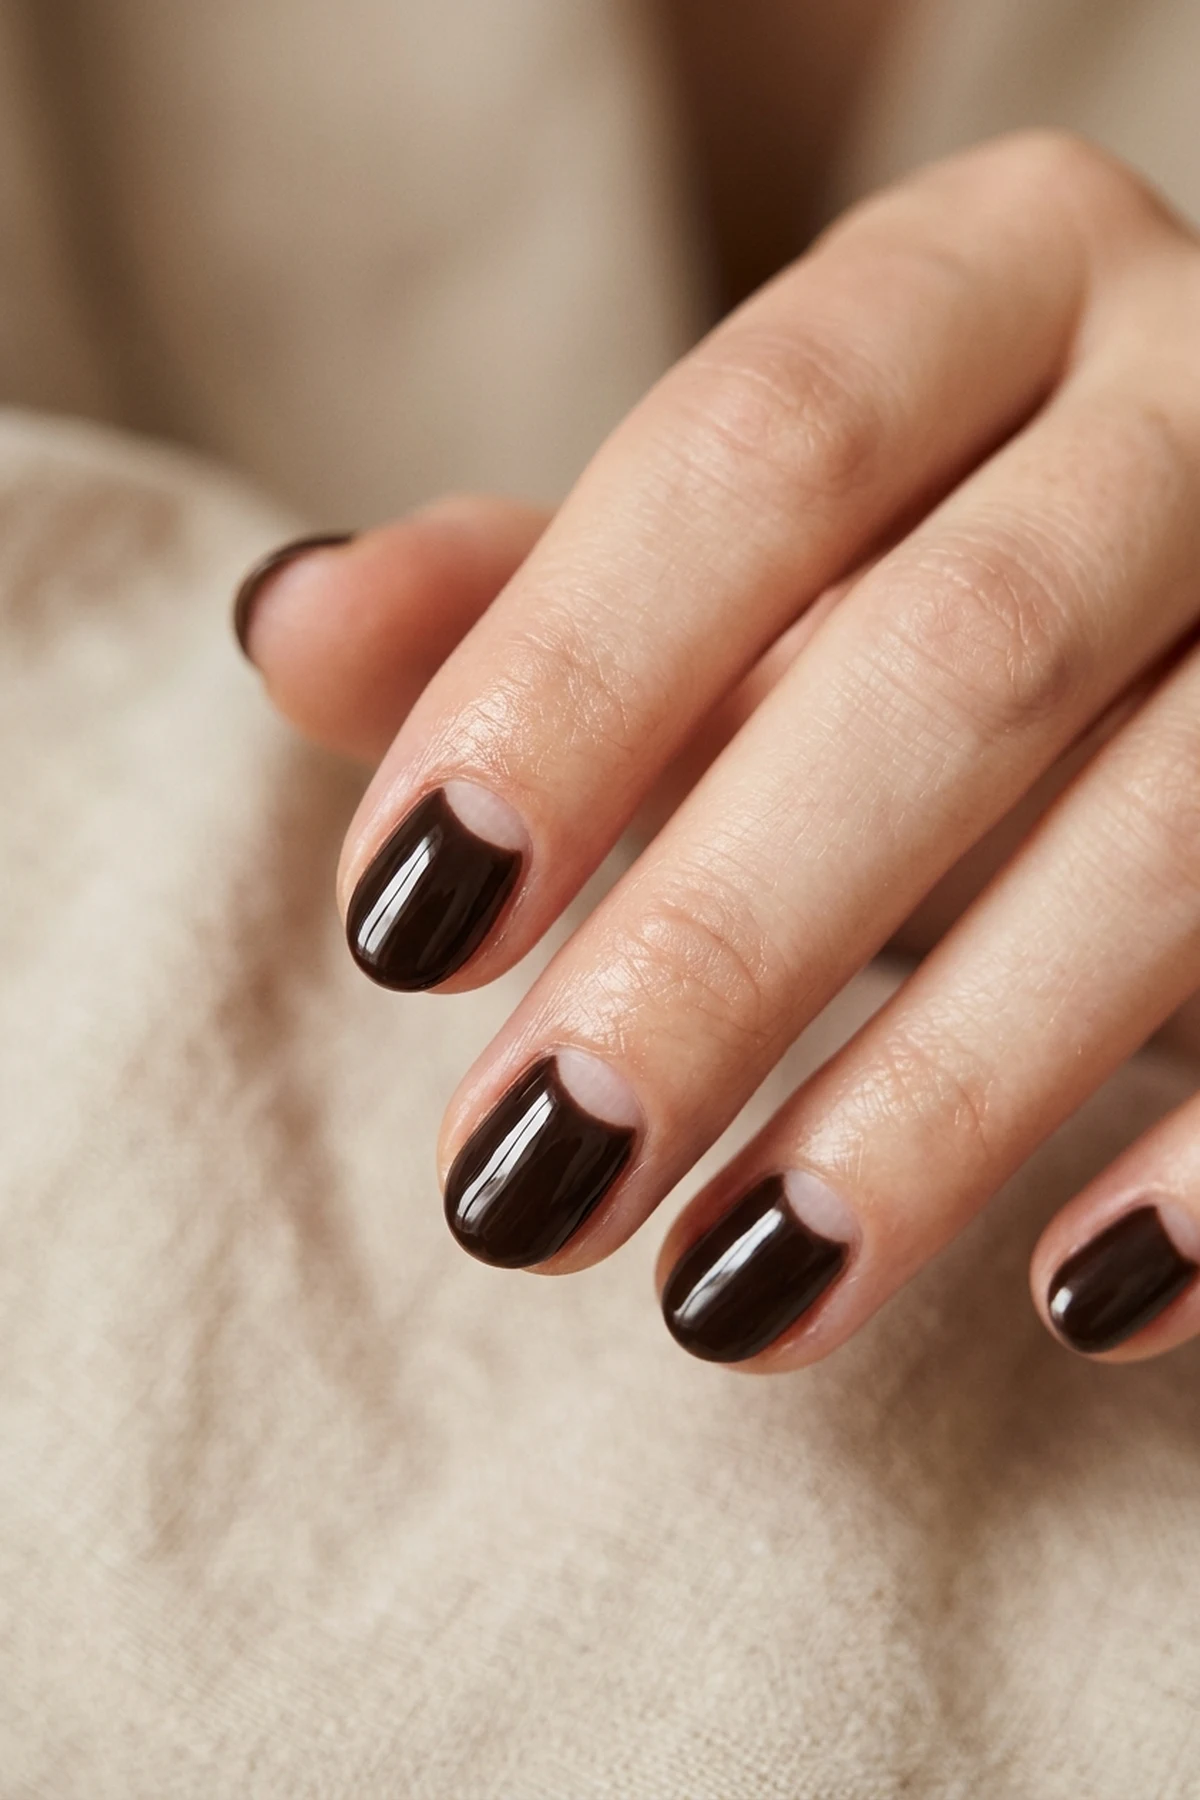
Few beginner-friendly techniques deliver as much vintage glamour as half-moon cuticle windows created with standard paper binder reinforcement stickers. Starting with two self-leveling coats of OPI Bubble Bath sheer base gives the bare crescent a healthy, porcelain-pink flush that hides natural nail plate discoloration. Because the base area stays translucent, your manicure grows out seamlessly for up to three weeks without showing a harsh horizontal ridge near the proximal fold.
Wait a full ten minutes for your sheer foundation to dry completely, then press a paper ring sticker across the lower third of each nail bed after tapping it against your knuckle to reduce excess tackiness. Sweep an opaque espresso brown or oxblood cream polish from the top edge of the sticker toward the free tip while maintaining a crisp one-millimeter cuticle flooding prevention margin along both lateral sidewalls. Peel the paper guide away with fine tweezers while the dark lacquer is still wet so the arch stays razor-sharp instead of stringing.
This clever DIY stationery shortcut eliminates the shaky wrist angles that normally ruin freehand curved lunula lines on your non-dominant hand. Float a plump drop of quick-drying topcoat over the slight ridge where the dark pigment meets the sheer window to level the surface into a unified glass sheet. Pair the high-contrast crescent geometry with stacked gold midi rings to highlight the negative space architecture.
17. Blooming Gel Watercolor Tortoiseshell Spots on Short Nails
🎯 Best For: Organic non-symmetrical patterns
✨ Vibe: Warm amber Parisian tortoise
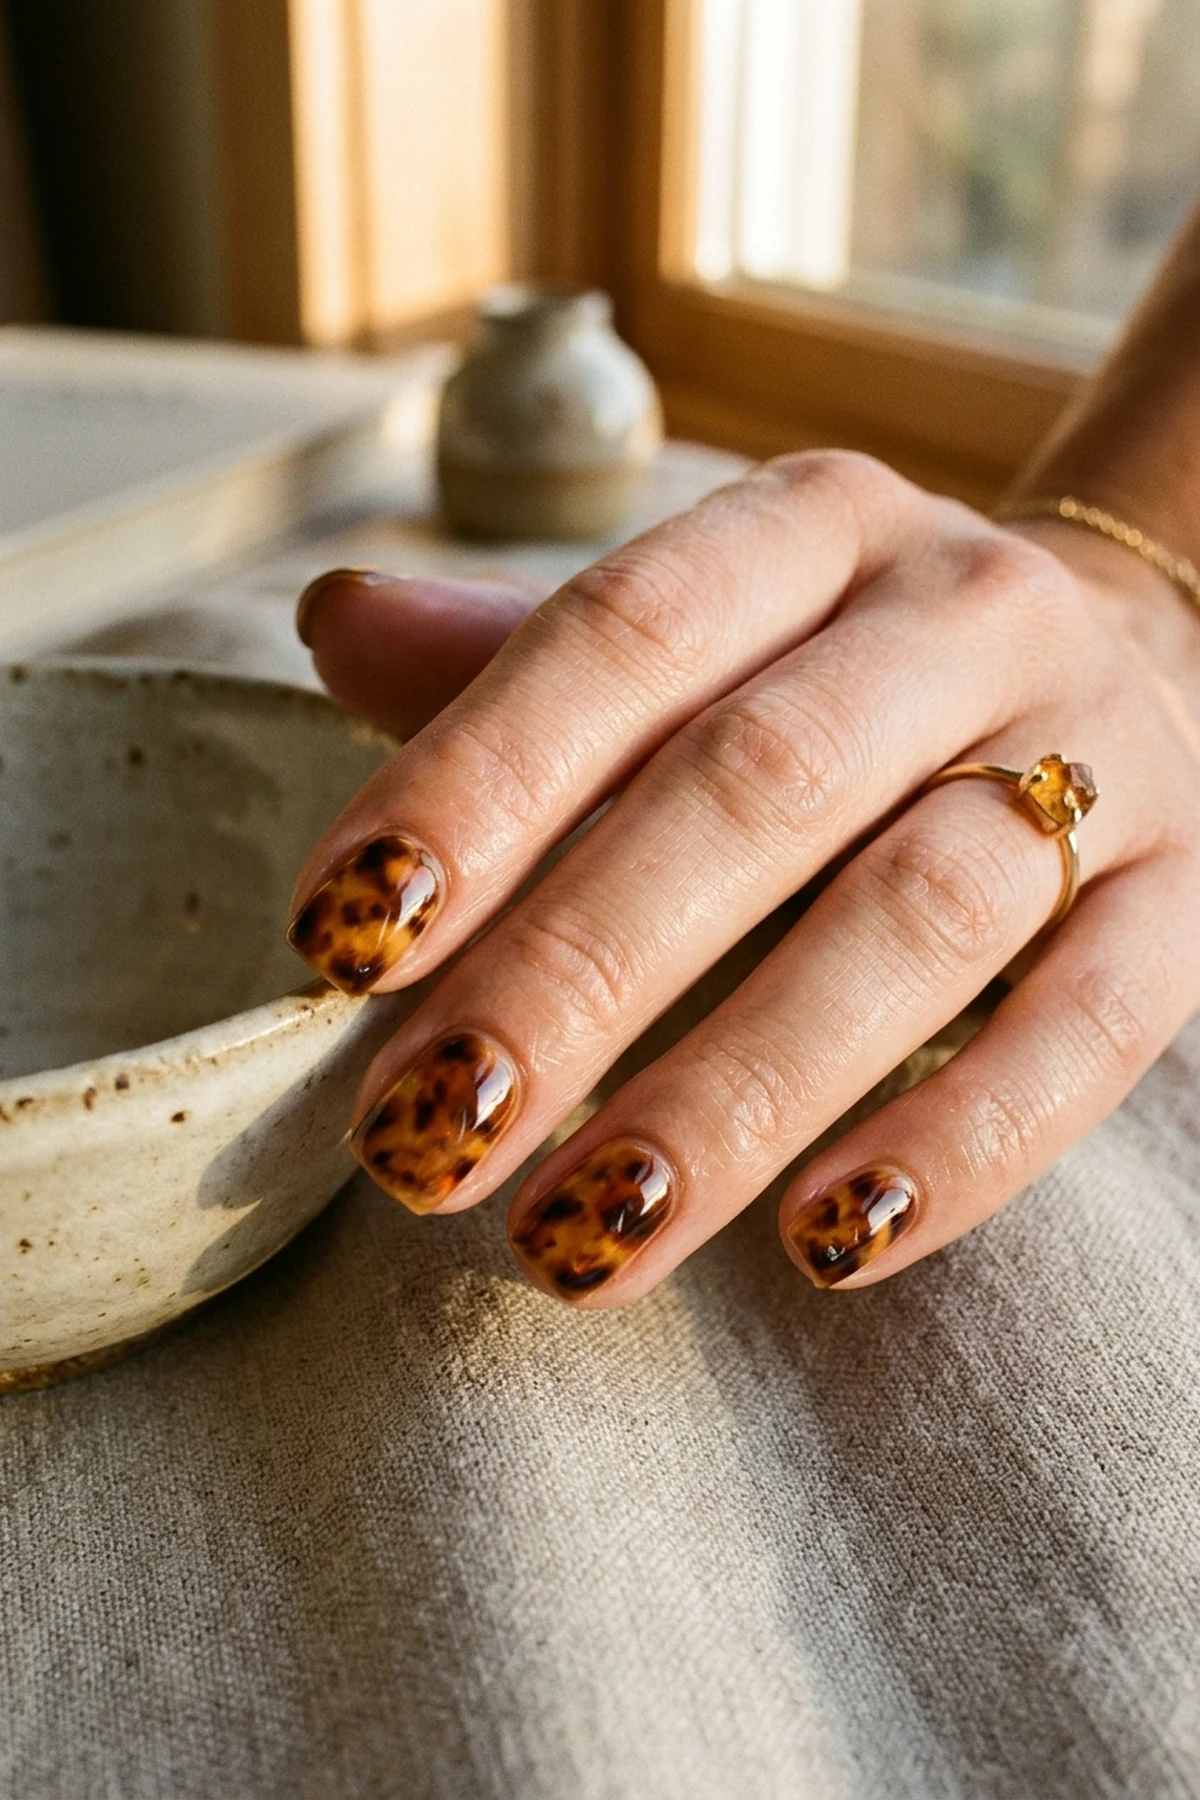
This expert pick demystifies salon-grade watercolor tortoiseshell spots by letting surface-tension chemistry do the blending for you on short squoval nails. Instead of laboriously feathering multiple brown shades with a dry brush, a slick slip coat of Beetles clear blooming gel causes droplets of warm caramel and roasted espresso to expand outward into smoky, translucent halos. Since authentic tortoiseshell is naturally irregular, no two nails need to match for the set to look cohesive.
Begin over a cured amber jelly base, glide a thin uncured layer of blooming medium across the nail plate, and drop three asymmetrical blobs of dark chocolate gel using the tip of a wooden orangewood stick. Wait six to eight seconds—just until the edges soften into blurred watercolor rings—before locking the pattern in place with thin two-minute flash curing layers under an LED lamp. Layering a second round of tiny black flecks over a fresh slip coat creates that unmistakable multi-dimensional acetate depth seen on luxury eyewear frames.
Achieving professional depth at home becomes effortless once you pair warm caramel tones with seasonal moody palettes like our favorite cute and simple Halloween nails for autumn transitions. Keep the amber mottling concentrated along a diagonal path on two accent fingers while painting the remaining nails solid espresso to prevent visual clutter on petite nail beds.
18. Diagonal Color-Block Slash with Scotch Tape Guides
🎯 Best For: Non-dominant hand painting
✨ Vibe: Architectural two-tone graphic
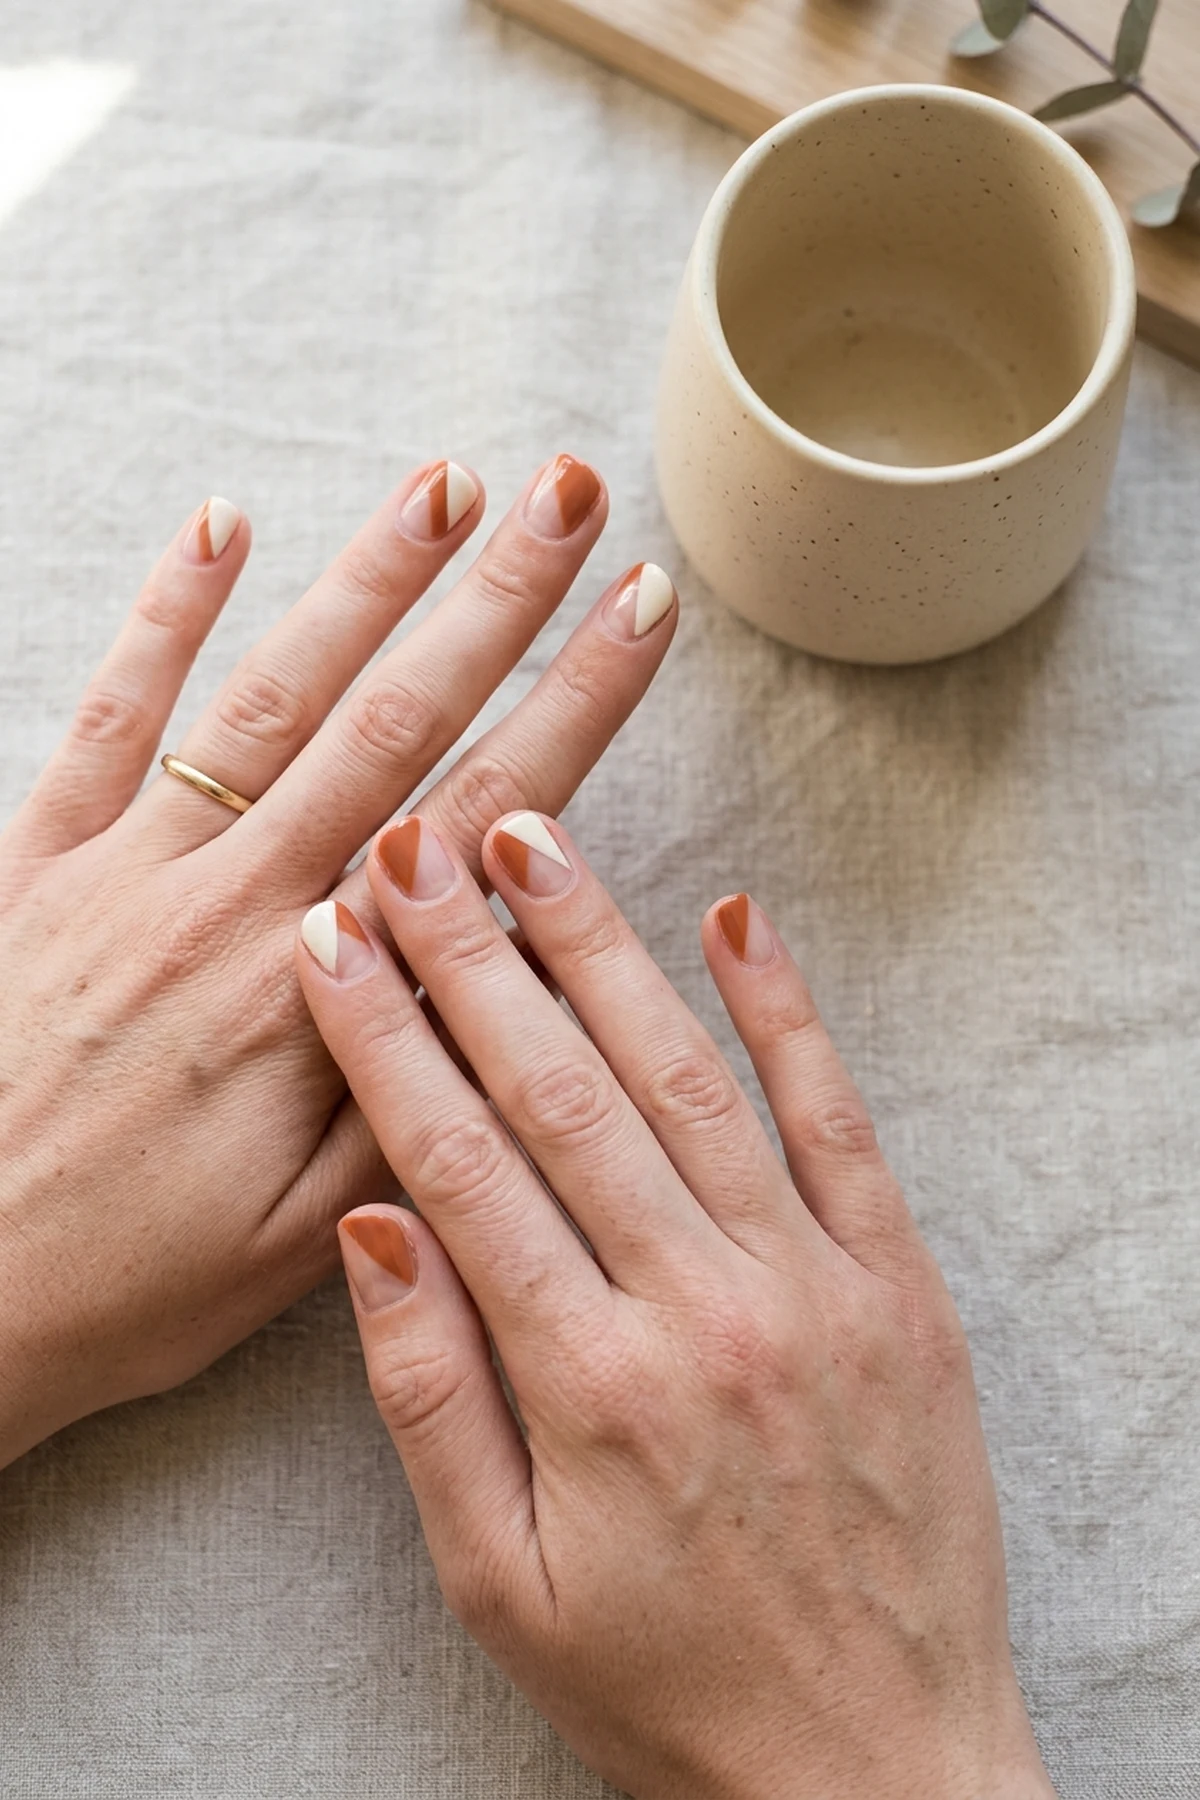
When you need a reliable time-saver that looks intentional on both hands, a diagonal color-block slash anchored by matte household Scotch tape guarantees ruler-straight geometry in minutes. Rather than struggling to balance horizontal French smile lines with your non-dominant hand, angling the pigment from the lower left sidewall to the upper right corner creates an elongating optical illusion. Seal the finished graphic slash under a generous layer of Essie Gel Couture platinum topcoat to fuse both color planes under a high-shine shield.
Apply a sheer neutral base coat first and let it cure or air-dry until it no longer dents under light finger pressure, then press a strip of matte magic tape firmly across the nail plate, sealing the lateral creases with a silicone hoof stick. Brush a single opaque coat of terracotta, sage green, or cobalt cream polish across the exposed triangle and lift the tape immediately at a forty-five-degree angle before a rubbery film forms. If a tiny drop of pigment seeps beneath the adhesive barrier near the skin fold, dip a flat brush into pure acetone cleanup solution and swipe once along the diagonal seam to restore surgical precision.
Minimalist graphic blocking thrives on high-contrast pairings such as warm bone cream against muted terracotta or charcoal slate over bare pink keratin. Alternate the direction of the diagonal slash on neighboring fingers to turn a five-minute tape hack into a gallery-worthy architectural manicure.
19. Glazed Donut Chrome Rub over Milky Pink Builder Gel
🎯 Best For: Bridal, work & everyday wear
✨ Vibe: Hailey-inspired pearlescent glaze
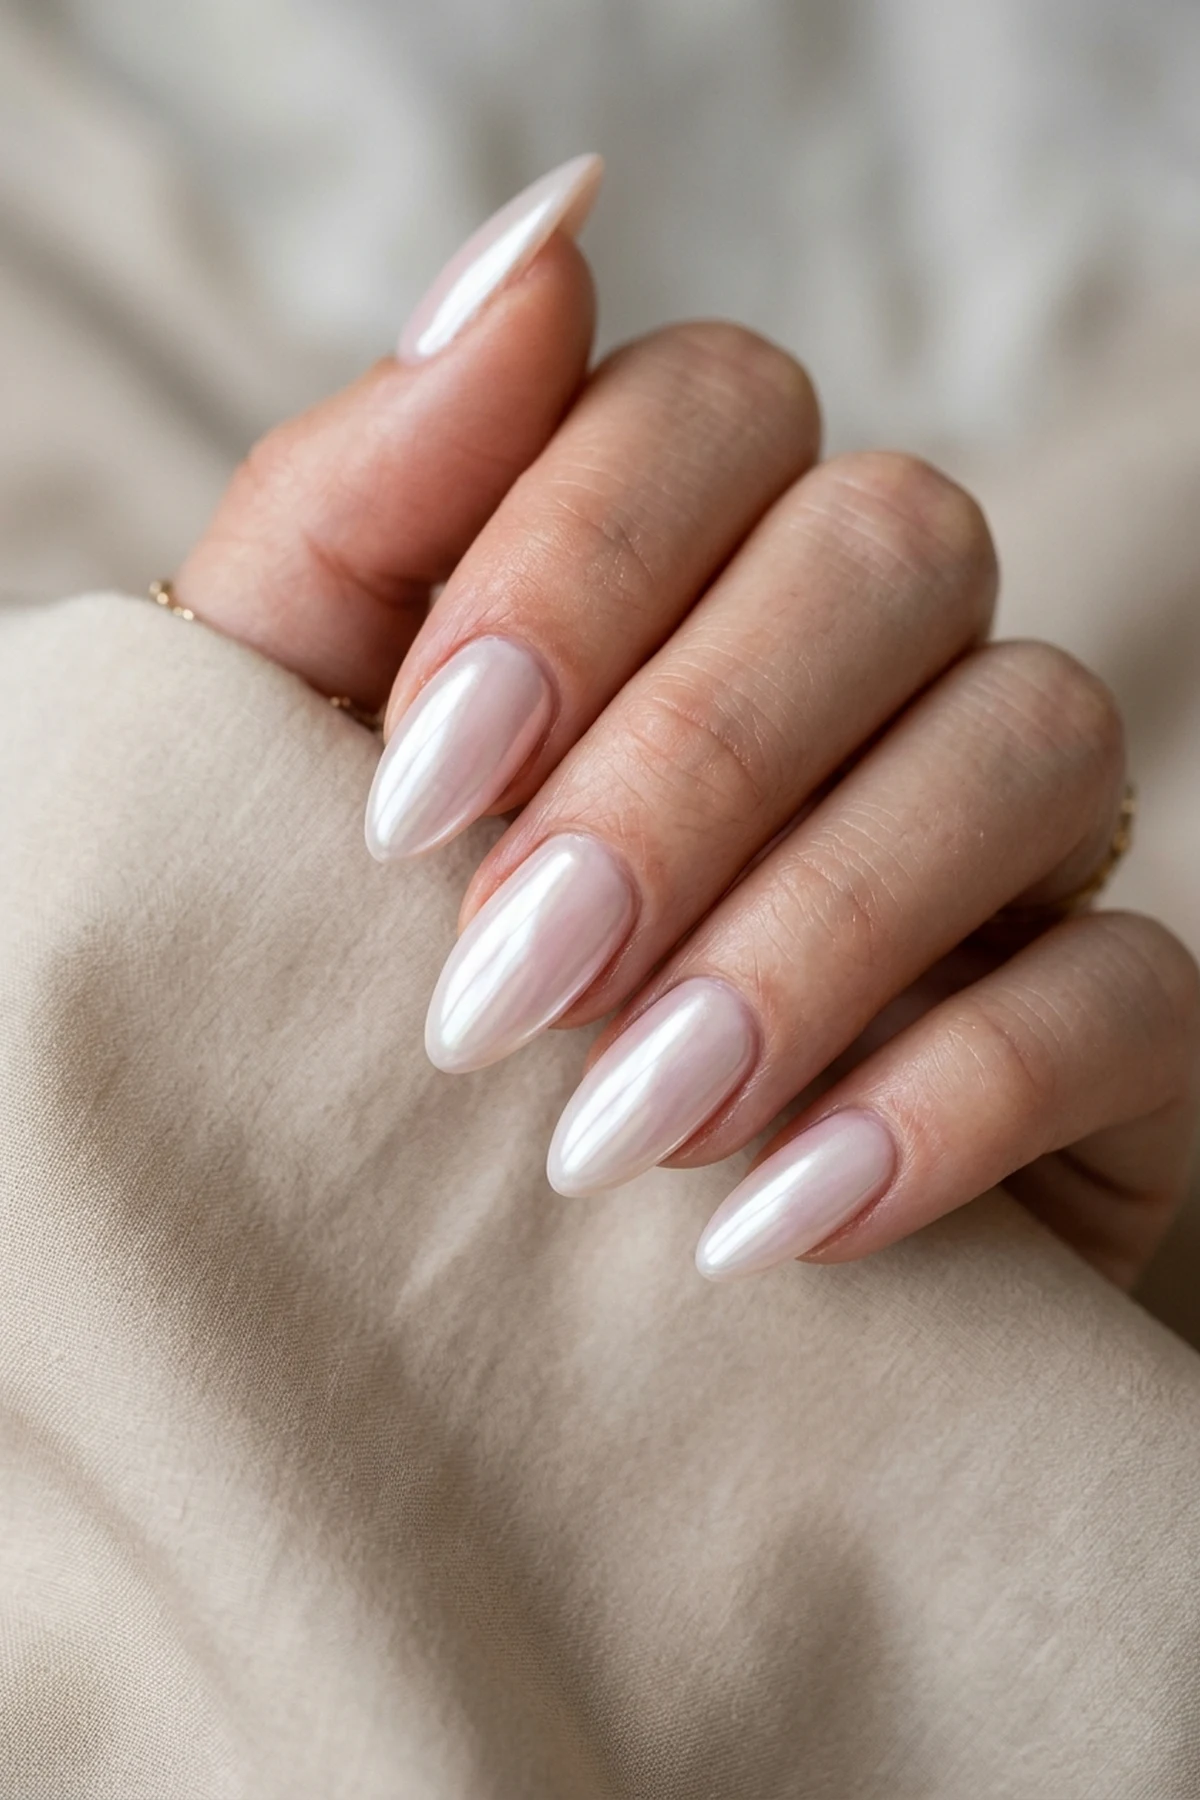
Still dominating every bridal and quiet-luxury mood board, the glazed donut chrome rub remains a perennial trend alert because it requires zero drawing skills while delivering a reflective, lit-from-within finish. Building a smooth apex with sheer milky pink builder gel fills in natural vertical ridges so the mirror pigment reflects light evenly without emphasizing surface dips. Unlike chunky glitter polishes, ultra-fine pearl mica buffs into a continuous satin sheet that flatters every skin undertone.
Cure your milky pink foundation thoroughly, apply a dedicated non-wipe topcoat, and cure for exactly thirty seconds—stopping halfway through a standard cycle leaves the warm polymer surface receptive to micro-pigment adhesion. Pick up a rice-sized speck of white pearl non-wipe chrome glazing powder on a silicone eyeshadow applicator and burnish it across the nail plate in tight circular motions until the chalky dust transforms into a translucent mirror sheen. Dust away loose particles from the lateral grooves with a fluffy kabuki brush before capping the free edge and curing a final sealing topcoat.
This cultural manicure staple transitions effortlessly from boardroom keyboards to formal evening events without showing noticeable tip wear or micro-scratches. Keep the pearl powder translucent by tapping off your sponge applicator on a lint-free wipe first so the delicate pink undertone shines through the icy glaze.
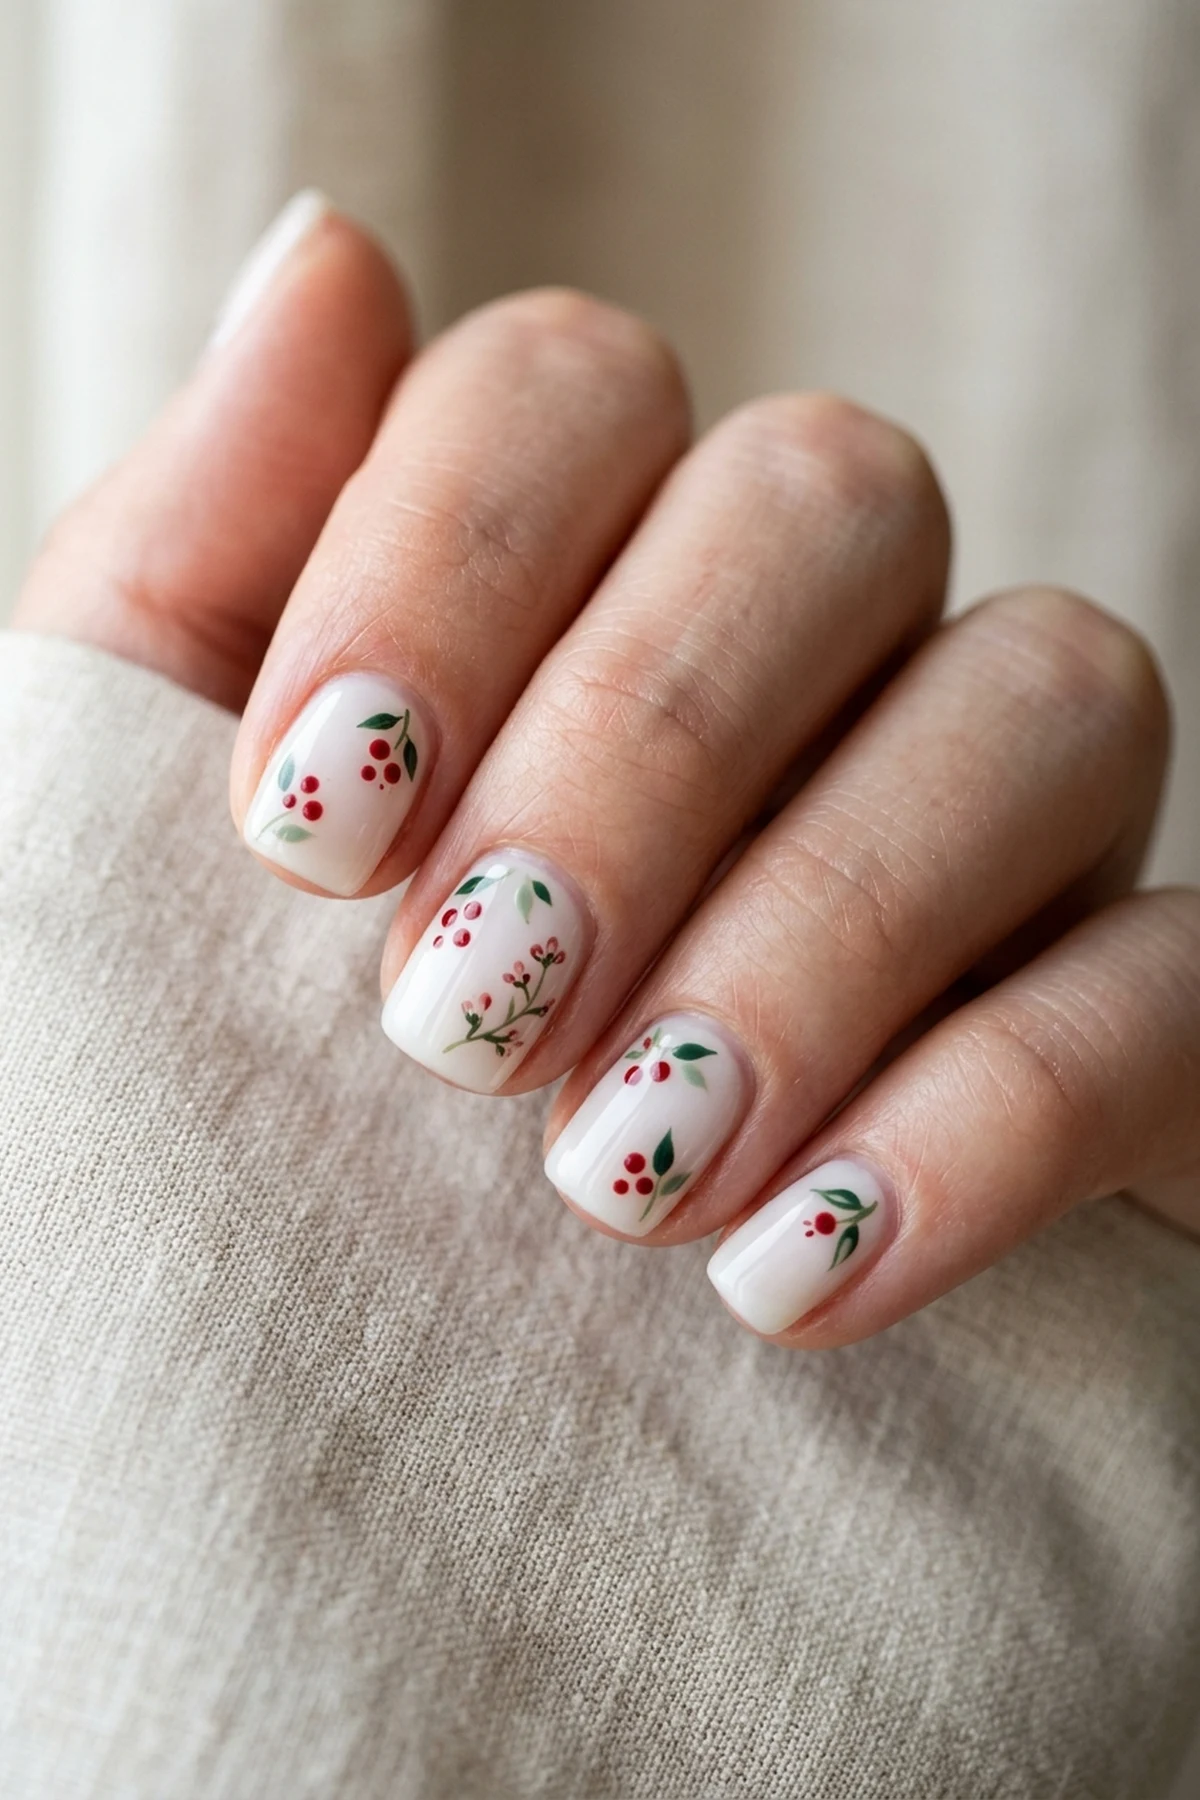
20. Dainty Bobby Pin Berry Clusters on Short White Nails
🎯 Best For: Short white & milky nails
✨ Vibe: Sweet botanical fruit micro-art
Skip expensive salon art kits with this clever budget swap that turns an ordinary hair accessory into a precision stamp for dainty bobby pin berry clusters on short white nails. Bending open the rounded epoxy tip of a standard metal hairpin gives you a consistent spherical nib capable of stamping a tight bobby pin floral dot cluster that mimics miniature summer raspberries or twin cherries. Against a chalk-free milky white base coat, the crimson and mulberry dots pop with crisp editorial contrast.
Puddle two drops of crimson red and forest green polish onto a piece of aluminum foil, dip the rounded tip of your bobby pin vertically into the red pool, and tap three touching dots in a tiny triangle near the upper corner of the nail. Before the berry trio dries flat, use a gentle toothpick marble swirl drag at the top of the cluster to pull two microscopic green leaf flicks and a hair-thin connecting stem. Wiping the metal pin tip on a paper towel after every single trio keeps the berry spheres uniform instead of mushrooming into oversized blobs.
DIY botanical micro-art looks freshest when you leave plenty of breathing room across the nail plate rather than crowding every millimeter with fruit motifs. Place a single three-dot berry cluster on your index and ring fingers while leaving the remaining nails glossy milk-white for a balanced cottagecore finish.
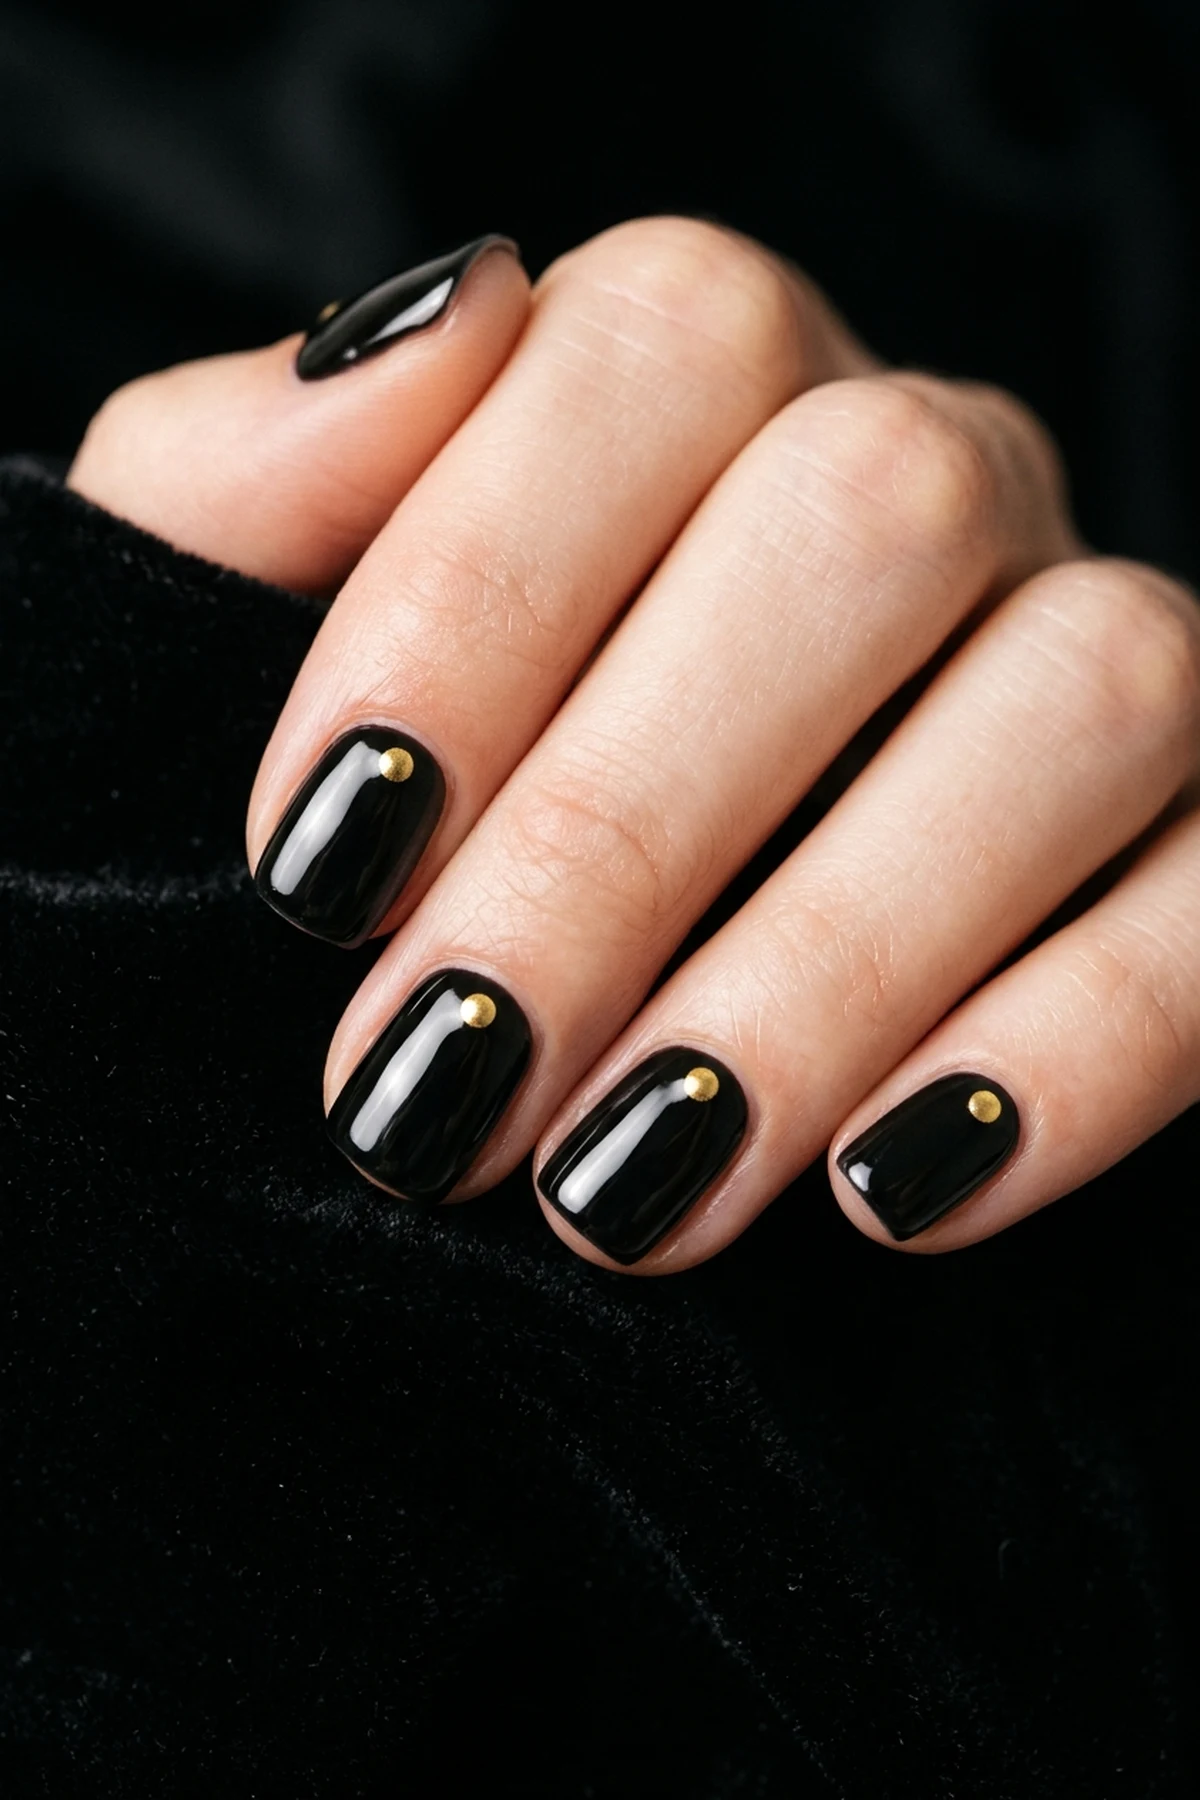
21. Minimalist Cuticle Gold Pearl Studs on Short Black Nails
🎯 Best For: Edgy short square nails
✨ Vibe: High-contrast Parisian hardware
When you want a high-impact time-saver that looks like custom runway hardware, minimalist cuticle gold pearl studs over glossy jet-black nails deliver instant editorial edge in under ten minutes. Instead of gluing bulky metal charms that snag on knitwear and hair strands, stamping a single molten-gold micro-sphere with a dual-ended metal dotting tool gives you the same jewelry-inspired focal point with a completely smooth profile. Short square and squoval nail beds look especially striking in deep onyx when anchored by a warm metallic point near the base.
Apply two thin coats of high-pigment black cream polish, pausing two minutes between layers so the dark solvent dries flat without bubbling. Because dark lacquers highlight every tiny slip near the skin fold, trace around the proximal arch with an angled flat cleanup brush lightly moistened in pure acetone cleanup solution to carve out a crisp, salon-neat perimeter before adding your gold accent. Dip the smallest nib of your dotting wand into metallic gold chrome polish and touch down once at the exact center point two millimeters above the cuticle rim.
Minimalist hardware manicures rely on razor-sharp negative space and mirror-like shine to contrast the tiny metallic stud. Lock the gold dot beneath a high-gloss topcoat so the metallic pigment stays tarnish-free for up to two weeks of daily wear.
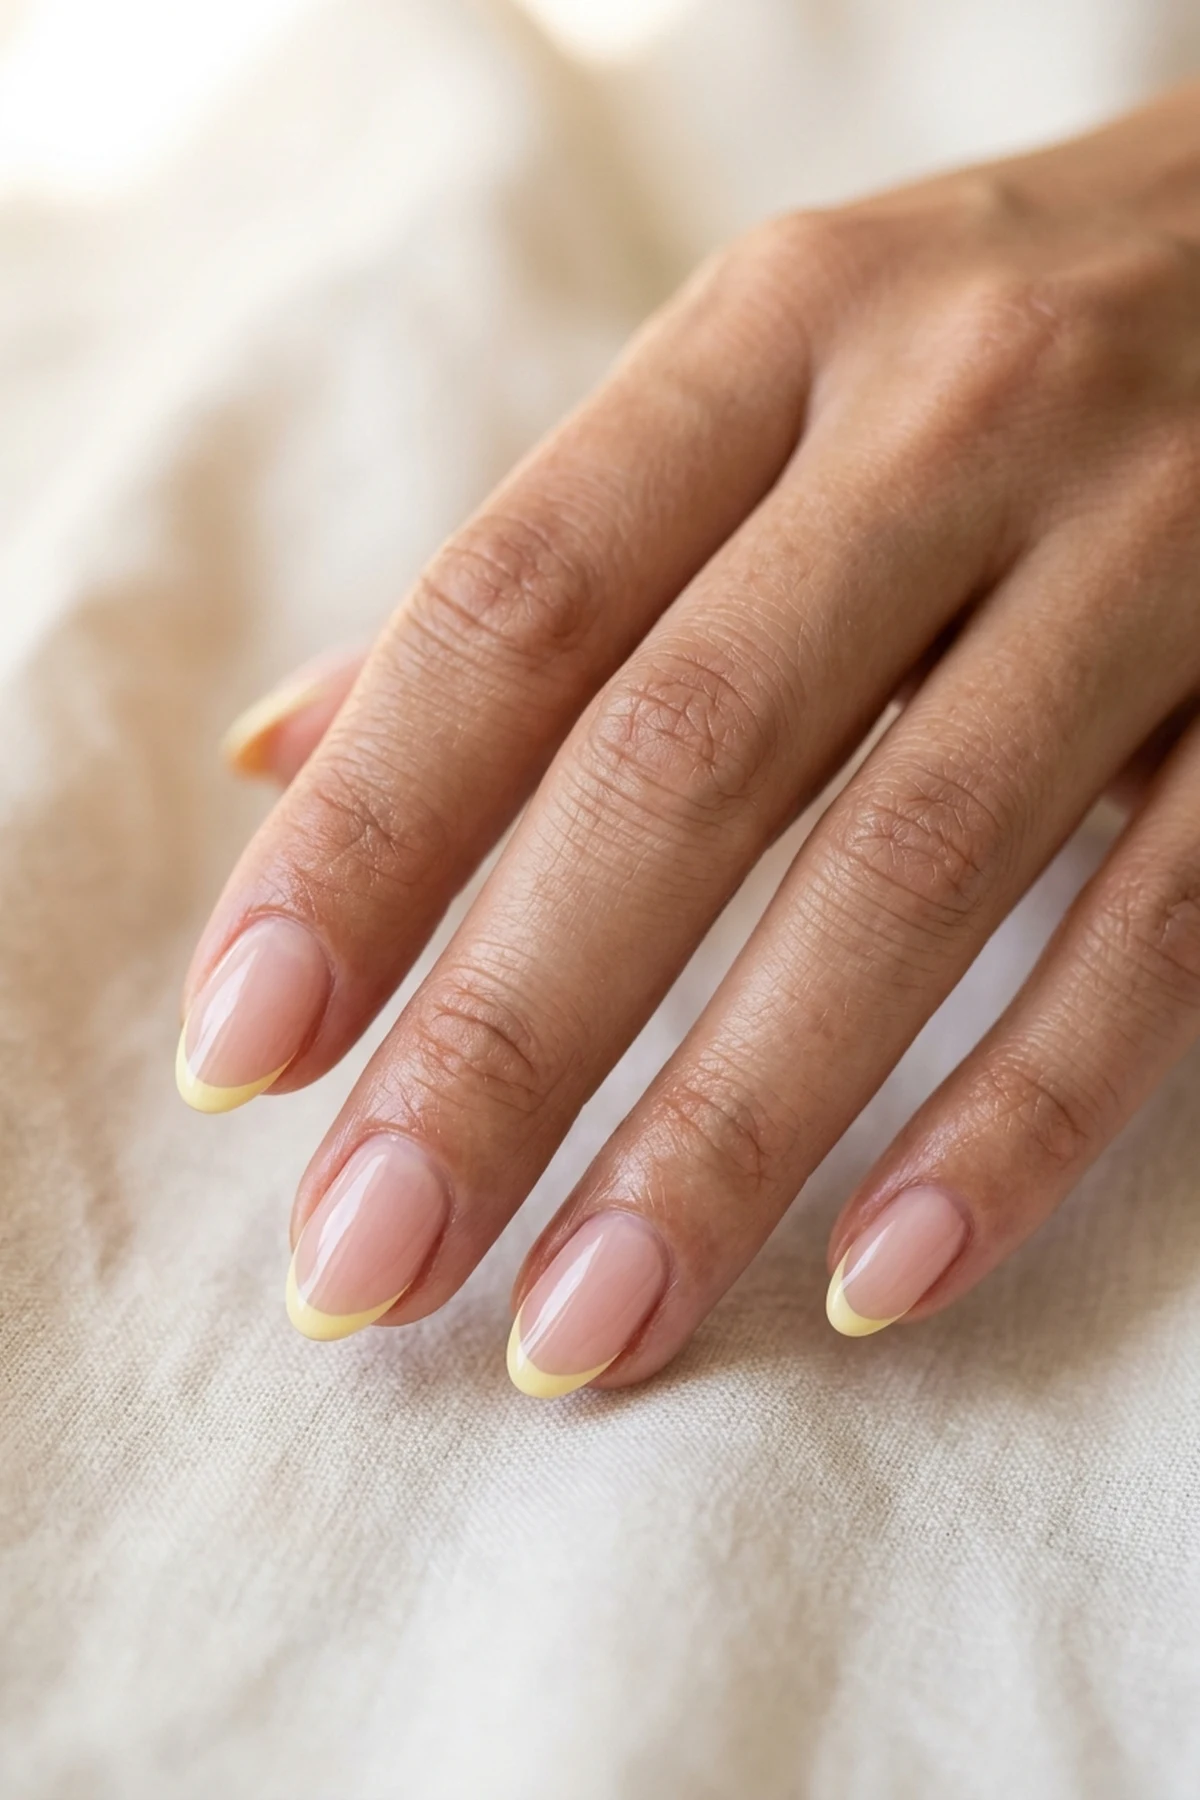
22. Butter Yellow Micro-French Smile Lines on Short Almond Nails
🎯 Best For: Spring & summer short almond tips
✨ Vibe: Sunny pastel Sorbet minimal
Soft pastel tips are leading this year’s warm-weather trend alert, and butter yellow micro-French smile lines offer a creamy, sunlit alternative to stark chalk-white edges on short almond nails. Swapping traditional optical white for a high-opacity butter yellow pastel cream polish warms up neutral and olive skin tones without overpowering delicate nail proportions. Even if your natural free edge only extends two millimeters past the fingertip, a whisper-thin pastel rim frames the almond taper with effortless grace.
Rather than dragging a liner brush across your non-dominant hand, brush a thin stripe of yellow lacquer onto the flexible pad of a clear silicone French tip stamper and gently kiss the tip of your nail into the cushion at a thirty-degree angle. Roll your fingertip slightly from left to right so the silicone conforms to the natural curve of the almond apex, depositing a uniform one-millimeter crescent in a single motion. Allow the stamped pastel arc to set for ninety seconds before floating your clear sealing coat over the edge so the pale pigment never streaks across the sheer pink base.
Seasonal pastel manicures also make a cheerful foundation if you ever want to add playful pop-culture accents inspired by adorable BT21 nail art designs on a single ring finger. Pair the creamy yellow tips with a sheer rose-milk base coat to keep the overall finish soft, breathable, and office-ready.
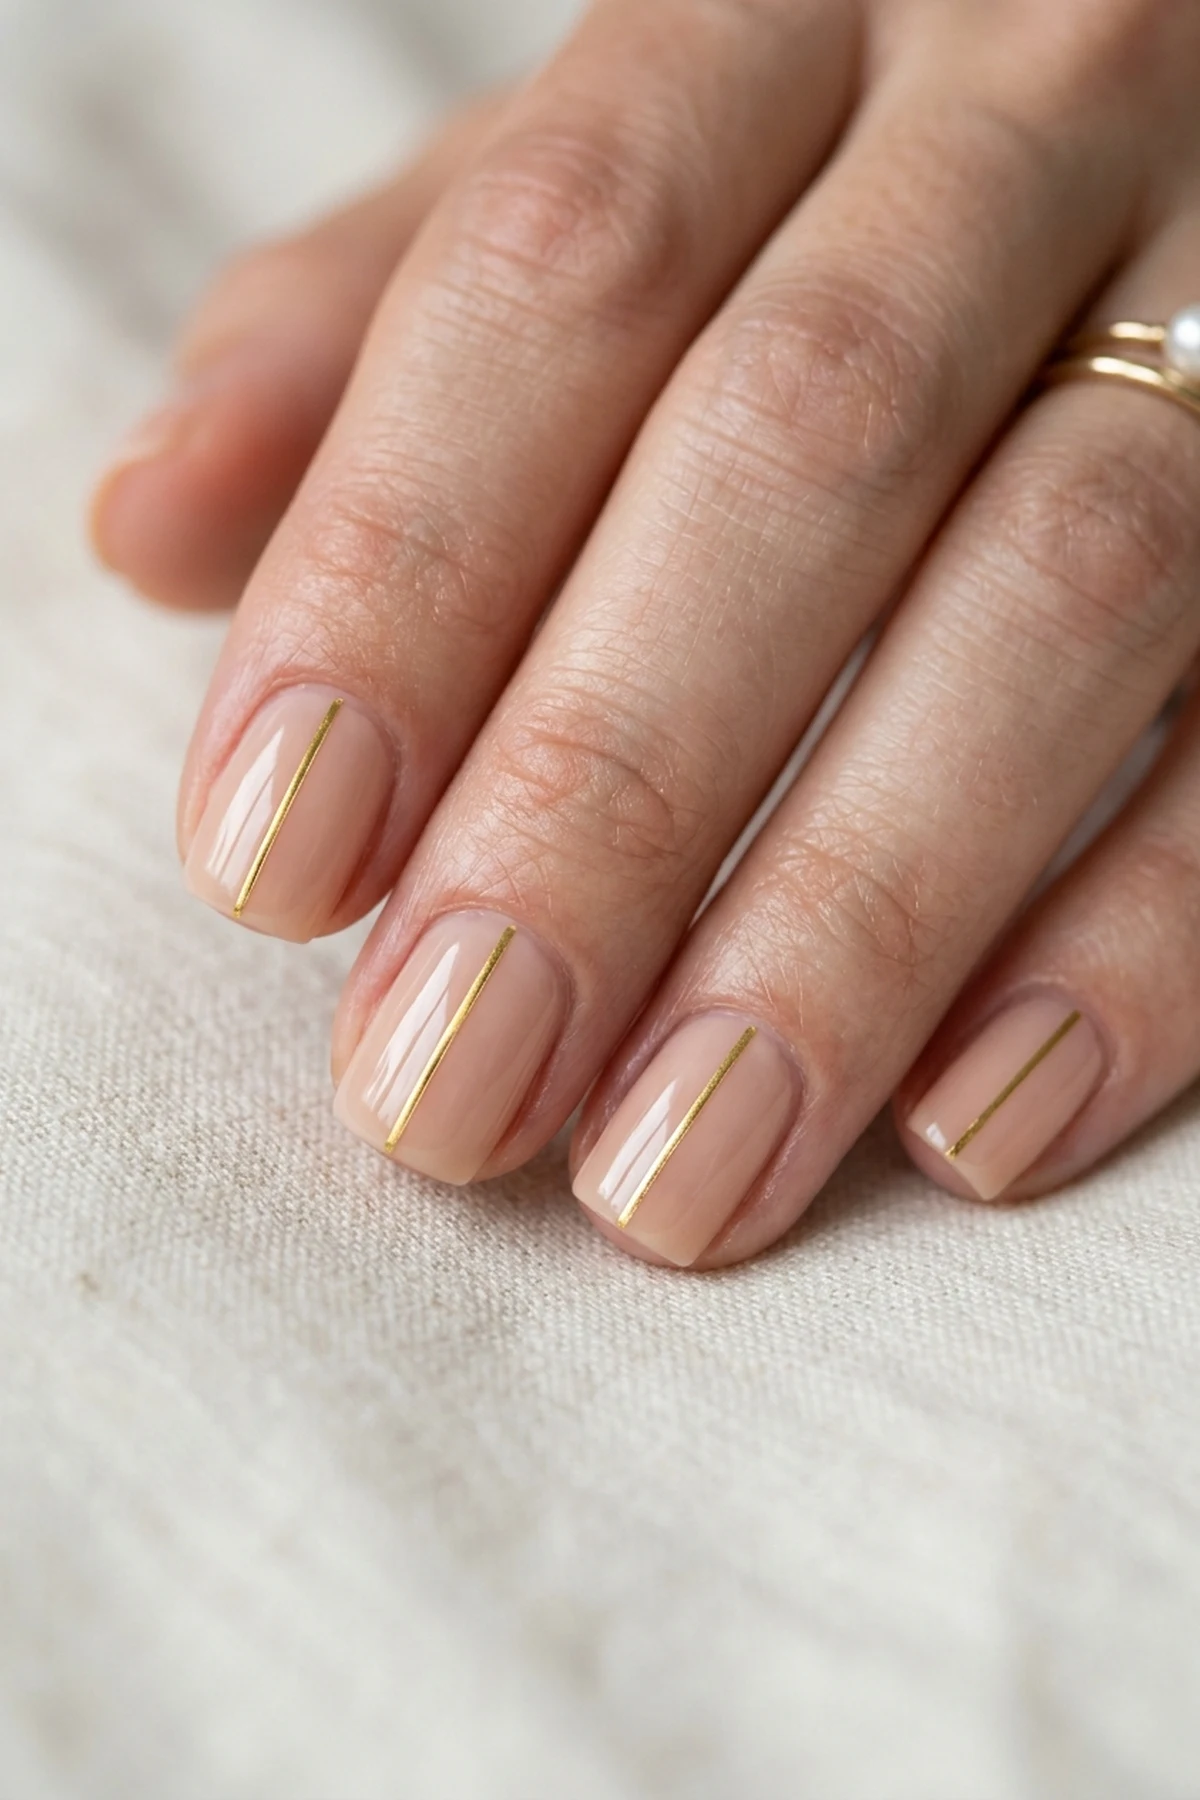
23. Vertical Center Metallic Striping Tape Spine on Nude Nails
🎯 Best For: Visually elongating short nail beds
✨ Vibe: Sleek architectural jewelry
A true hidden gem for petite hands, a vertical center metallic striping tape spine draws the eye lengthwise to make wide or bitten nail beds appear noticeably longer and slimmer. Because self-adhesive ultra-thin metallic striping tape comes pre-cut to a uniform one-millimeter width, you get a laser-straight gold or silver pinstripe down the middle of the nail without touching a detail brush. Paired with a skin-matching sheer nude foundation, the reflective vertical line reads like delicate fine jewelry resting on the finger.
Start by smoothing longitudinal ridges across the natural nail plate with a gentle 180-grit natural nail buffer so the adhesive foil ribbon lies completely flat without catching on uneven keratin. Once your two coats of sheer nude polish are bone-dry to the touch, unspool a two-inch piece of gold striping tape with tweezers, press it down the vertical center axis from just above the cuticle to the tip, and snip the excess half a millimeter inside the free edge. Leaving that microscopic buffer zone at both ends prevents the foil ribbon from lifting or peeling when your fingertips tap against keyboards or zippers.
Minimalist linear tape designs demand thorough encapsulation so the metallic edge stays recessed inside the clear coat. Anchor the ribbon permanently using a two-step free-edge cap sealing technique, sweeping your glossy topcoat down the vertical spine and directly across the horizontal tip edge.
24. Cloud & Starburst Dotting Tool Sky on Soft Blue Nails
🎯 Best For: Dreamy accent nails & kids DIY
✨ Vibe: Whimsical daydream sky
This beginner-friendly crowd-pleaser turns simple overlapping polish droplets into a whimsical cloud and starburst dotting tool sky over soft cornflower blue nails. Because cumulus clouds are naturally billowy and asymmetrical, clustering four to five white dots of varying sizes side by side and tapping their centers together creates an instant fluffy silhouette. Adding a few tiny celestial sparkles alongside the clouds transforms a basic pastel manicure into a dreamy Pinterest-worthy statement.
Paint your nails with two even coats of periwinkle or baby blue cream polish, then stamp three large white spheres in a tight cluster with two smaller dots flanking the bottom corners to form a flat cloud base. Once the cloud clusters settle, dip the very tip of a 7mm micro-detail striper brush into opaque white DND DC high-pigment liner gel—or a bright white art lacquer—to pull four intersecting hairline ticks into a classic North Star shape. Resting your painting wrist flat against the table edge while pulling outward from a tiny center dot keeps the four star points crisp and needle-thin.
For an elevated DIY finish that avoids looking overly busy, paint the full cloud-and-star motif on your middle and ring fingers while dotting single miniature stars on the remaining nails. Finish with a plumping gel-effect topcoat to give the pastel sky a dreamy glass dome effect.
25. Sheer Milky Builder Overlay with Pressed Dry Mini Florals
🎯 Best For: Zero-painting botanical nail art
✨ Vibe: Botanical resin milk-bath
Our final expert pick requires zero freehand drawing because real miniature blossoms do all the visual heavy lifting inside a sheer milky builder overlay with pressed dry mini florals. Encapsulating paper-thin dried baby’s breath petals inside a self-leveling slip layer of sheer milky pink builder gel creates the coveted “milk-bath” resin aesthetic seen in luxury Japanese nail studios. If you prefer a warmer sunlit undertone around the petals, blending a drop of translucent peach syrup gel near the center of the nail plate adds a soft editorial glow before you press the botanicals into place.
Cure your initial milky base coat, brush on a thin uncured slip layer of clear or milky builder gel, and use angled tweezers to lay two tiny pressed floral buds flat near the lateral corner of the nail. Press a clear silicone stamper or a piece of plastic wrap gently over the wet surface for three seconds before curing under your LED lamp so every dry petal edge embeds flush without poking up through the overlay. Float one final encapsulating bead of clear builder gel across the apex to level any remaining texture before wiping the inhibition layer and applying glossy topcoat.
Professional encapsulated botanical manicures stay crystal-clear and lift-free for three full weeks when you maintain flexible surrounding skin with daily jojoba cuticle oil hydration every evening. Massage a single drop of oil across the proximal fold and underneath the free edge to prevent dry micro-lifting around the thicker builder overlay.
Frequently Asked Questions
What household items can I use for beginner nail art without buying brushes?
You can replicate almost any salon dotting tool or stencil using everyday items already in your bathroom drawer. The rounded epoxy tip of a splayed bobby pin stamps uniform daisy petals and berry clusters, while wooden toothpicks pull crisp marble swirls and heart points. Matte Scotch tape, paper binder reinforcement rings, and cosmetic wedge sponges handle straight color-block slashes, half-moon cuticle windows, and diffused aura gradients with zero brushwork.
How long should I wait before applying topcoat over nail art dots or stripes?
When working with regular air-dry lacquer, wait a full three to four minutes for raised dots or striping lines to become dry to the touch before sealing. Load a generous bead of quick-dry glossy topcoat onto your brush and float it lightly across the surface so the bristles never drag through the underlying pigment. If you use UV or LED gel polish, flash-cure detail work for thirty to sixty seconds before applying your final non-wipe topcoat.
Which simple nail art designs look best on ultra-short or bitten nails?
Vertical and negative-space motifs visually elongate petite nail beds without overwhelming short proportions. Try a single vertical metallic striping tape spine down the center axis, whisper-thin micro-French tips applied with a silicone stamper, or a single gold micro-stud centered just above the cuticle arch. Keeping at least sixty percent of the sheer pink or nude base coat visible creates the illusion of longer, slimmer fingers.
How do I keep dark or bright nail polish from flooding my cuticles?
Place your brush bristle tip two millimeters ahead of the proximal skin fold, push gently back toward the cuticle to leave a hairline gap, and then sweep forward toward the free edge. This one-millimeter cuticle flooding prevention margin stops wet pigment from wicking into the lateral sidewalls and lifting prematurely. If a slip occurs, dip an angled flat eyeliner or cleanup brush into pure acetone, blot it on a paper towel so it is damp rather than dripping, and trace once around the perimeter.
Is gel polish or regular air-dry lacquer easier for beginner nail art at home?
Both formulas have distinct advantages depending on which technique you choose. Regular air-dry cream polish works best for Scotch tape color-blocking, cosmetic sponge ombré fades, and quick toothpick dots because it requires no lamp and wipes off easily. UV/LED gel polish is far more forgiving for freehand wave swirls, tortoiseshell blooming designs, and chrome powder rubs because the pigment will never dry or stiffen until you cure it under the lamp.
How can I stop my DIY nail art from chipping at the tips after a few days?
Prep the natural nail plate by gently buffing away surface shine with a 180-grit buffer and wiping each nail with isopropyl alcohol to remove trapped skin oils. Always lock in your base coat, color layer, and glossy topcoat using the free-edge cap sealing technique—sweeping the brush horizontally across the very tip edge of the nail. Finish with daily jojoba cuticle oil hydration every night to keep the keratin flexible and resistant to brittle corner splits.
Get our latest guides, news, and insights highlighted in your Google Search & AI Overviews.