✨ This article was AI edited. Editorial responsibility: Britany Marshall Beauty.
The right eye makeup tutorial maps brush angles and pigment depth directly to your unique orbital bone rather than copying a one-size-fits-all diagram. After testing studio placement methods across hooded, almond, downturned, monolid, and mature lids, we organized fifteen anatomy-matched routines that prevent crease transfer and flatter your natural features. Use our placement metrics below to match your exact fold height, brush shape, and desired finish.
| # | Eye Makeup Tutorial & Technique | ⏱️ Difficulty | 👁️ Best Eye Shape | 🖌️ Key Brush Placement |
|---|---|---|---|---|
| 1 | Easy 3-Shade Neutral Orbital Crease Mapping | Beginner | Almond & Balanced Eyes | Orbital socket sweep + center mobile lid pat |
| 2 | Hooded Eye Open-Eye Faux Crease Placement | Intermediate | Hooded & Partially Hooded Eyes | 2mm above natural fold with eyes looking straight ahead |
| 3 | Soft Brown Smokey Upward Outer-V Diffusion | Beginner | Almond & Classic Proportional Eyes | Outer-third V stamp blended inward toward center crease |
| 4 | Downturned Eye 45-Degree Temple Lift | Beginner | Downturned & Drooping Outer Corners | Anchor dark pigment 3mm inside outer tear corner, sweep toward temple |
| 5 | Round Eye Horizontal Elongation & Lash Smudge | Intermediate | Round & Prominent Eyes | Horizontal outer-third sweep + lower lash outer-half smudge |
| 6 | Deep-Set Eye Luminous Mobile Lid Packing | Beginner | Deep-Set & Prominent Brow-Bone Eyes | Flat shader press across inner two-thirds of mobile lid; skip dark socket |
| 7 | Monolid Vertical Ombré Root-to-Brow Gradient | Intermediate | Monolid & Epicanthic Fold Eyes | Dense lash-root pigment fading vertically in 3 tiers toward brow bone |
| 8 | Mature Eye Cream-to-Satin Lift (Over 50 & 60) | Beginner | Mature, Textured & Crepey Eyelids | Featherweight cream swipe on mobile lid + upward outer-corner buff |
| 9 | Soft Half-Cut Crease Flat Shader Carving | Advanced | Low-Crease, Hooded & Tapered Almond Eyes | Look-up concealer stamp + inner two-thirds flat shader cut |
| 10 | Cat Eye Bat-Wing & Shadow-Guided Flick | Intermediate | Hooded, Downturned & Almond Outer Folds | Map wing with angled shadow first, connect across open fold |
| 11 | Halo Spotlight Dual-Corner Shading | Intermediate | Close-Set, Narrow & Almond Eyes | Inner-third + outer-third matte anchors with center-iris shimmer tap |
| 12 | Wide-Set Eye Inner-Third Bridge Contour | Intermediate | Wide-Set Eyes (> 1 Eye Width Apart) | Sweep transition shade from inner brow head down toward tear duct |
| 13 | Douyin Rose-Pink Aegyo-Sal Lower Lash Contour | Intermediate | Monolid, Almond & Short Mid-Face | Parallel lower-lash S-curve shadow 3mm below waterline + center tap |
| 14 | Kohl-Rimmed Bedroom Smokey Waterline Smudge | Beginner | Almond, Large & Prominent Eyes | Upper/lower lash-root kohl press diffused 2mm upward before setting |
| 15 | Color-Wheel Contrast Accent Placement | Beginner | All Eye Shapes (Brown, Green, Hazel & Blue) | Neutral socket frame + complementary color pop stamped above pupil |
Contents of Article
- 1. Easy 3-Shade Neutral Eye Makeup Tutorial: Orbital Crease Mapping for Beginners
- 2. Hooded Eye Makeup Tutorial: Open-Eye Faux Crease Placement Above the Fold
- 3. Soft Brown Smokey Eye Makeup Tutorial: Upward Outer-V Diffusion for Almond Eyes
- 4. Downturned Eye Makeup Tutorial: 45-Degree Temple Lift & Outer Corner Placement
- 5. Round Eye Makeup Tutorial: Horizontal Elongation & Outer-Third Lash Smudge
- 6. Deep-Set Eye Makeup Tutorial: Luminous Mobile Lid Packing & Forward Brow-Bone Balance
- 7. Monolid & Asian Eye Makeup Tutorial: Vertical Ombré Gradient & Root-to-Brow Blending
- 8. Mature Eye Makeup Tutorial for Women Over 50 & 60: Cream-to-Satin Lift Placement
- 9. Soft Half-Cut Crease Eye Makeup Tutorial: Flat Shader Carving for Low-Fold Lids
- 10. Cat Eye Makeup Tutorial: Bat-Wing & Shadow-Guided Flick Mapping for Folded Corners
- 11. Halo Spotlight Eye Makeup Tutorial: Dual-Corner Shading for Close-Set Eyes
- 12. Wide-Set Eye Makeup Tutorial: Inner-Third Bridge Contour & Tear-Duct Framing
- 13. Douyin Rose-Pink Eye Makeup Tutorial: Aegyo-Sal Lower Lash Contour & Shimmer Mapping
- 14. Kohl-Rimmed Bedroom Smokey Eye Makeup Tutorial: Waterline Tightline & Pencil Smudge
- 15. Color-Wheel Eye Makeup Tutorial for Brown, Green & Blue Eyes: Contrast Accent Placement
- Frequently Asked Questions
- What is the correct order of steps in a beginner eye makeup tutorial?
- How does brush placement differ between hooded eyes and deep-set eyes?
- Where should I stop outer-V eyeshadow so downturned eyes do not look droopy?
- How do I stop eyeshadow and eyeliner from transferring onto my upper eyelid fold?
- Which three eyeshadow brushes do I actually need for step-by-step blending?
- When should I use an inner corner tear-duct highlight versus a center-lid halo spotlight?
1. Easy 3-Shade Neutral Eye Makeup Tutorial: Orbital Crease Mapping for Beginners
👁️ Best Eye Shape: Almond & Balanced Eyes
🖌️ Key Brush Placement: Orbital socket sweep + center mobile lid pat
Mastering a beginner-friendly orbital crease mapping routine starts with neutralizing eyelid discoloration and surface oil before touching a single powder pan. Smooth a thin layer of tinted eyeshadow primer base from the lash line up to the brow bone, then let it set for thirty seconds so your pigments glide seamlessly without patchy skipping.
Next, tap a medium dome brush into a warm taupe matte neutral transition shade that sits two shades deeper than your natural skin tone. Gently press the bristles into the hollow of your orbital socket and sweep back and forth from the outer corner toward the inner third, stopping before the tear duct so the inner eye stays bright and open.
Finish this minimalist three-step architecture by pressing a soft champagne satin onto the center mobile lid with your ring finger and anchoring a richer espresso matte strictly along the outer lash roots. Keep the brow arch clean of heavy shimmer to maintain an effortless, sculpted daytime contour that works in any office or daylight setting.
2. Hooded Eye Makeup Tutorial: Open-Eye Faux Crease Placement Above the Fold
👁️ Best Eye Shape: Hooded & Partially Hooded Eyes
🖌️ Key Brush Placement: 2mm above natural fold with eyes looking straight ahead
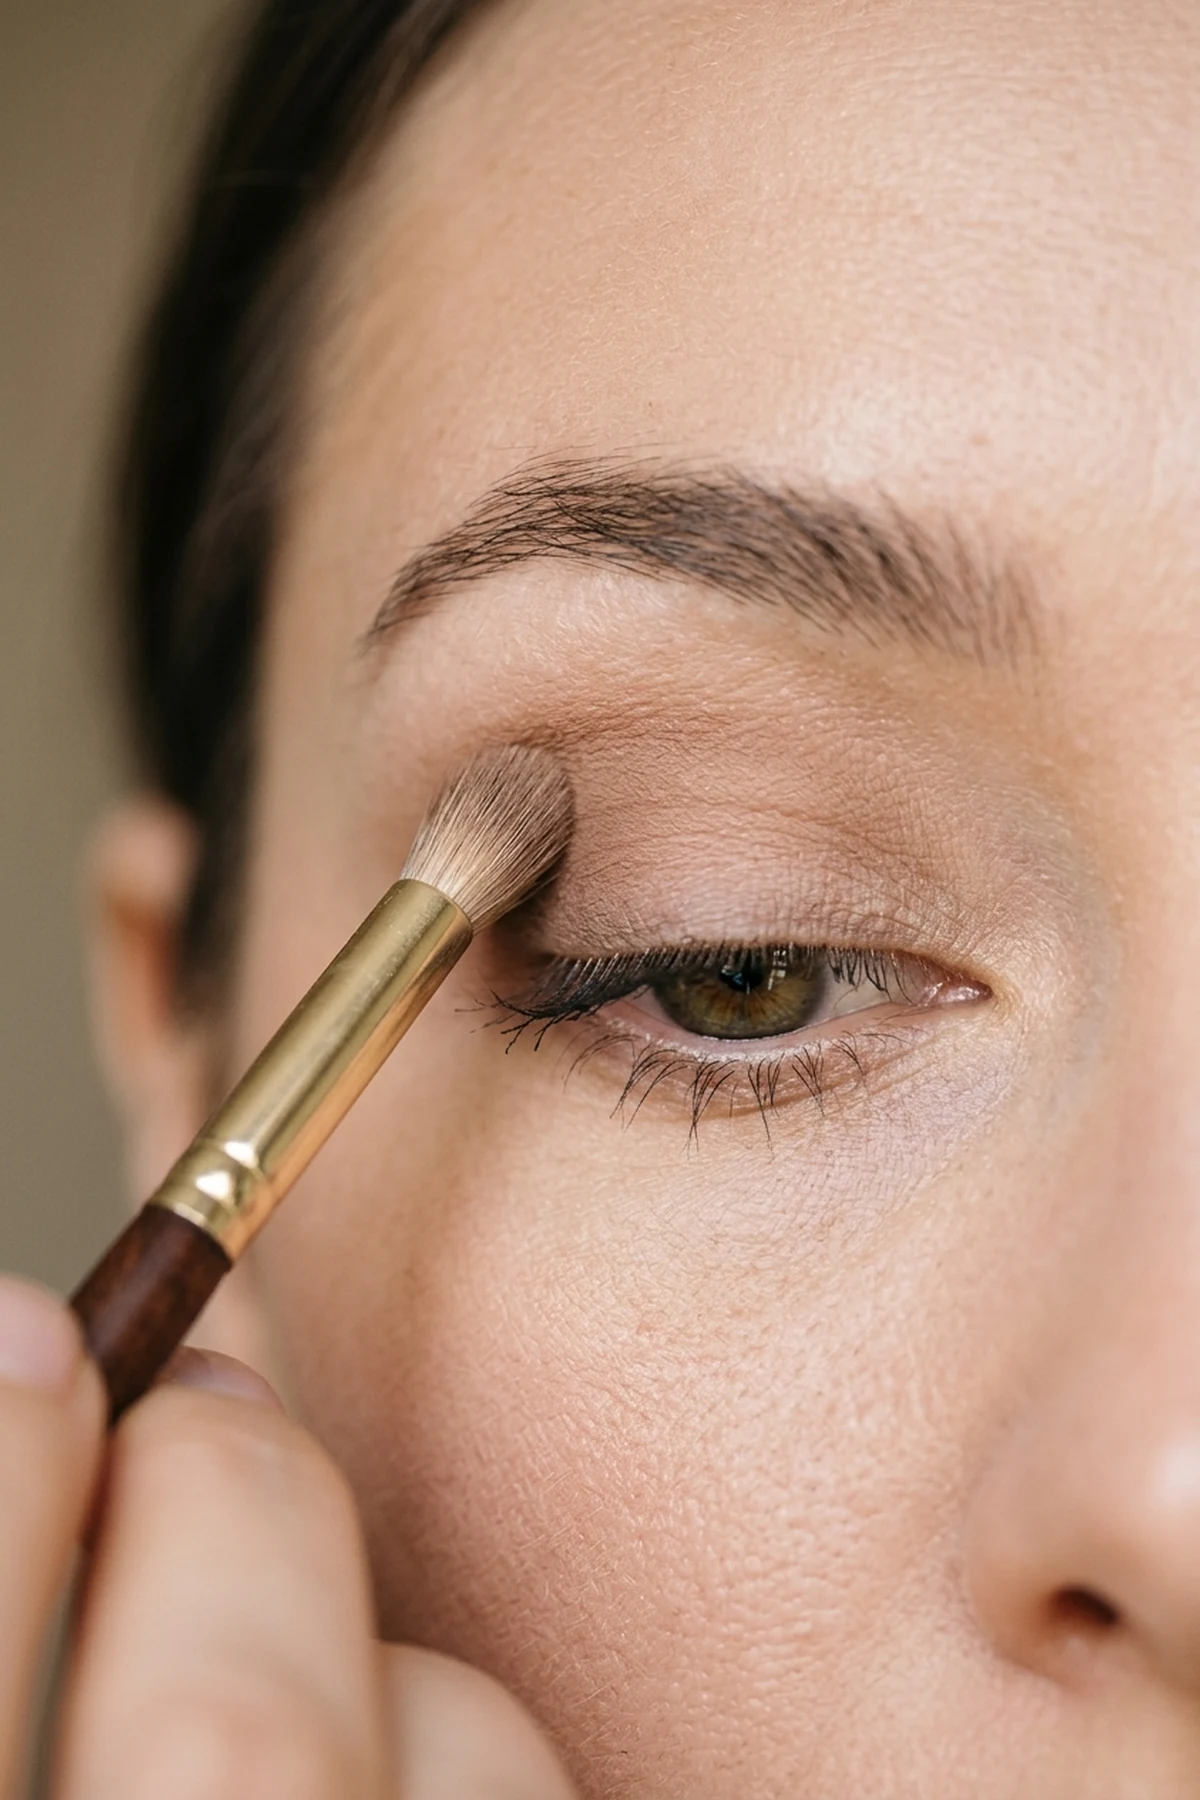
Our top expert pick for hooded lids solves the frustration of watching carefully blended shadow disappear the moment you open your eyes. Instead of tilting your chin back and closing your lid, relax your forehead and look straight into a flat mirror while executing the faux crease mapping technique directly onto the visible skin two millimeters above your natural fold.
Hold your brush by the end of the handle for featherlight pressure and buff a rose-brown or cool taupe matte across that elevated arc to simulate a deeper socket shadow. Always set your primer with a translucent micro-milled setting powder along the crease hinge first, which creates a dry barrier that prevents hooded fold pigment transfer during warm, humid afternoons.
Reserve luminous satin shades strictly for the inner half of the movable eyelid and keep the skin directly beneath the brow bone completely matte. Because light pushes features forward while matte shadows recede, keeping the overhanging hood free of frost instantly lifts and de-puffs the entire eye contour with professional precision.
3. Soft Brown Smokey Eye Makeup Tutorial: Upward Outer-V Diffusion for Almond Eyes
👁️ Best Eye Shape: Almond & Classic Proportional Eyes
🖌️ Key Brush Placement: Outer-third V stamp blended inward toward center crease
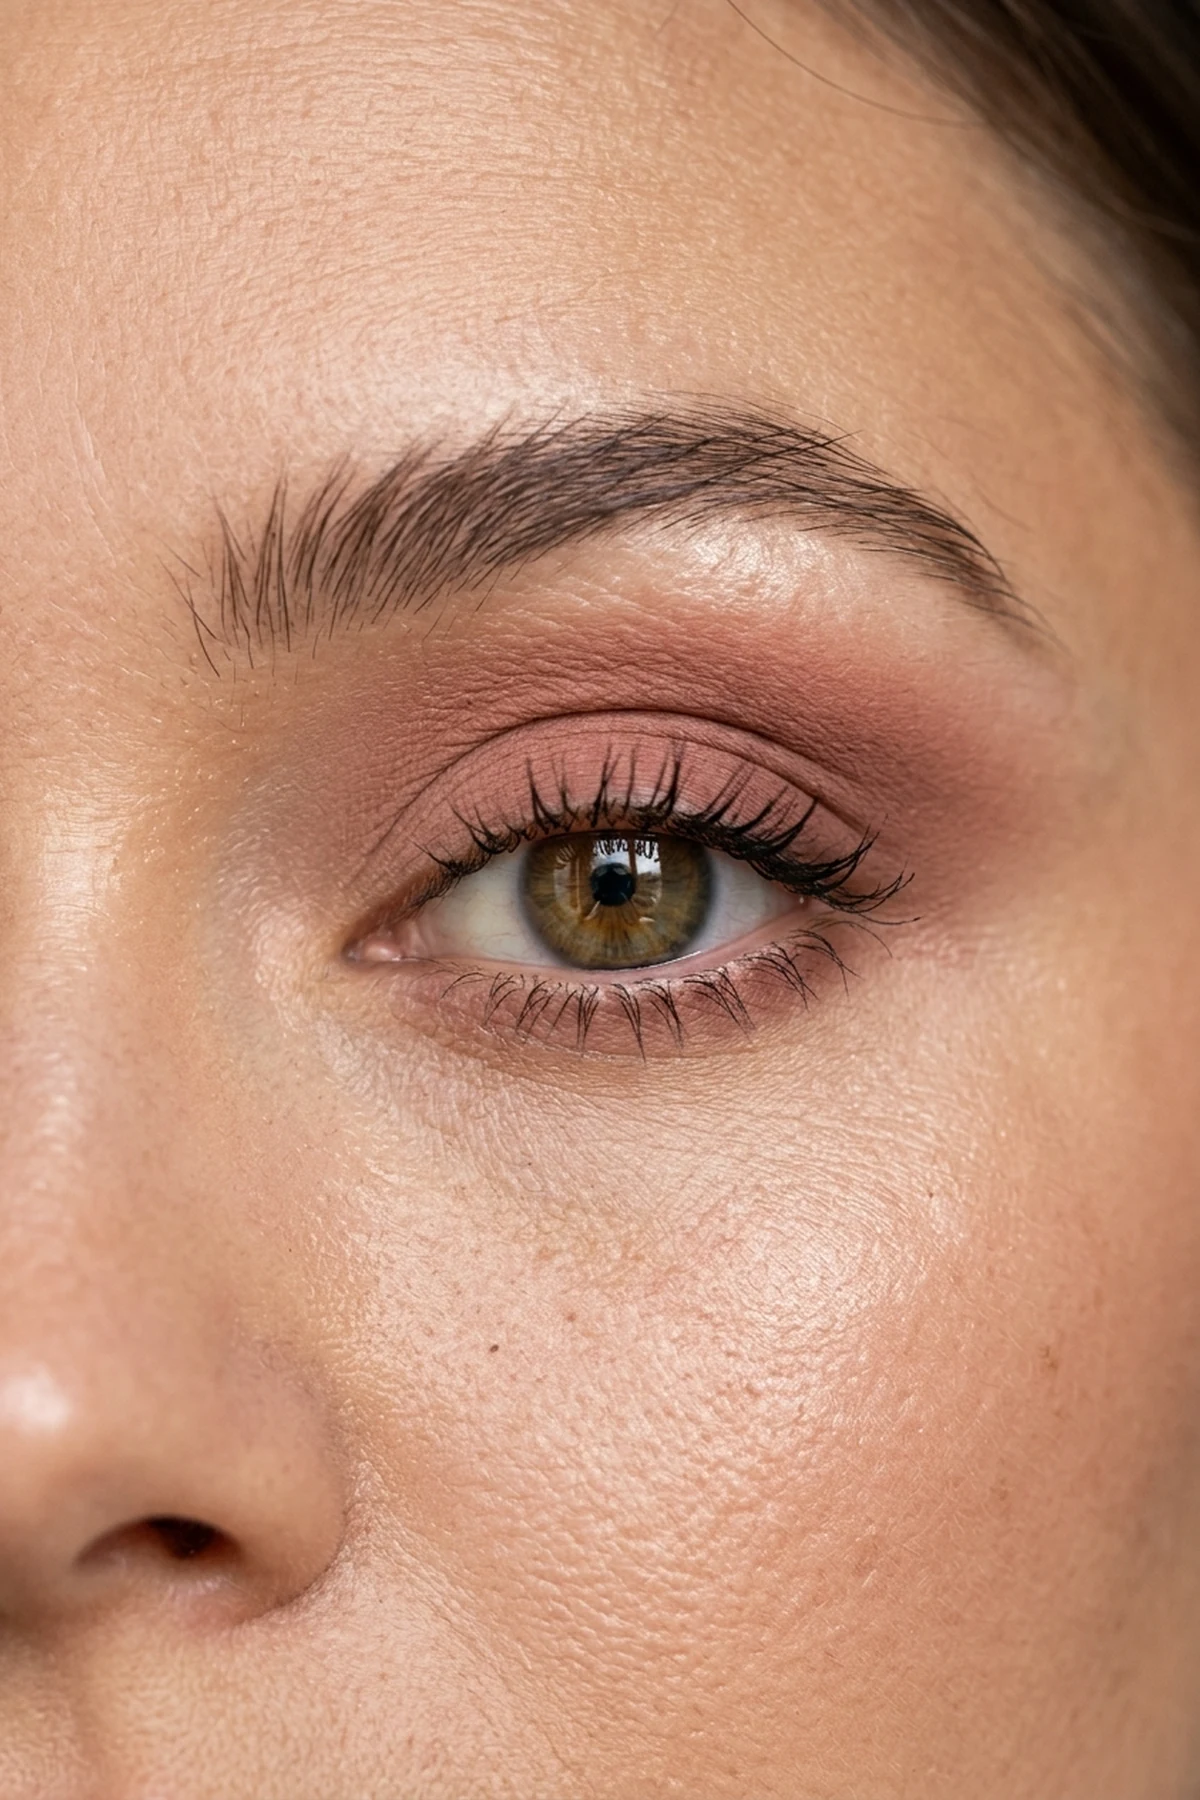
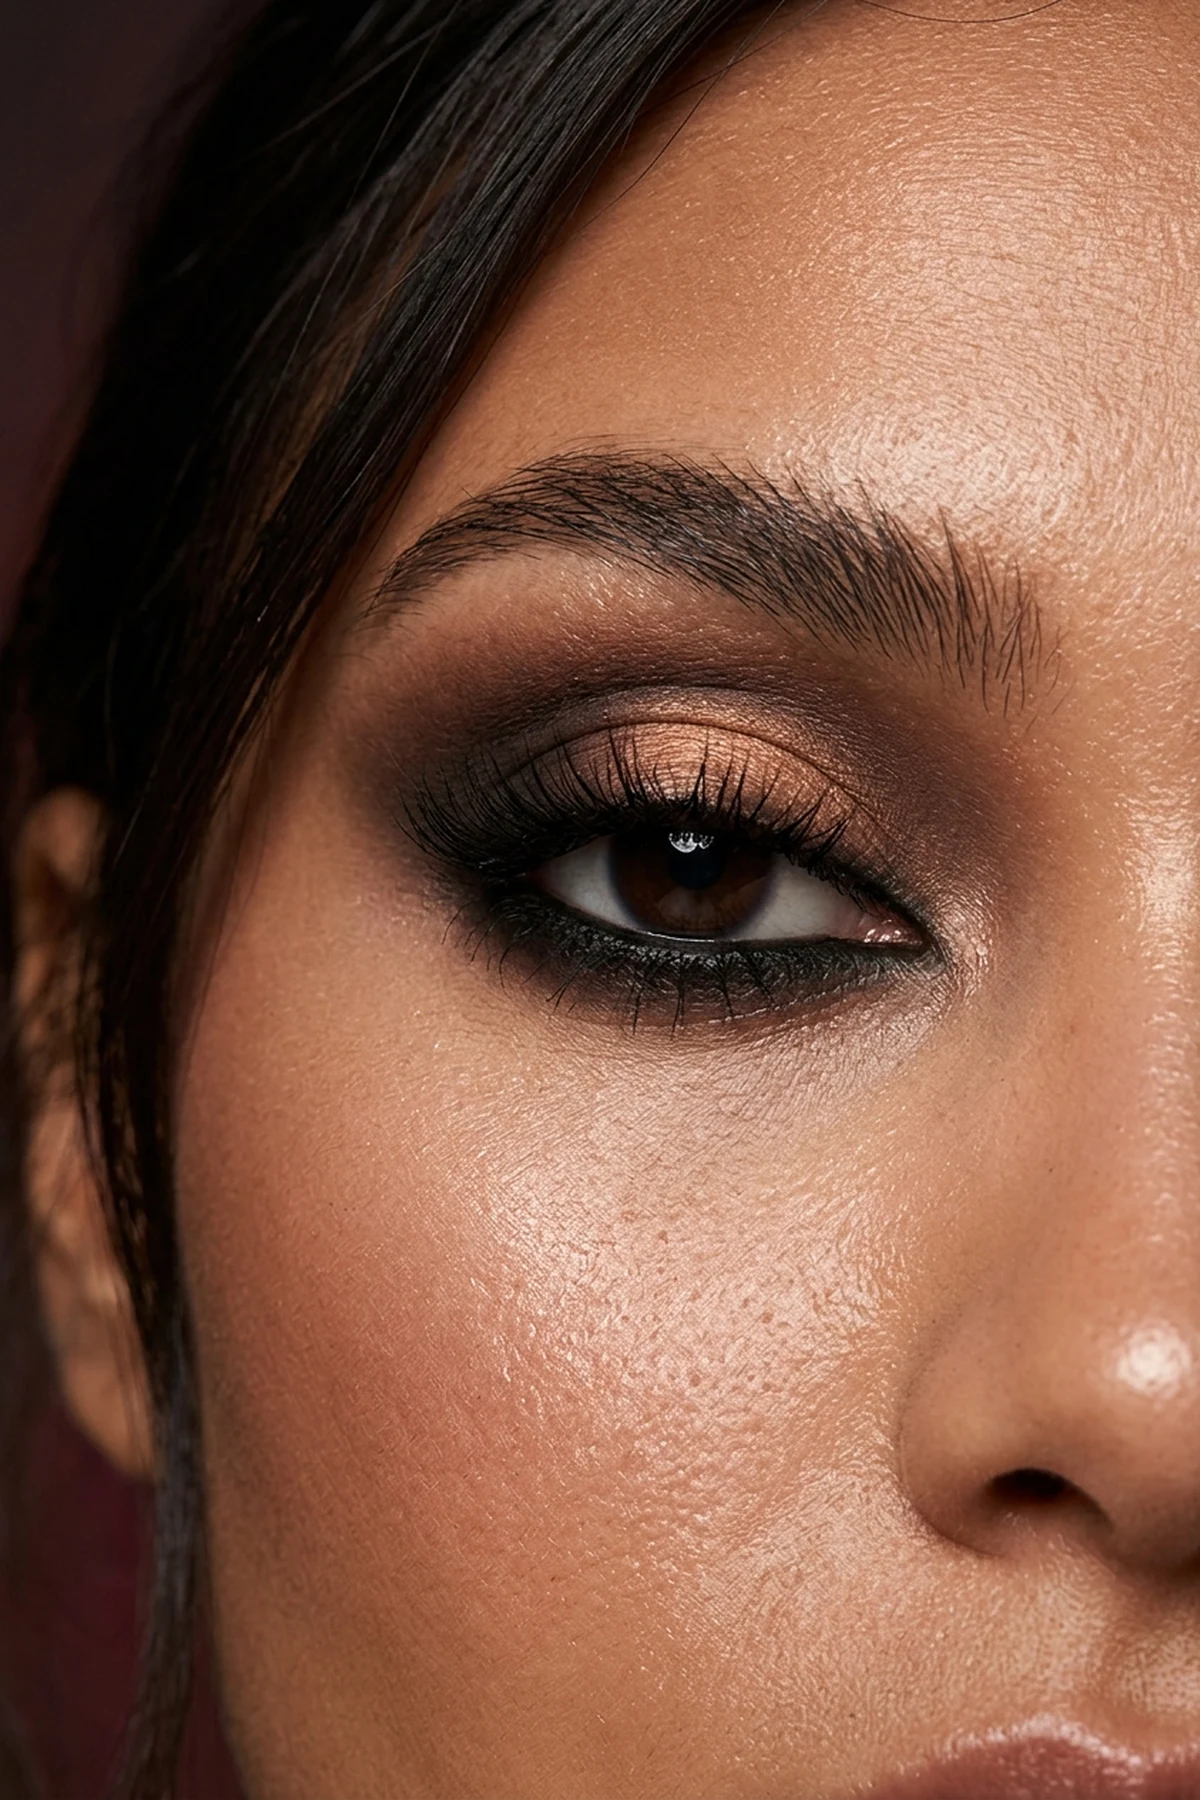
This seasonal trend alert replaces harsh, heavy black party shadow with a dimensional soft brown smokey eye makeup gradient that flatters classic almond proportions. By swapping stark charcoal for roasted espresso, warm cinnamon, and toasted bronze, you build sultry evening depth without shrinking the visible surface area of your mobile lid.
To sculpt the outer corner, load a small crease brush with dark cocoa pigment and stamp a sideways triangle using an upward outer-V placement that connects the outer third of the lash line to the outer orbital bone. Feather the edges inward toward the center pupil in tiny circular motions so the darkest concentration remains anchored at the outer perimeter.
Press a molten bronze shimmer across the center lid to bridge the light inner corner and deep outer V, drawing inspiration from pretty soft glam makeup color palettes for seamless tonal harmony. Wrap the residual warmth along the outer third of the lower lash line to lock in a balanced, red-carpet finish.
4. Downturned Eye Makeup Tutorial: 45-Degree Temple Lift & Outer Corner Placement
👁️ Best Eye Shape: Downturned & Drooping Outer Corners
🖌️ Key Brush Placement: Anchor dark pigment 3mm inside outer tear corner, sweep toward temple
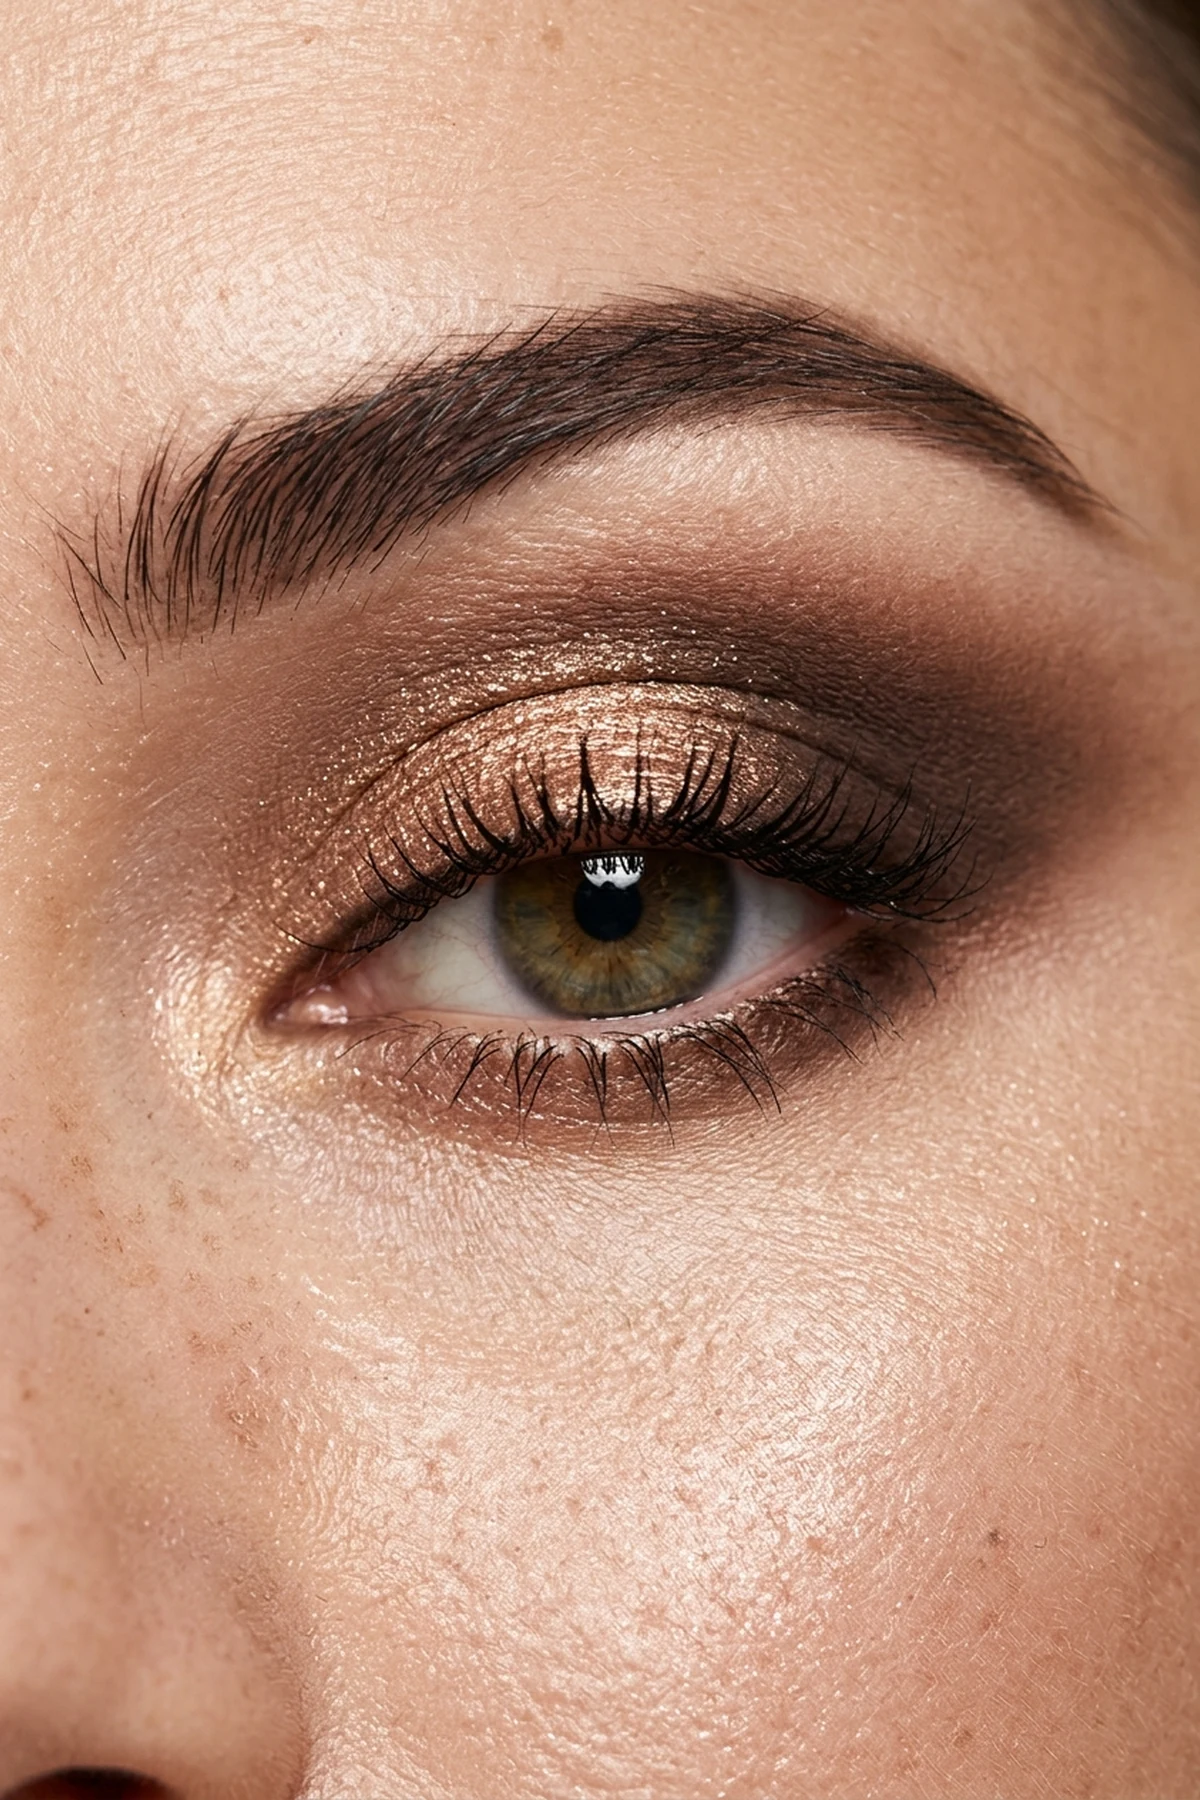
When your outer tear duct sits slightly lower than your inner corner, extending shadow all the way to the very edge of the upper lashes pulls the eye downward. This time-saving DIY adjustment relies on a 45-degree temple lift, anchoring your deepest contour shade three millimeters inside the outer corner with a tapered fluffy blending brush.
Angle your brush handle along an imaginary diagonal line running from the lower lash line up toward the tail of your eyebrow, sweeping warm terracotta or neutral mocha upward into the outer crease. Leave the outermost two millimeters of the lower corner completely bare of dark shadow, and brighten that tiny pocket with a drop of satin concealer to create an instant architectural lift.
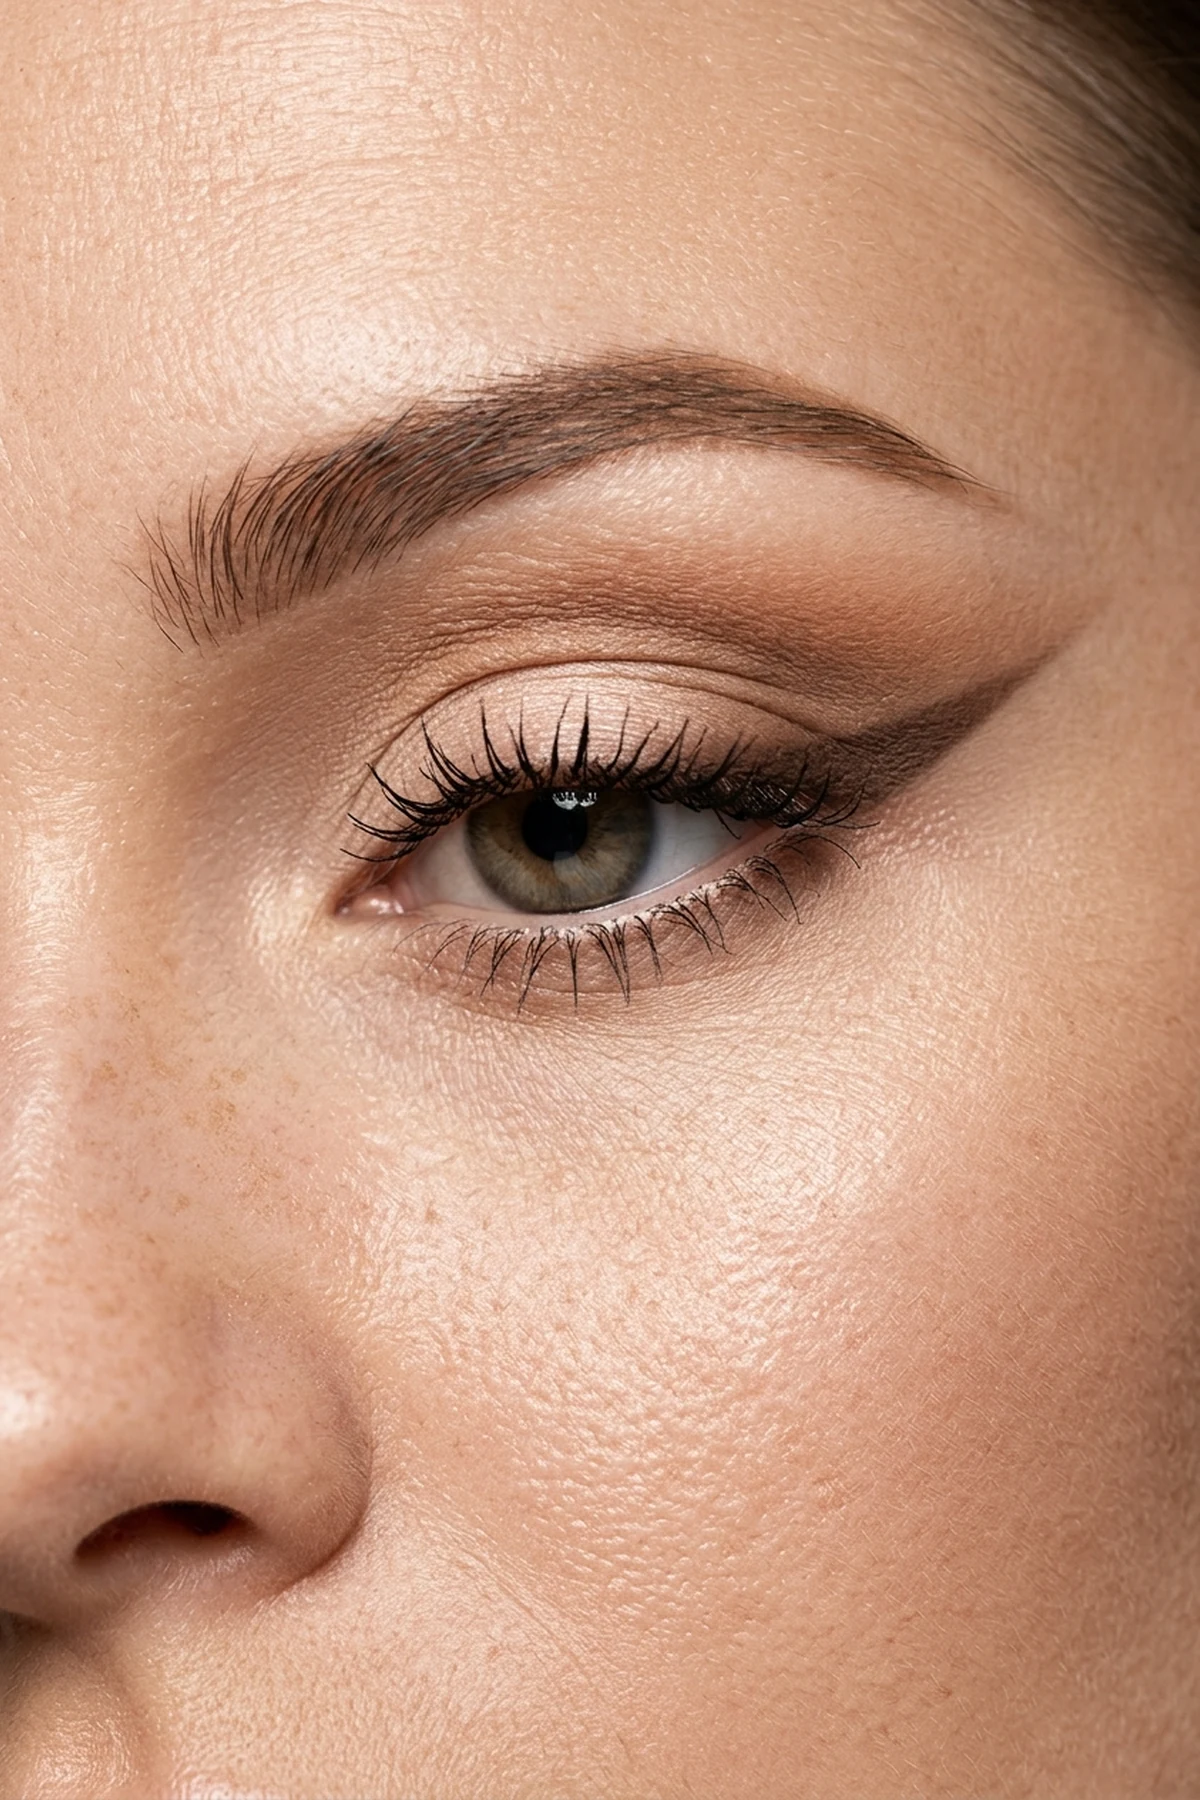
Complete the optical elevation by mapping a lifted cat-eye wing placement that starts its upward flick before reaching the drooping lateral fold. Curl the center and outer lashes aggressively and concentrate two coats of lengthening mascara on the upper outer third to reinforce the lifted diagonal trajectory.
5. Round Eye Makeup Tutorial: Horizontal Elongation & Outer-Third Lash Smudge
👁️ Best Eye Shape: Round & Prominent Eyes
🖌️ Key Brush Placement: Horizontal outer-third sweep + lower lash outer-half smudge
Prominent, circular eyes naturally command attention, and this hidden gem technique uses horizontal elongation mapping to stretch the silhouette into a sleek, feline almond shape. Instead of rounding your transition shade high into the center arch—which exaggerates vertical height—sweep medium-toned matte pigment horizontally past the outer orbital edge toward the temple.
Load an angled micro-detail pencil brush with deep umber or charcoal-brown shadow and press it tightly against the outer half of the upper and lower lash roots. Buff the pigment outward into a smoky, diffused lower lash smudge that connects seamlessly with the upper outer-third wing while leaving the inner half of the lower lid clean.
Avoid placing bright frost directly on the center dome of a prominent mobile lid, as high-shine metallics amplify roundness under direct lighting. Instead, sweep a velvety satin mid-tone across the entire lid and focus your lash curler on the outer corner hairs to visually lengthen your horizontal eye width.
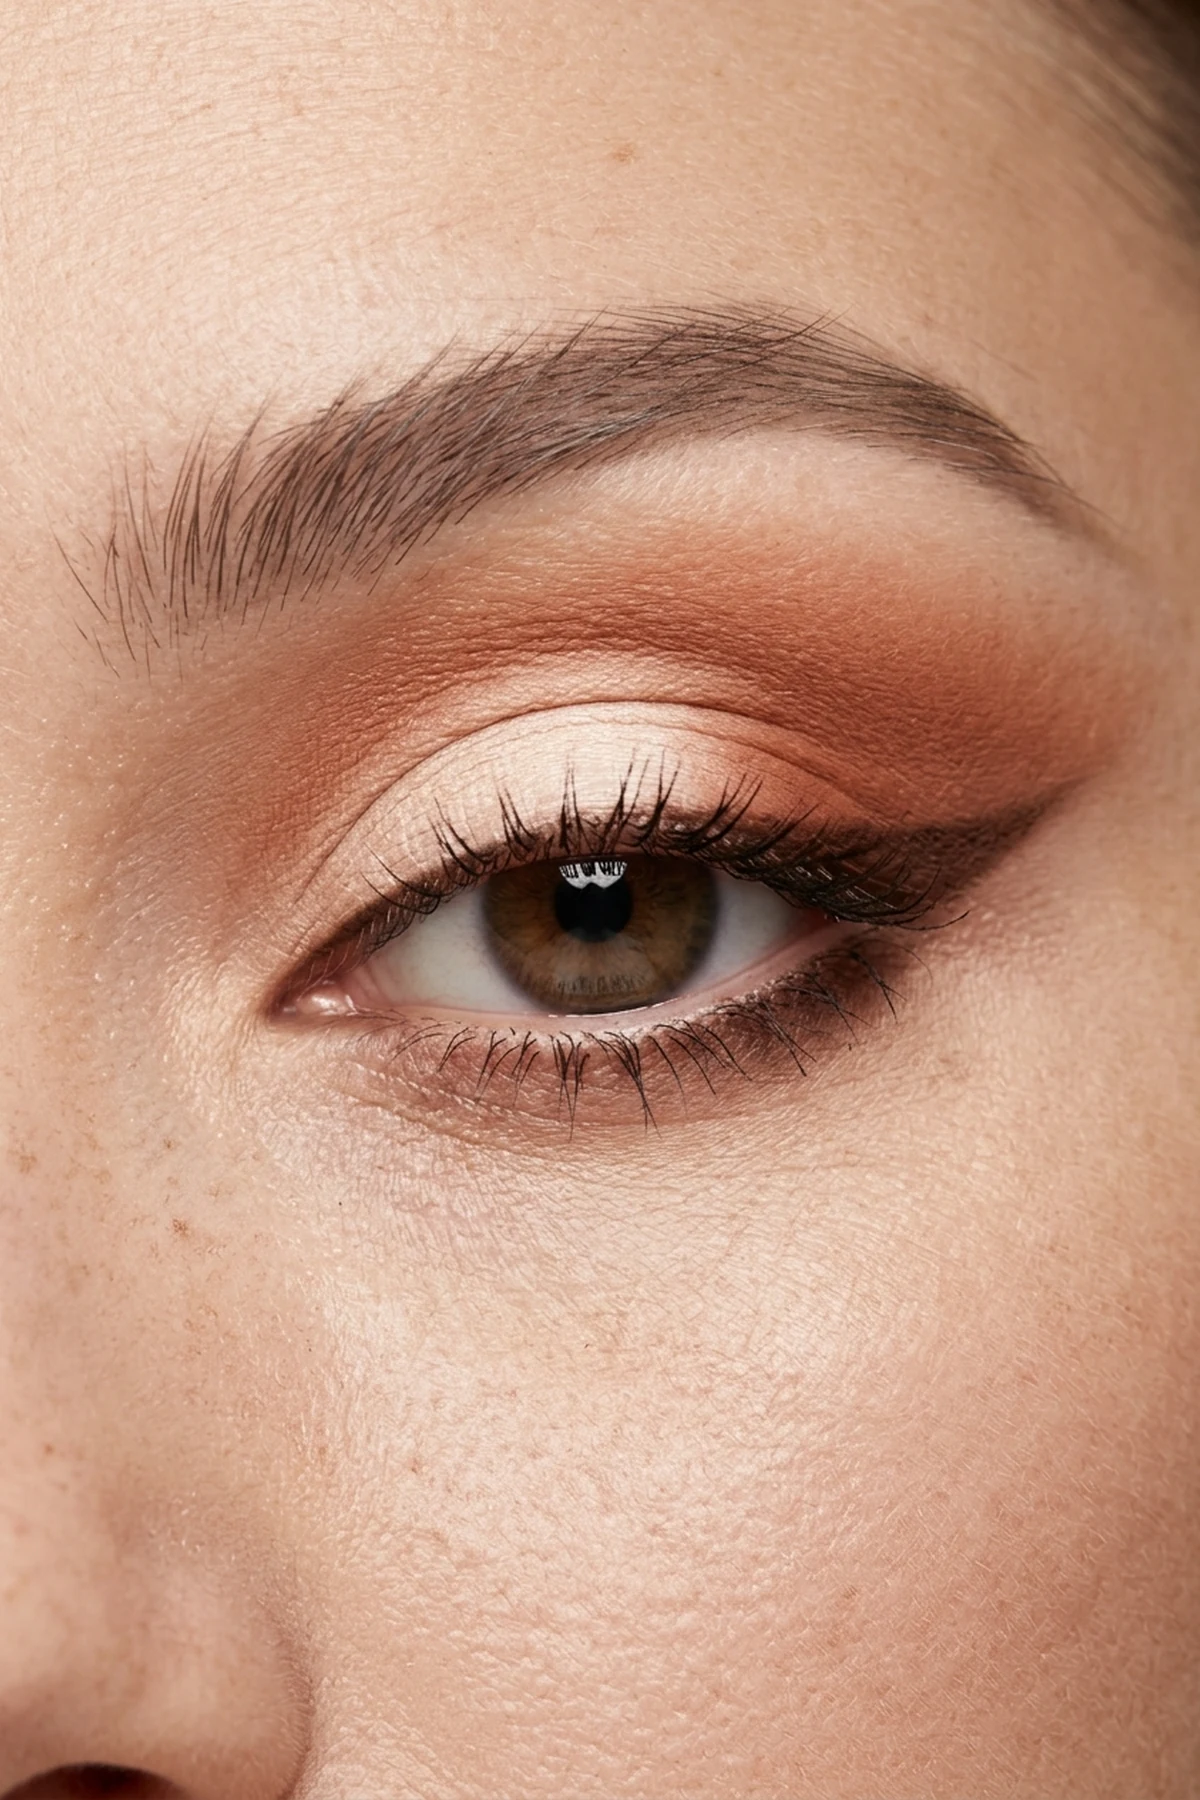
6. Deep-Set Eye Makeup Tutorial: Luminous Mobile Lid Packing & Forward Brow-Bone Balance
👁️ Best Eye Shape: Deep-Set & Prominent Brow-Bone Eyes
🖌️ Key Brush Placement: Flat shader press across inner two-thirds of mobile lid; skip dark socket
Because deep-set eyes naturally sit further back beneath a prominent brow bone, heavy dark crease colors only push the socket deeper into shadow. This expert pick reverses that natural recession through luminous mobile lid packing, using a dense flat shader brush to press light-reflecting pearl, peach, or warm champagne pigment across the inner two-thirds of the eyelid.
Instead of carving into the deepest hollow of the socket, whisper a soft beige-peach transition shade slightly higher along the upper orbital rim where the brow bone begins to curve forward. Keep dark contouring strictly confined to the outermost millimeter of the lash line so the natural shadow of your bone structure provides effortless depth without looking hollow.
Amplify the forward-bringing optical illusion by tapping a concentrated champagne inner corner highlight around the tear duct and sweeping it five millimeters along the inner lower lash line. This minimalist light placement balances a strong brow ridge and keeps deep-set eyes looking wide, rested, and luminous from morning to night.
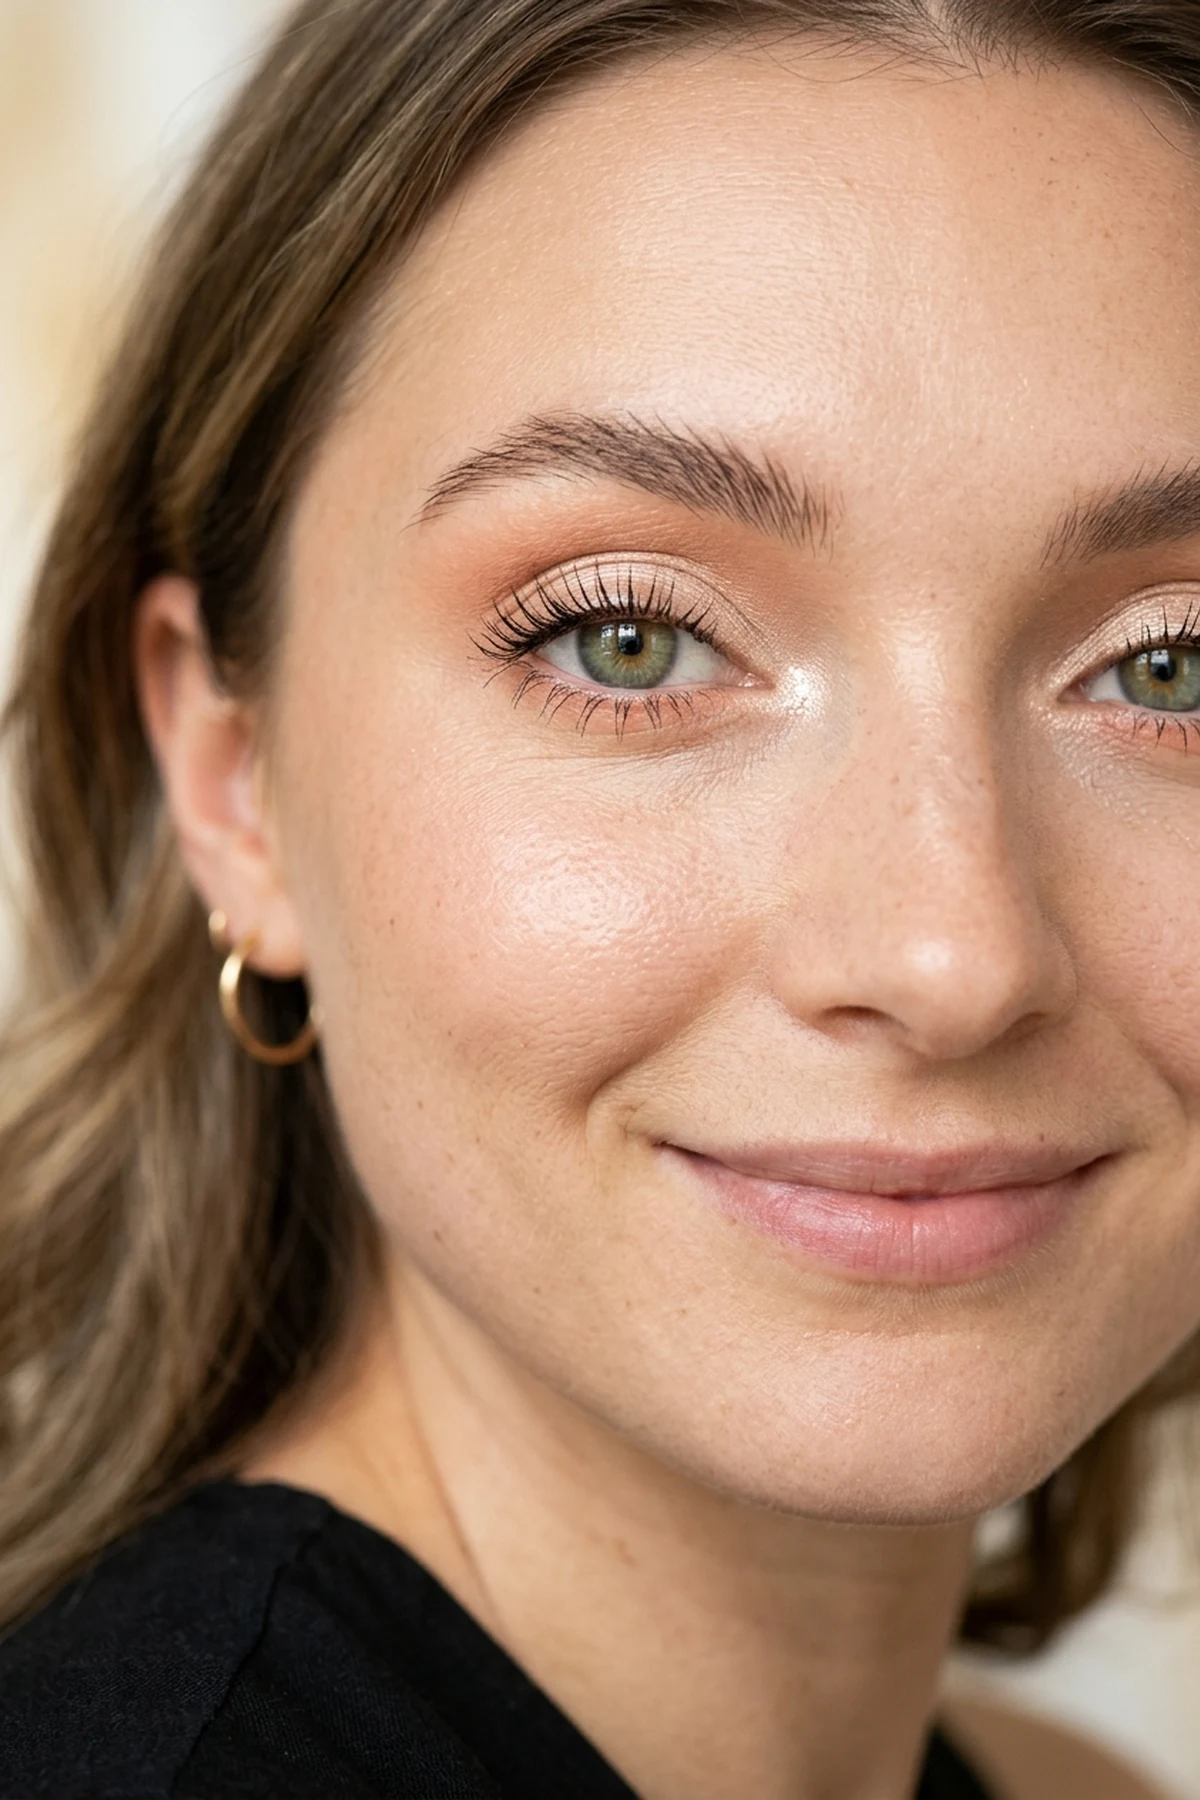
7. Monolid & Asian Eye Makeup Tutorial: Vertical Ombré Gradient & Root-to-Brow Blending
👁️ Best Eye Shape: Monolid & Epicanthic Fold Eyes
🖌️ Key Brush Placement: Dense lash-root pigment fading vertically in 3 tiers toward brow bone
Traditional socket-line diagrams fail on smooth monolids because there is no recessed fold to divide the eyelid into separate horizontal zones. This cultural trend alert celebrates smooth lid architecture with a vertical ombré gradient, layering three harmonious shades from a velvet pressed pigment palette in ascending tiers from the lash roots toward the brow.
Start by pressing your richest espresso or burgundy shade four millimeters high along the upper lash line so the dark base stays fully visible when your eyes are open. Next, overlap the top edge of that dark band with a warm terracotta or rosewood mid-tone using a controlled windshield-wiper blending motion that diffuses the boundary upward without muddying the gradient.
Crown the vertical transition by dusting a sheer apricot matte across the upper orbital zone and tapping a fine-milled crystal topper directly over the center pupil. When you blink, the seamless root-to-brow progression catches the light with multi-dimensional depth while keeping the lash line crisp and defined.
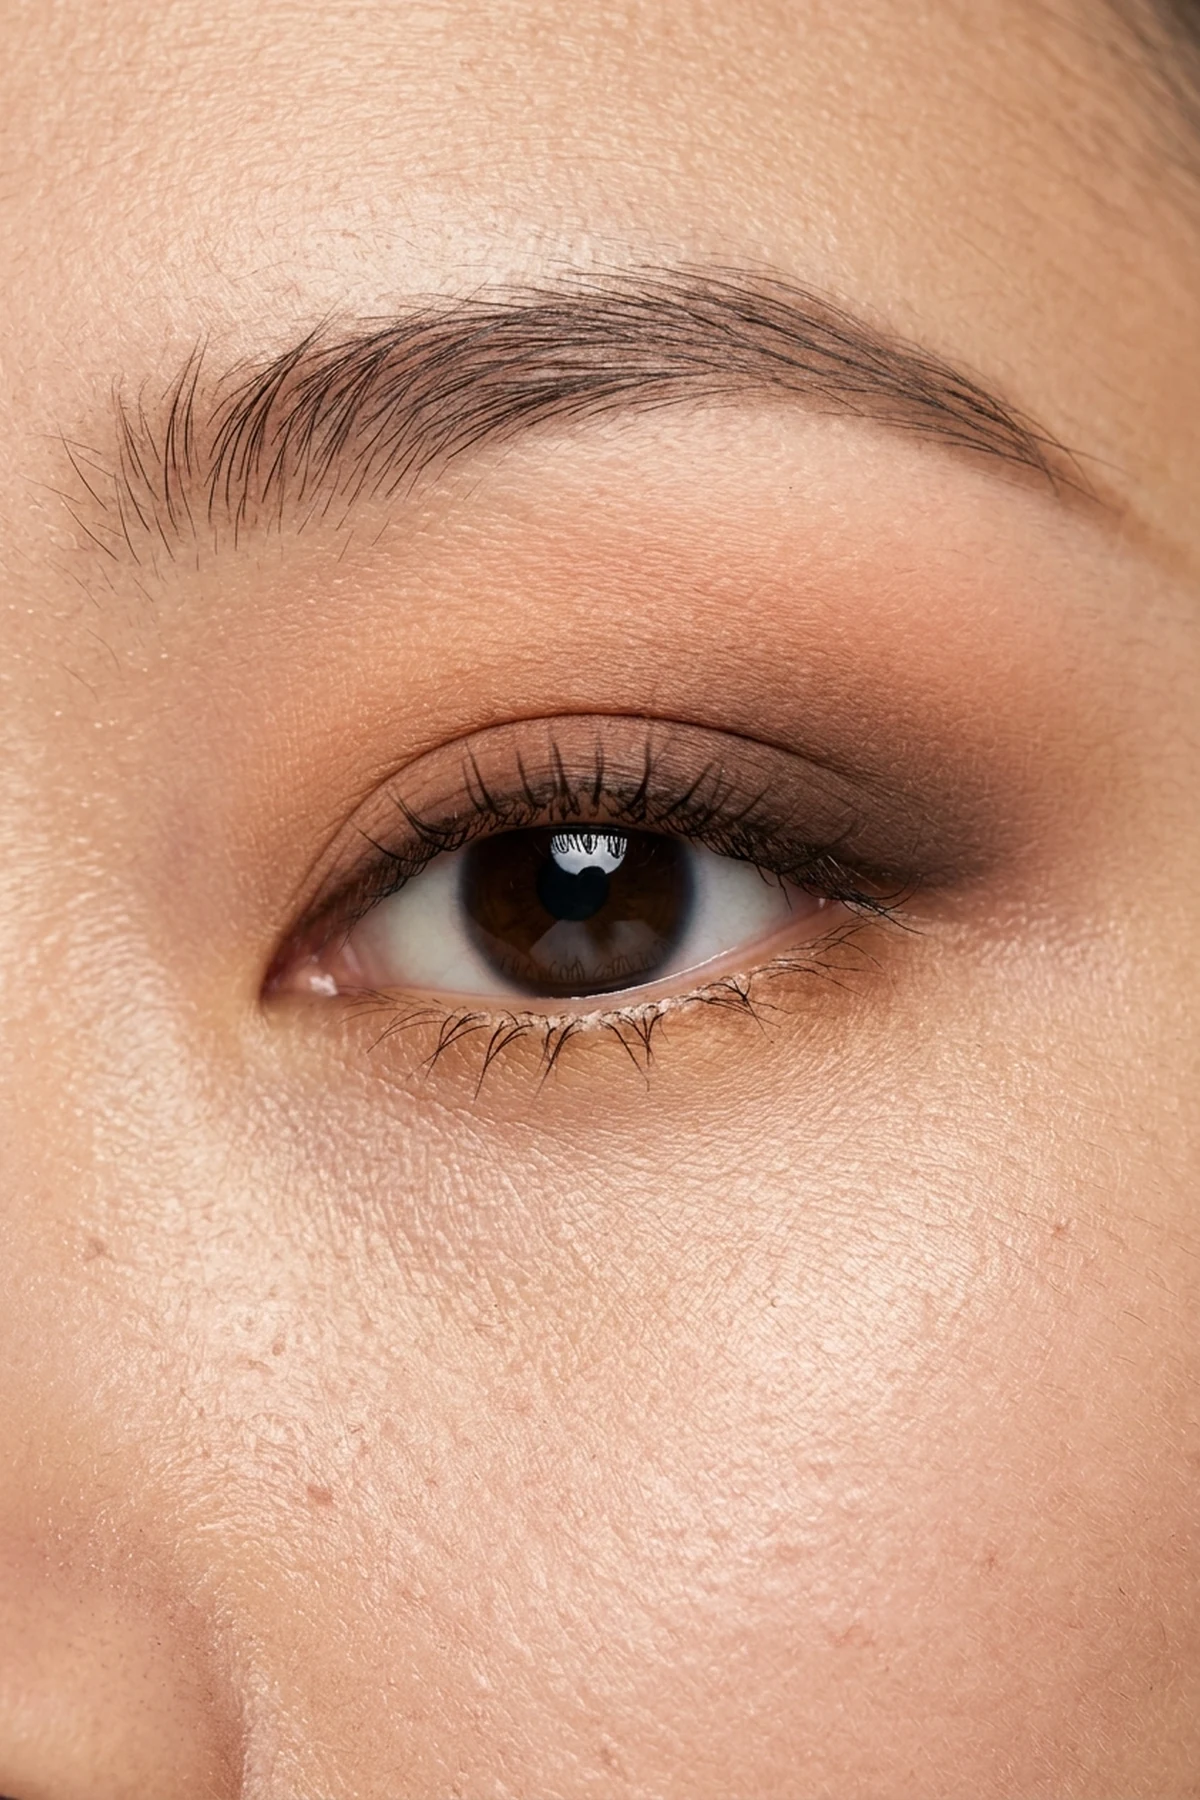
8. Mature Eye Makeup Tutorial for Women Over 50 & 60: Cream-to-Satin Lift Placement
👁️ Best Eye Shape: Mature, Textured & Crepey Eyelids (Over 40, 50 & 60)
🖌️ Key Brush Placement: Featherweight cream swipe on mobile lid + upward outer-corner buff
Delicate, textured eyelids over fifty and sixty often look dry or crepey when layered with chalky matte powders or chunky glitter particles. This time-saving routine upgrades your daily application with a cream-to-satin lift placement, gliding a hydrating, long-wear cream shadow stick in rose-taupe or soft bronze directly across the mobile lid.
Before the emollient formula self-sets into a crease-proof film, take a synthetic domed brush and feather the upper edge slightly above the natural fold, sweeping the outer corner upward toward the temple. Cream-to-satin textures move flexibly with delicate skin rather than settling into fine lines, making them the gold standard for flattering everyday eye looks on mature faces.
To restore lost lash density without harsh liquid lines, press a soft slate-brown pencil directly between the upper lash roots and leave the lower lid free of heavy dark pigment. A brightening peach corrector tucked into the inner under-eye hollow completes a fresh, lifted finish in under four minutes.

9. Soft Half-Cut Crease Eye Makeup Tutorial: Flat Shader Carving for Low-Fold Lids
👁️ Best Eye Shape: Low-Crease, Hooded & Tapered Almond Eyes
🖌️ Key Brush Placement: Look-up concealer stamp + inner two-thirds flat shader cut
When you want full-glam evening drama on low-fold or tapered lids, our expert pick is the soft half-cut crease, which carves out crisp lid real estate without theatrical stage lines. Begin by building a warm cinnamon and deep mocha gradient slightly above your natural socket, then place a tiny dot of full-coverage concealer at the center lash line and look straight up so the product stamps your true fold height.
Use a razor-thin synthetic dense flat shader brush to connect that stamped guide dot from the inner tear duct across the inner two-thirds of the mobile lid, creating a clean canvas that eliminates a muddy over-blended crease. Because leftover cream and dark shadow buildup on bristles will instantly streak your light concealer base, always clean and disinfect makeup brushes properly before carving sharp boundaries.
Set the carved inner two-thirds with a luminous champagne-gold satin and softly tap a mid-tone warm brown over the intersection where the light lid meets the outer third. Diffusing that vertical seam ensures your maximalist cut crease transitions smoothly into a smoky outer corner.
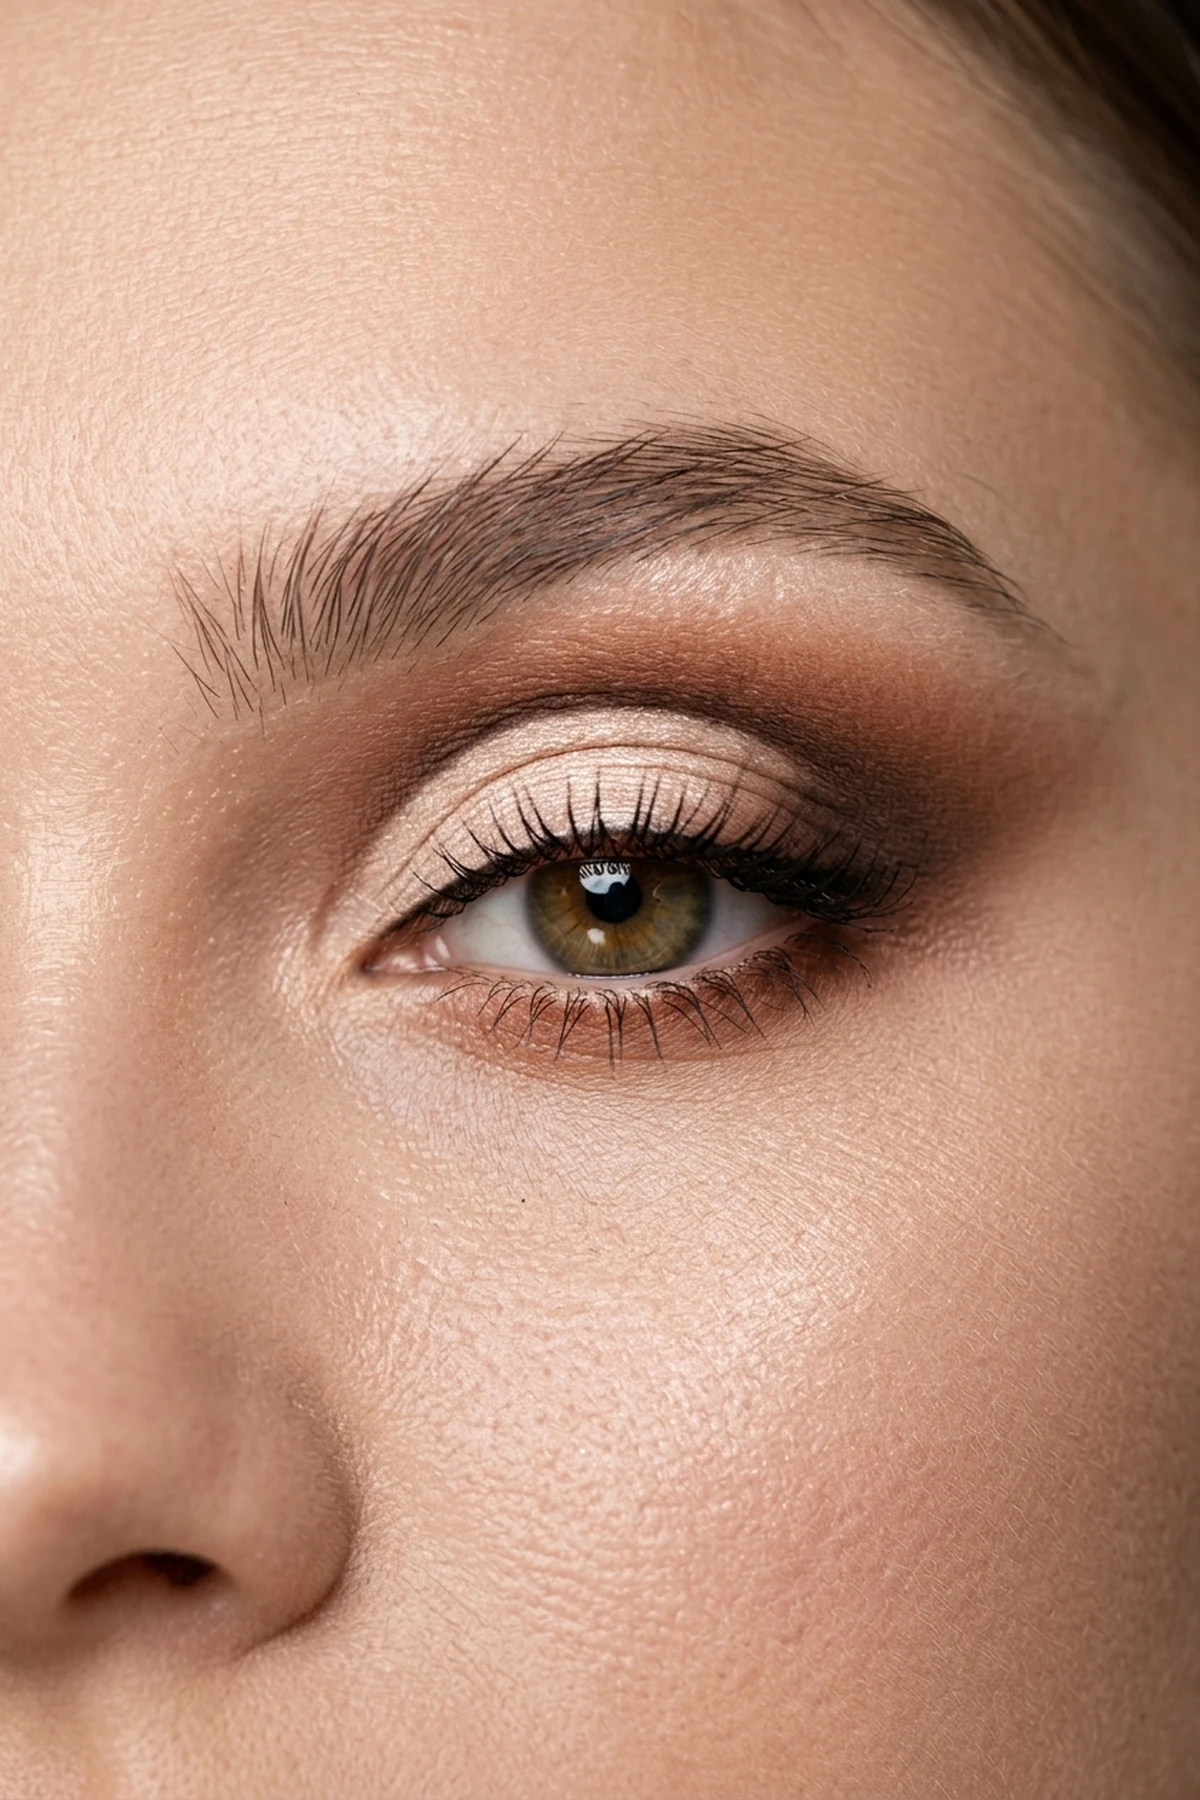
10. Cat Eye Makeup Tutorial: Bat-Wing & Shadow-Guided Flick Mapping for Folded Corners
👁️ Best Eye Shape: Hooded, Downturned & Almond Outer Folds
🖌️ Key Brush Placement: Map wing with angled shadow first, connect across open epicanthic/lateral fold
Drawing a single continuous liquid sweep across an outer eyelid fold almost always results in a curved, comma-shaped hook once your face relaxes. This budget-friendly DIY technique uses bat-wing shadow-guided mapping—sketching your flick first with dark brown eyeshadow and an angled brush while gazing straight ahead—to guarantee a razor-sharp lifted cat-eye wing placement.
With your eye completely open and relaxed, trace your liquid or gel liner over that shadow guide from the outer corner toward the brow tail, then draw a straight connecting bridge directly across the skin fold back to the mid-lid lash line. When you close your eye, the liner forms a small geometric step resembling a bat wing, which locks into a straight, unbroken triangle whenever your eyes are open.
Fill in the small step inside the crease fold, let the pigment dry for fifteen seconds with your eyes gently closed, and finish with two coats of smudge-proof tubing mascara. Because tubing polymers wrap each lash in water-resistant sleeves rather than dissolving into surface oils, your sharp wing stays pristine all night.
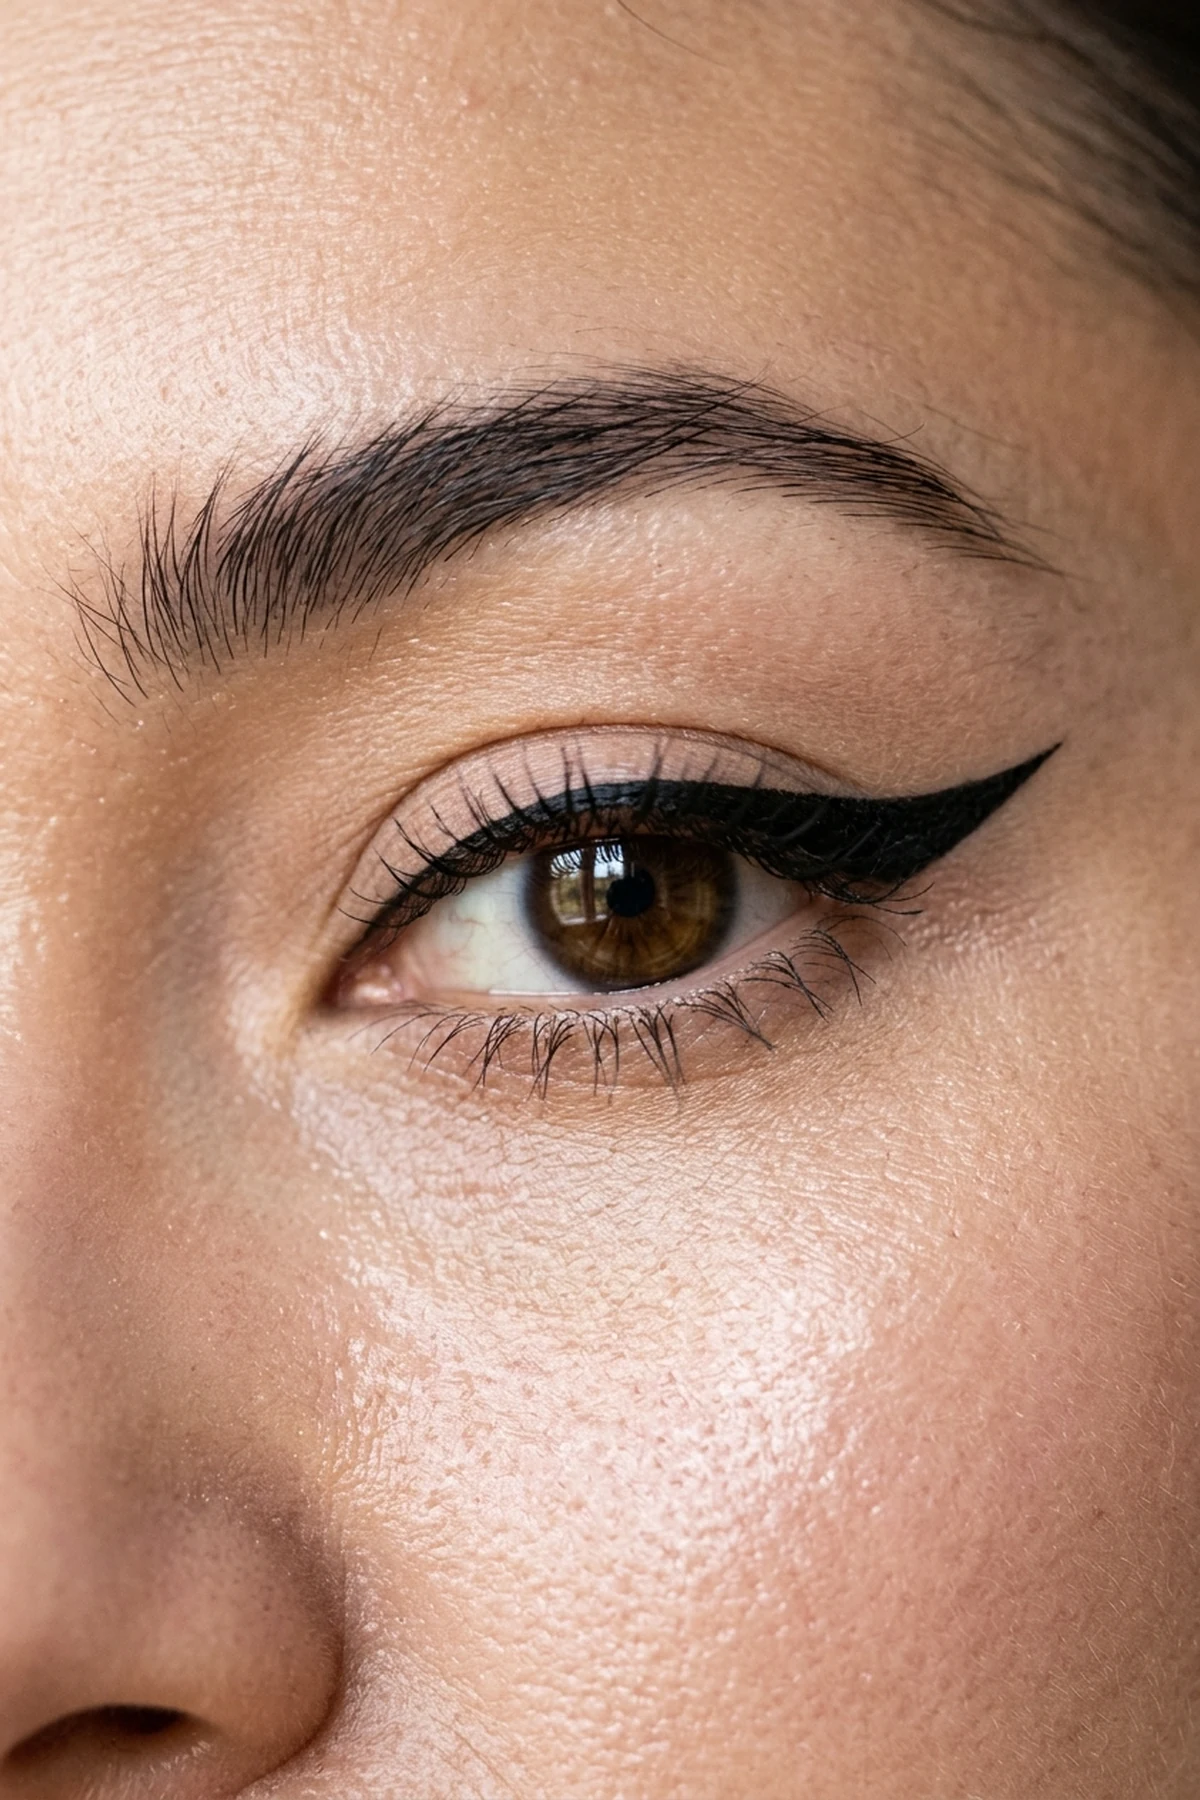
11. Halo Spotlight Eye Makeup Tutorial: Dual-Corner Shading for Close-Set Eyes
👁️ Best Eye Shape: Close-Set, Narrow & Almond Eyes
🖌️ Key Brush Placement: Inner-third + outer-third matte anchors with vertical center-iris shimmer tap
Unlike traditional outward-swept gradients, this hidden gem halo spotlight eye makeup tutorial builds three-dimensional fullness by sandwiching a glowing vertical column of light between two dark matte corners. Using a richly pigmented velvet pressed pigment palette, press a warm cocoa or deep plum matte onto both the inner third and outer third of the mobile lid, leaving the center strip directly above your iris untouched.
Connect the inner and outer dark anchors softly through the orbital crease with a clean blending brush so the dark frame surrounds the center lid like a soft halo. Before tapping metallic rose-gold or champagne shimmer onto that bare center column, always complete your eye look prior to foundation or sweep away stray particles with a fan brush to eliminate under-eye shadow fallout.
Mirror the exact three-zone pattern along the lower lash line by placing dark matte shadow on the inner and outer thirds and dotting shimmer right beneath the pupil. This maximalist spotlight effect draws attention to the center of the iris and brings captivating roundness to narrow or almond eyes.
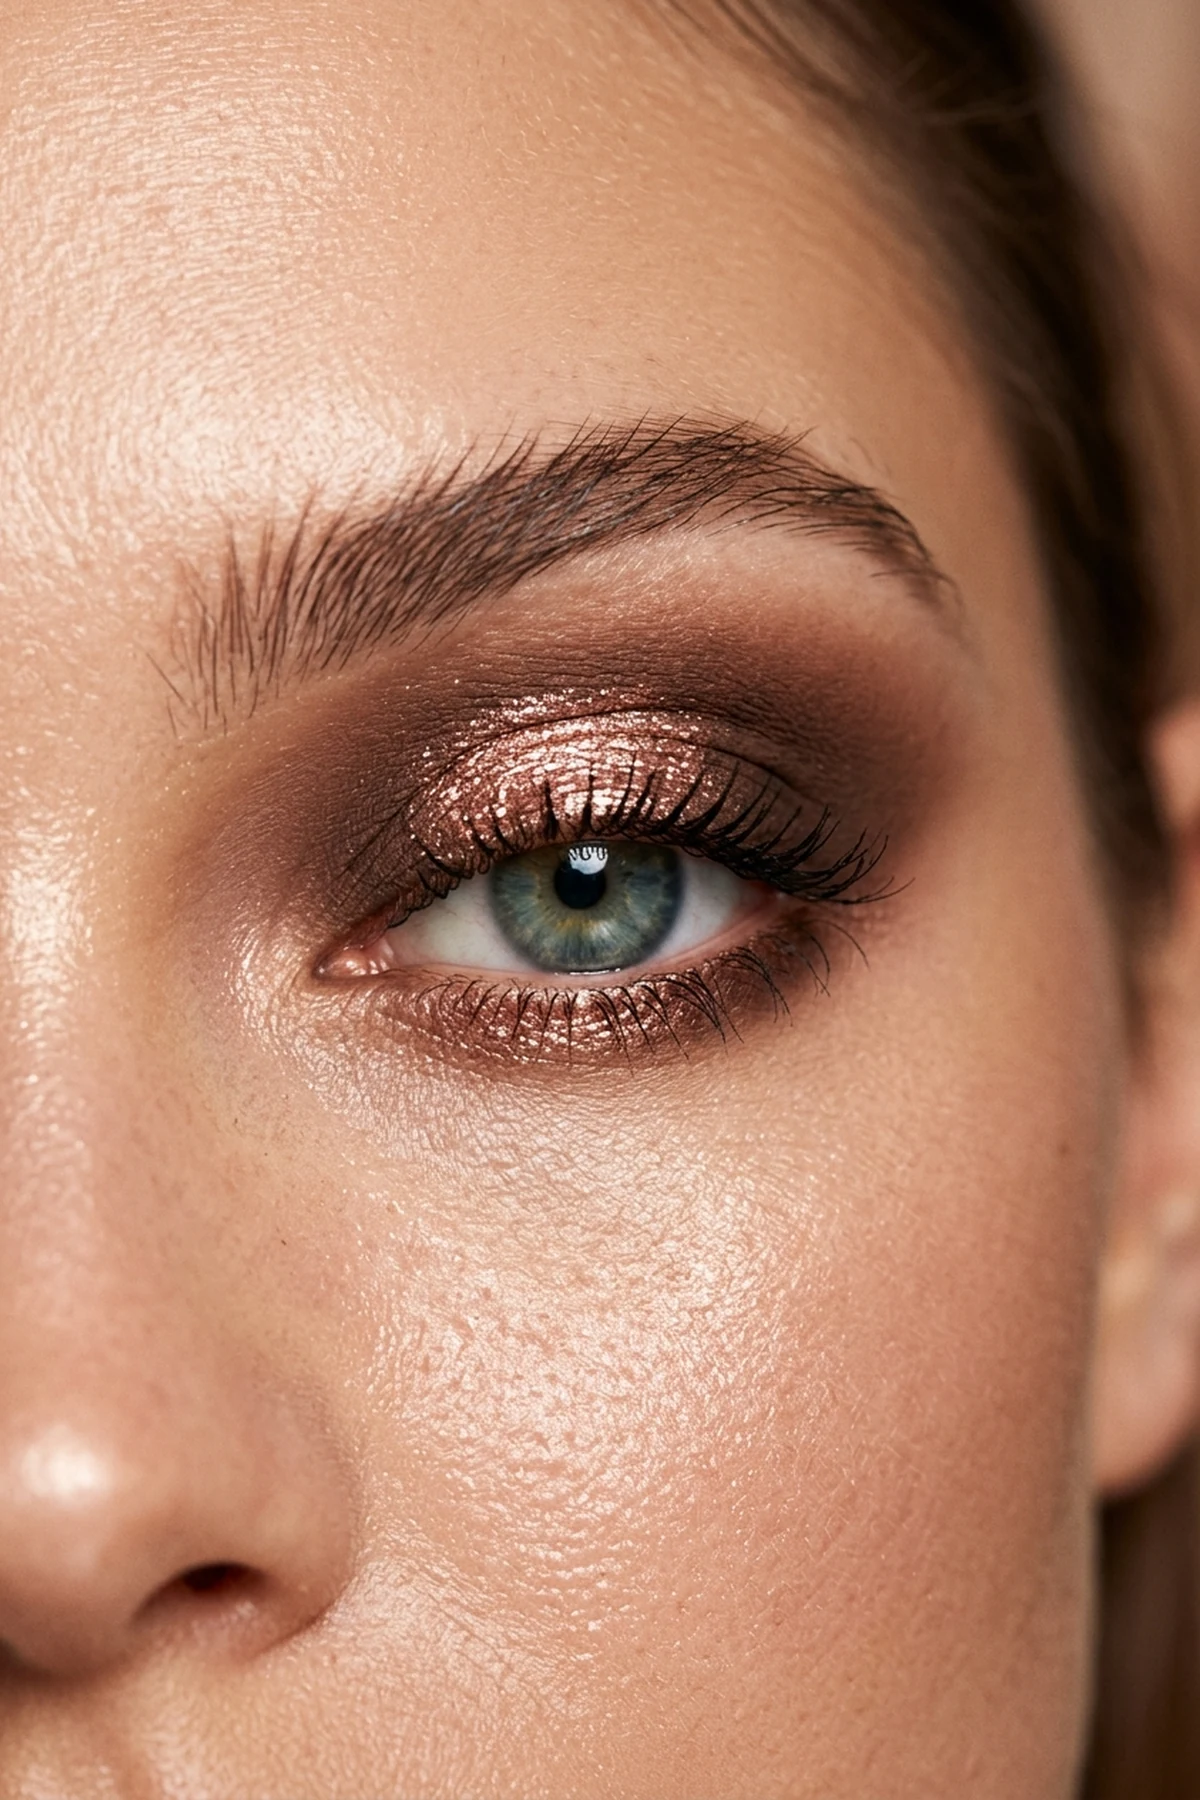
12. Wide-Set Eye Makeup Tutorial: Inner-Third Bridge Contour & Tear-Duct Framing
👁️ Best Eye Shape: Wide-Set Eyes (Distance > 1 Eye Width Apart)
🖌️ Key Brush Placement: Sweep transition shade from inner brow head down toward inner tear duct
When the space between your inner tear ducts exceeds the width of one eye, standard outward-winged tutorials accidentally exaggerate the distance and throw off facial harmony. Our pro artist pick corrects this balance through inner-third bridge contouring, reversing your usual brush direction so pigment travels from the inner socket outward rather than pulling toward the temples.
Pick up a cool-toned taupe matte neutral transition shade on a tapered fluffy blending brush and nestle the bristles right into the pocket where your inner brow head meets the upper bridge of your nose. Feather that shadow downward toward the inner tear duct and across the inner half of the crease, creating subtle architectural depth that visually draws wide-set eyes closer together.
Skip frosty white inner-corner highlights—which push wide-set eyes even further apart—and instead bring your eyeliner all the way to the inner tear duct channel. Keep the outer corner clean and softly diffused so the visual weight remains anchored toward the center of your face.
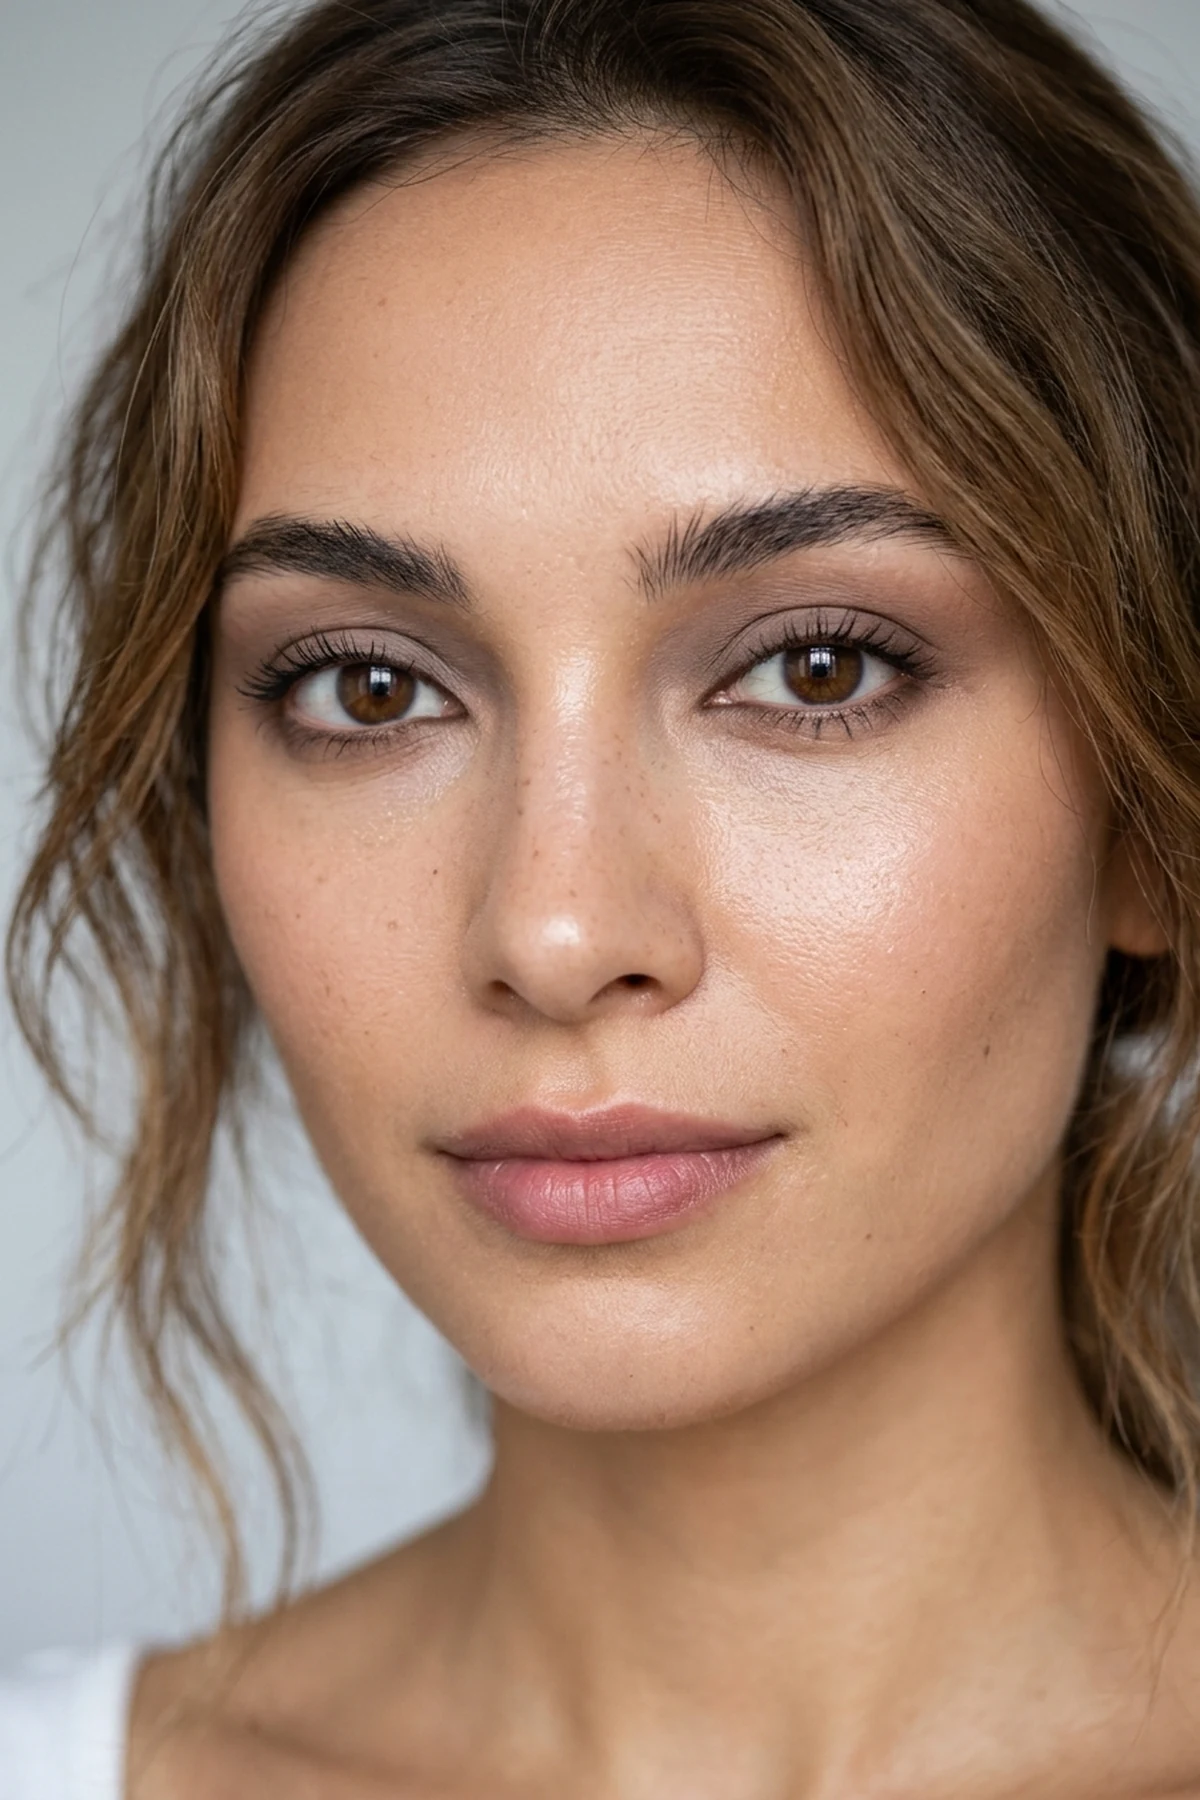
13. Douyin Rose-Pink Eye Makeup Tutorial: Aegyo-Sal Lower Lash Contour & Shimmer Mapping
👁️ Best Eye Shape: Monolid, Almond & Short Mid-Face Proportions
🖌️ Key Brush Placement: Parallel lower-lash S-curve shadow 3mm below waterline + micro-glitter center tap
Inspired by East Asian editorial beauty, this trending Douyin rose-pink eye makeup tutorial enlarges the vertical dimension of the eye while visually shortening the mid-face through strategic lower-lid contouring. Sweep a sheer dusty-rose matte across the entire upper and lower orbital zone first, creating a soft blush halo that frames the eye in monochromatic warmth.
Squint slightly in the mirror to locate your natural under-eye puff (the aegyo-sal band), then trace a whisper-thin cool taupe shadow line three millimeters below the lower lashes using an angled micro-detail pencil brush. Fill the narrow three-millimeter ridge between your lower lashes and that shadow line with a luminous matte cream pencil, and pop a crystal champagne inner corner highlight onto the tear duct and center upper lid.
Finish the glass-sparkle aesthetic by drawing a delicate, downward-sloping puppy wing that follows your natural upper lash curve, or compare everyday liquid wing and smudged pencil eyeliner styles to customize your outer edge. Pair with spaced, spiky lash clusters to complete the doll-like focal point.
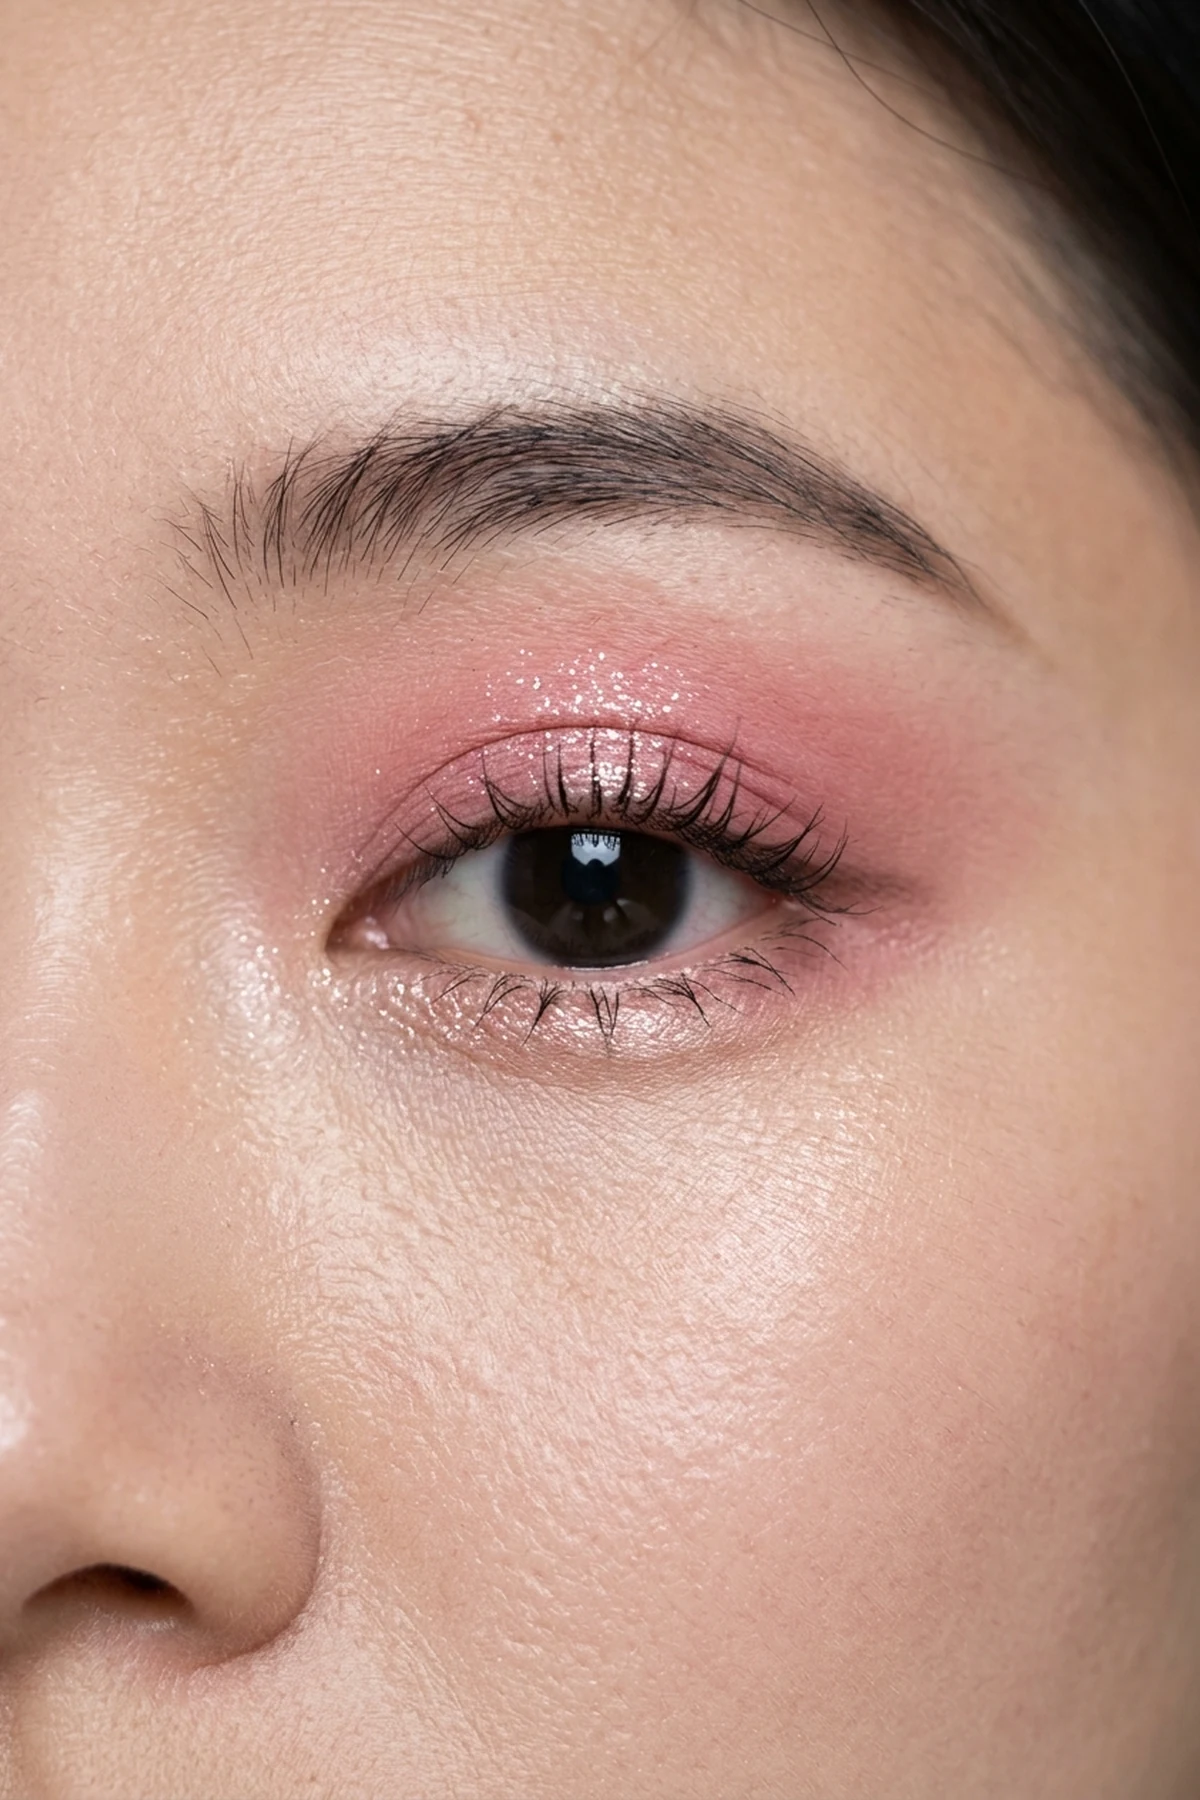
14. Kohl-Rimmed Bedroom Smokey Eye Makeup Tutorial: Waterline Tightline & Pencil Smudge
👁️ Best Eye Shape: Almond, Large & Prominent Eyes
🖌️ Key Brush Placement: Upper/lower lash-root kohl press diffused 2mm upward before formula sets
When you need sultry evening impact in under three minutes without juggling five different eyeshadow pans, this time-saving kohl-rimmed bedroom smokey eye delivers effortless French-girl grit. Trace a richly pigmented creamy waterproof kohl pencil in espresso or roasted black along both the upper and lower waterlines, pressing the tip directly between the lash roots so no bare skin peeks through.
Work on one eye at a time before the volatile waxes lock in place: run a short smudger brush back and forth along the upper lash line, dragging the softened kohl two millimeters upward onto the mobile lid. Immediately buff the lower lash line into a smoky, diffused lower lash smudge and set the blurred perimeter with a pinch of warm bronze or saddle-brown powder shadow.
This seasonal evening staple thrives on lived-in softness rather than surgical perfection, making it ideal for beginners who struggle with liquid liner symmetry. Finish by pressing a drop of clear lip balm or satin bronze cream onto the center lid for an editorial, candlelit sheen.
15. Color-Wheel Eye Makeup Tutorial for Brown, Green & Blue Eyes: Contrast Accent Placement
👁️ Best Eye Shape: All Eye Shapes (Mapped by Iris Color: Brown, Green, Hazel & Blue)
🖌️ Key Brush Placement: Neutral socket frame + complementary color pop stamped directly above pupil
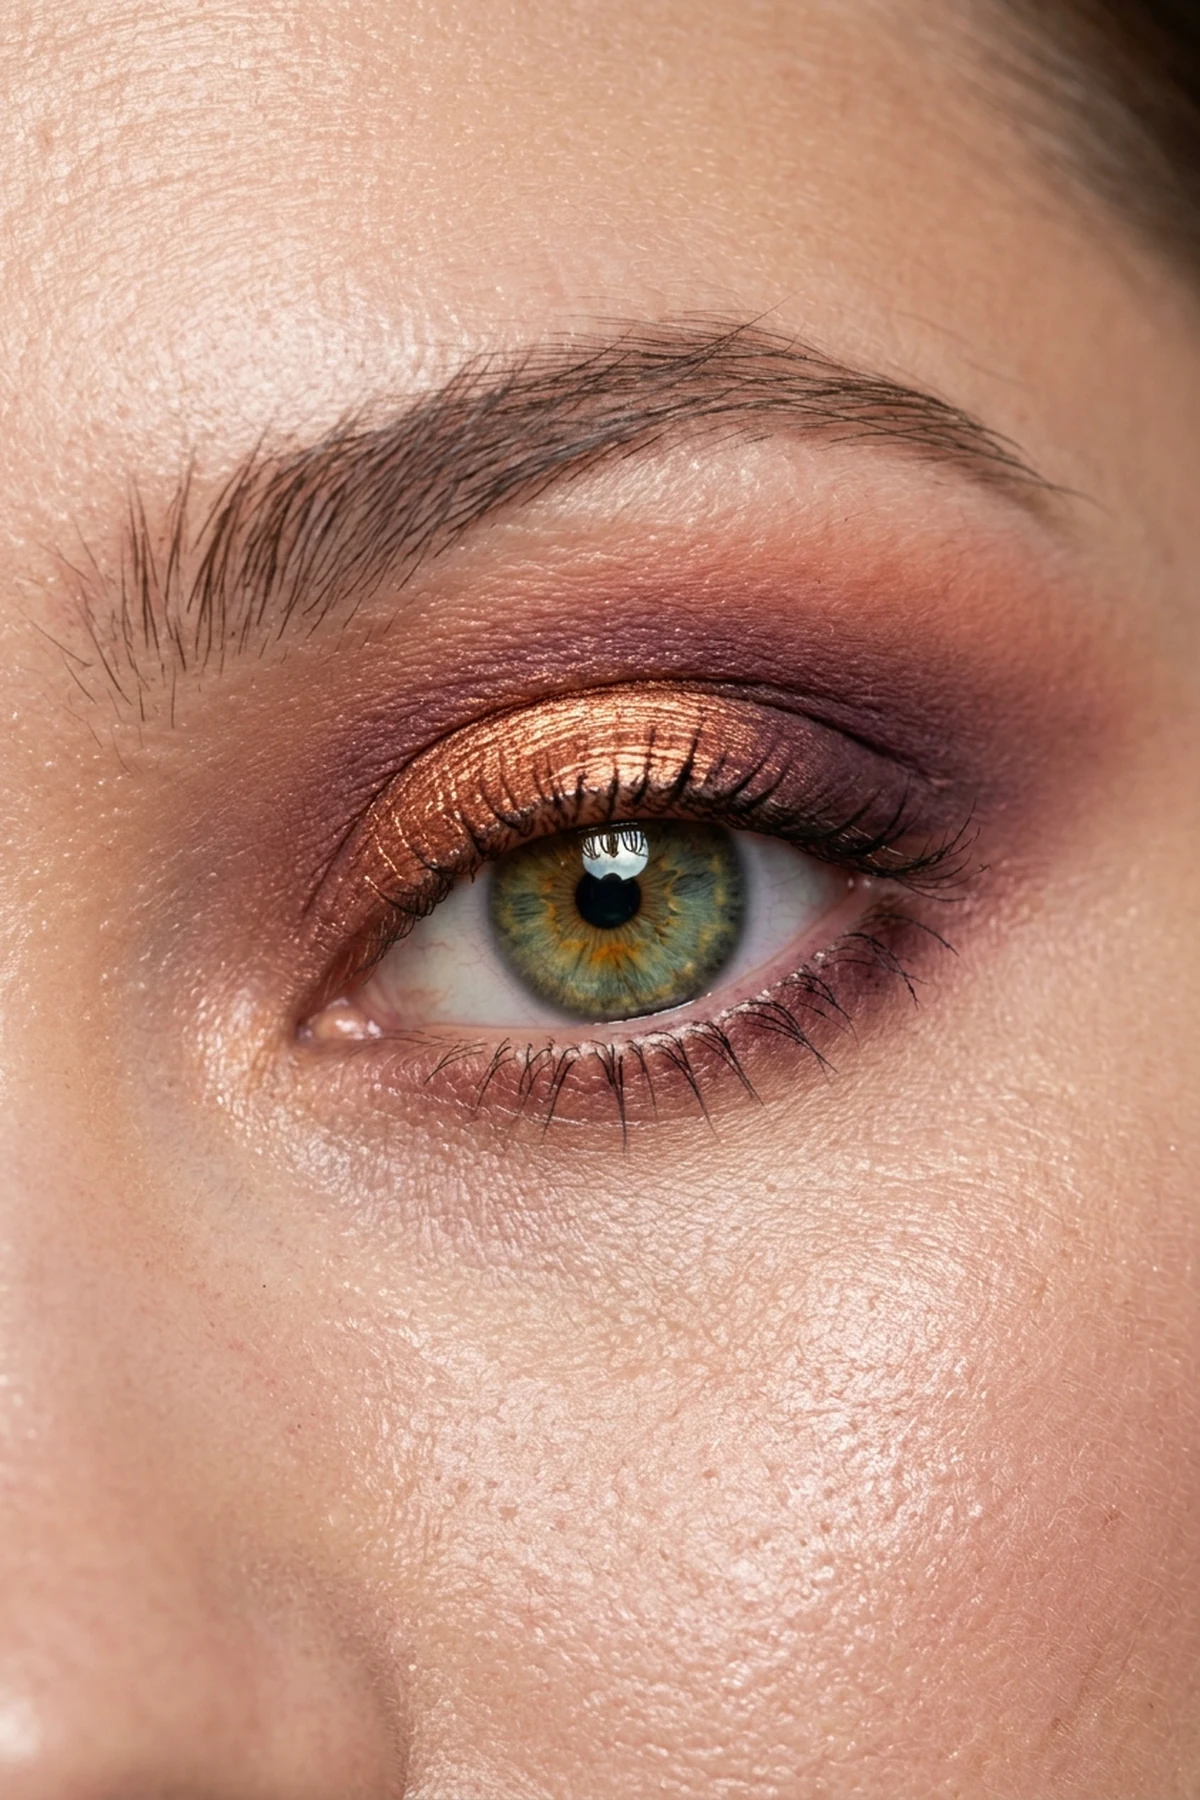
Making your natural iris color pop does not require covering your entire eyelid in bright neon pigment. This beginner-friendly DIY method uses color-wheel contrast placement: first prep the lid with a tinted eyeshadow primer base, then build a wearable neutral taupe or warm brown socket frame using a relaxed windshield-wiper blending motion.
Once your neutral bone structure is sculpted, select the complementary shade sitting directly opposite your eye color on the artist’s color wheel—burnt copper and warm terracotta for blue eyes, burgundy-plum and cranberry for green or hazel eyes, and rich cobalt, olive, or amber-gold for brown eyes. Stamp that concentrated accent shade strictly onto the center mobile lid right above the pupil and along the center lower lash line.
Surrounding a vibrant contrast pop with neutral matte brown keeps the look sophisticated while creating instantaneous optical contrast right next to your iris. Blend the edges where the color accent meets the neutral socket so the chromatic flash looks seamlessly integrated whenever you blink.
Frequently Asked Questions
What is the correct order of steps in a beginner eye makeup tutorial?
Always start with a thin layer of eyeshadow primer across the bare eyelid and wait thirty seconds for the film to set. Next, sweep a medium matte transition shade into the orbital crease, press your shimmer or satin accent shade onto the mobile lid with a flat shader brush, and anchor your darkest matte pigment along the outer-third lash roots before finishing with eyeliner and mascara. If you want extra curl without daily mascara smudging, you can also explore open eye lash extensions for hooded and almond eyes to keep the center pupil lifted around the clock.
How does brush placement differ between hooded eyes and deep-set eyes?
Hooded eyes feature an overhanging skin fold that hides the natural socket when looking straight ahead, so you must map a matte faux crease two millimeters above that fold to create visible lift. Deep-set eyes sit further back beneath a prominent brow bone and already have a strong natural crease shadow, meaning you should skip dark socket contouring and pack luminous satin shades onto the inner two-thirds of the mobile lid to bring the eyes forward.
Where should I stop outer-V eyeshadow so downturned eyes do not look droopy?
Stop all dark crease and outer-V pigment three millimeters inside the outer tear corner rather than dragging shadow all the way to the outermost lash edge. Angle your blending brush along a 45-degree trajectory running from the lower lash line toward the tail of your eyebrow, and brighten the tiny gap below the wing with a dot of satin concealer.
How do I stop eyeshadow and eyeliner from transferring onto my upper eyelid fold?
Skip heavy under-eye creams or facial oils on the upper mobile lid before applying makeup, as emollients break down powder binders within two hours. Prep the lid from lashes to brow with an oil-controlling eyeshadow primer, lightly dust the crease hinge with translucent setting powder before blending your transition shade, and swap traditional wax mascaras for a water-resistant tubing mascara formula.
Which three eyeshadow brushes do I actually need for step-by-step blending?
You only need three core tools to execute any anatomy-mapped eye look: a medium tapered fluffy blending brush for diffusing transition shades into the socket, a dense flat shader brush for packing cream or shimmer onto the mobile lid without fallout, and an angled micro-detail pencil brush for smudging the outer lash roots and lower waterline.
When should I use an inner corner tear-duct highlight versus a center-lid halo spotlight?
Apply a champagne inner corner highlight around the tear duct when you have close-set, deep-set, or almond eyes and want to visually widen the distance between your eyes while brightening dark inner hollows. Switch to a center-lid halo spotlight—sandwiching shimmer between matte inner and outer corners—when you have wide-set or narrow eyes and want to create three-dimensional vertical roundness without pushing the eyes further apart.
Get our latest guides, news, and insights highlighted in your Google Search & AI Overviews.