Contents of Article
- TL;DR: The Tame Impala Nails Trend
- 1. Psychedelic Swirls: The Classic Tame Impala Look
- 2. How to Achieve the Warped Melting Grid Pattern
- 3. Kaleidoscope Gradients for Short Nails
- 4. Abstract Linework Inspired by the Currents Album
- 5. 70s Retro Waves: A Nostalgic Touch
- 6. Ethereal Aura Glow: Minimalist Trippy
- 7. Reverse Stamping for Groovy Floral Swirls
- 8. Chrome Isolation: Melting Effects Catching the Light
- 9. Marbled Blue and Purple Polish Techniques
- 10. Thin Sound Wave Lines on a Black Base
- 11. Optical Illusion Checkerboard with Neon Pops
- 12. Tie-Dye Blooming Gel for Natural Nails
- 13. Cosmic Galaxy Nails: Dark Blue and Glowing Aura
- 14. Mismatched Indie Concert Nail Art
- 15. Pastel Psychedelic Swirls for a Dreamy Vibe
- 16. Dark Academia Marbling with Metallic Accents
- 17. Y2K Neon Slime Melting Effect on Coffin Nails
- 18. Simple Bright Orange Aura on Almond Shapes
- 19. 3D Textured Clear Gel Swirls over Matte Base
- 20. Iridescent Chrome over Wavy Designs
- 21. Neon Yellow and Purple High Gloss Waves
- 22. 1970s Vintage Wallpaper Mustard and Brown Swirls
- 23. Lava Lamp Jelly Nails with Floating Neon Blobs
- 24. Dripping Rainbow Chrome for Edge
- 25. Wavy Pastel Lines on a Clear Minimalist Base
- 26. Holographic Glitter with Warped Checkerboard
- 27. Sponge Blended Deep Space Nebula Nails
- 28. Retro Vinyl Record Concentric Circles in Red
- 29. Glowing Neon Airbrush Effect on Matte Black
- 30. Watercolor Bleeding Edges in Soft Blues and Pinks
- Frequently Asked Questions (FAQ)
TL;DR: The Tame Impala Nails Trend
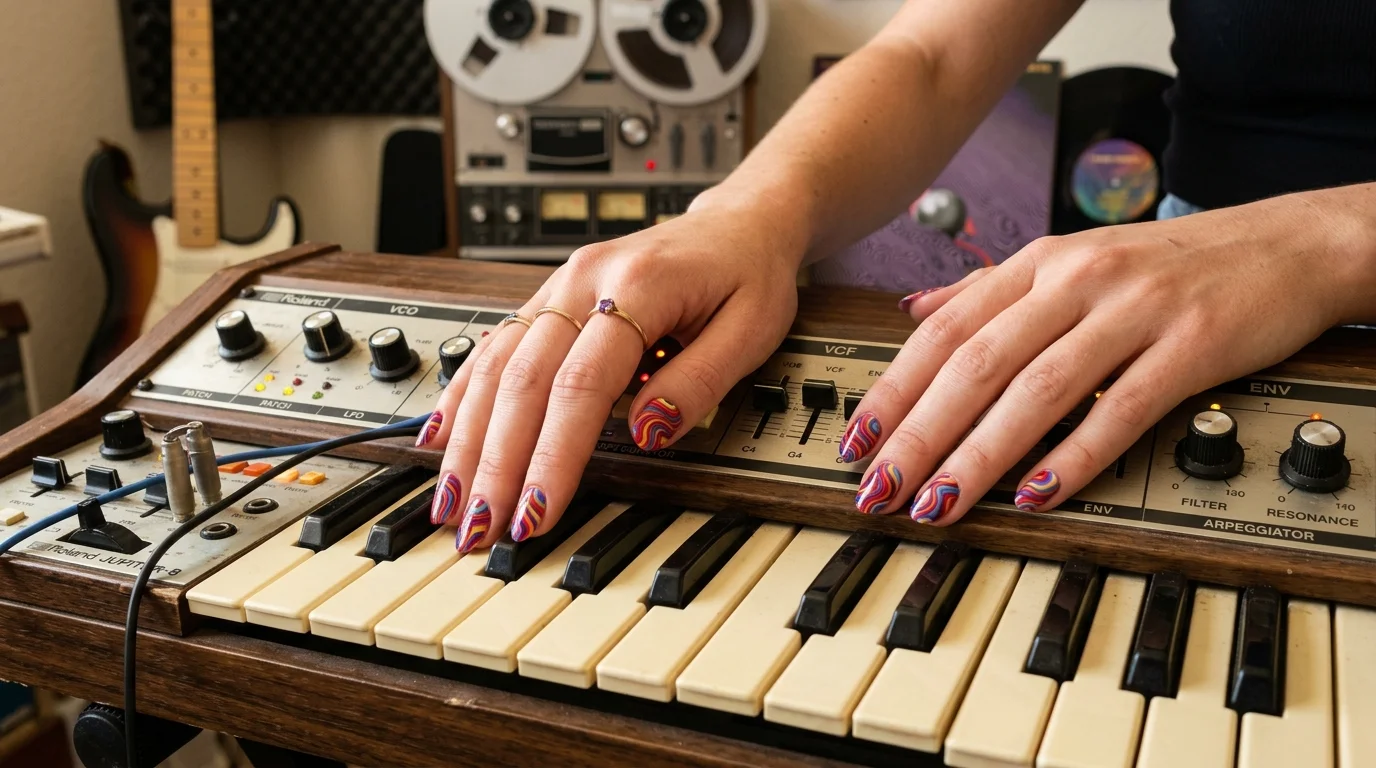
The Tame Impala nails trend is taking Pinterest by storm, offering a vibrant, psychedelic aesthetic inspired by the iconic album art and hypnotic sounds of the indie rock band. Whether you prefer neon melting grids or soft, ethereal aura glows, these nail art designs allow you to carry a piece of musical nostalgia right at your fingertips. Below is a quick ranking of our top picks based on difficulty and vibe.
Top 5 Tame Impala Nail Styles
| Rank | Nail Design | Difficulty Level | Vibe | Best For |
|---|---|---|---|---|
| 1 | Psychedelic Swirls | Intermediate | Classic Trippy | Concerts & Festivals |
| 2 | Warped Melting Grid | Beginner | Retro Edgy | Everyday Statement |
| 3 | Cosmic Galaxy | Intermediate | Deep Space | Night Out |
| 4 | Chrome Isolation | Advanced | High Impact | Raves |
| 5 | Ethereal Aura Glow | Intermediate | Soft & Dreamy | Minimalists |
1. Psychedelic Swirls: The Classic Tame Impala Look
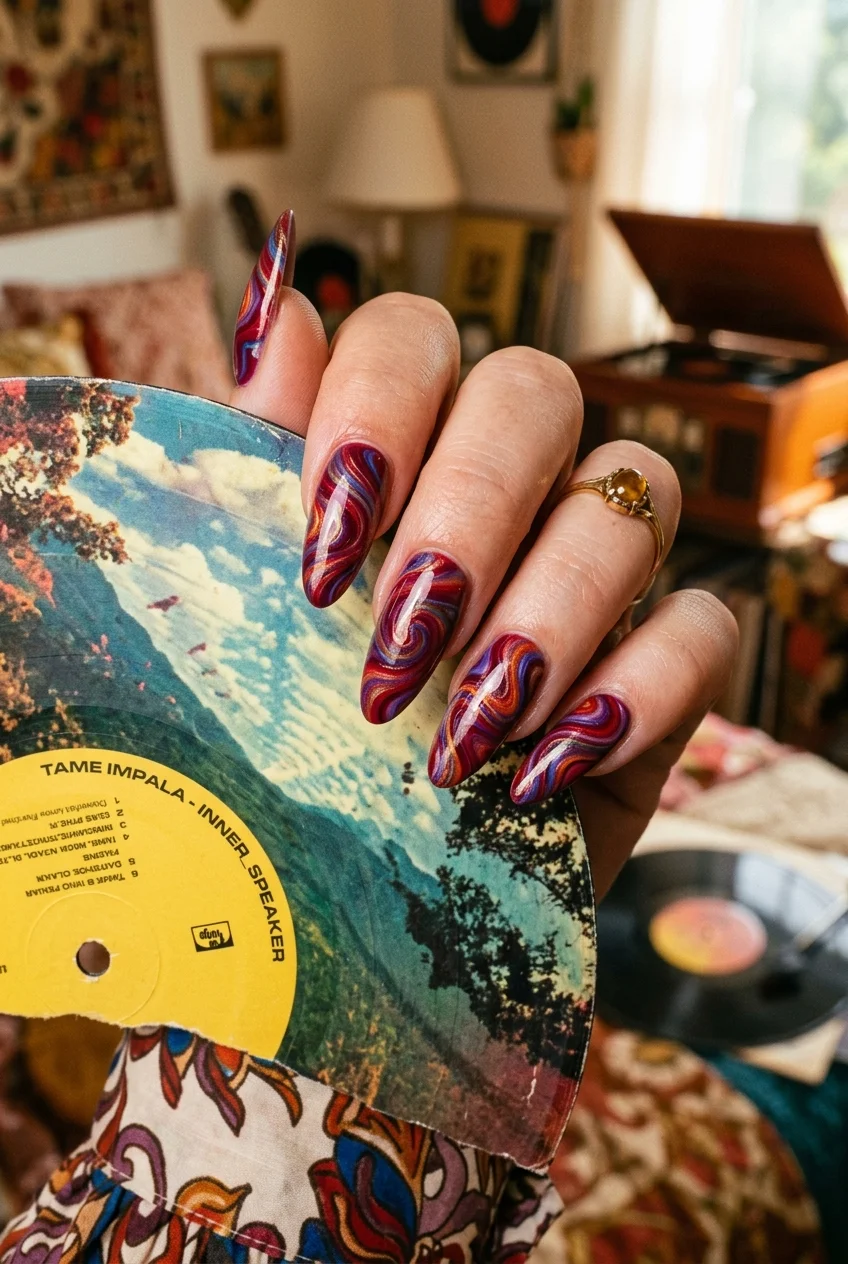
⏱️ Difficulty: Intermediate | 🎯 Best For: Classic Trippy | ✨ Compliments: High
If you’re looking to capture the iconic Tame Impala aesthetic, you can’t go wrong with classic psychedelic swirls. Using a high-quality polish like OPI ensures that your swirling colors stay vibrant without bleeding together.
An expert technique is to work with thin, deliberate strokes to prevent the colors from looking muddy. Make sure you use a glossy top coat to seal in the flowing patterns and give them that liquid, mesmerizing finish.
2. How to Achieve the Warped Melting Grid Pattern
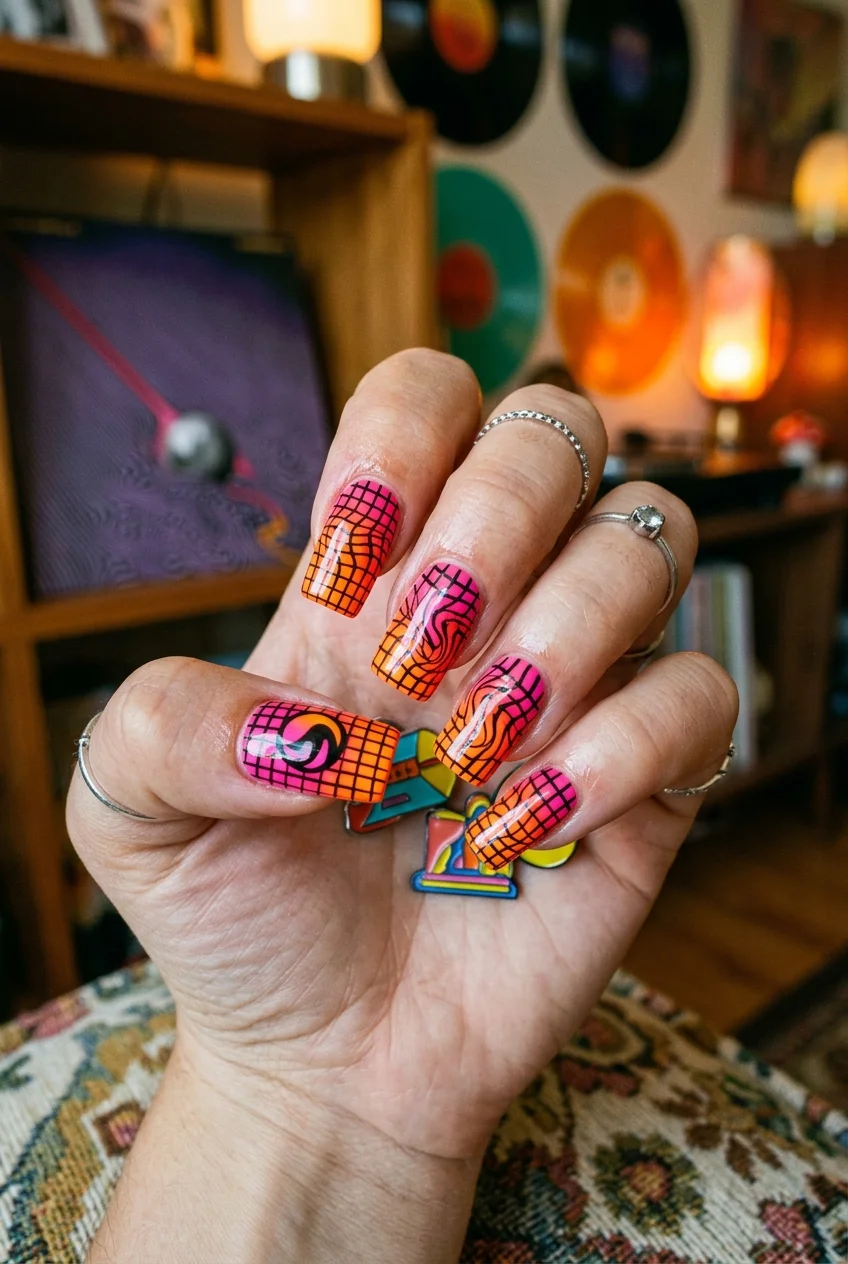
⏱️ Difficulty: Beginner | 🎯 Best For: Retro Edgy | ✨ Compliments: High
The warped melting grid pattern is a staple of indie pop album covers and is surprisingly easy to create. You don’t need a perfectly steady hand; in fact, the slight imperfections make the grid look like it’s genuinely melting off your nails.
To save time, use a highly pigmented polish like Essie so you only need one coat for the lines. This keeps the design flat and prevents it from looking bulky or raised.
3. Kaleidoscope Gradients for Short Nails
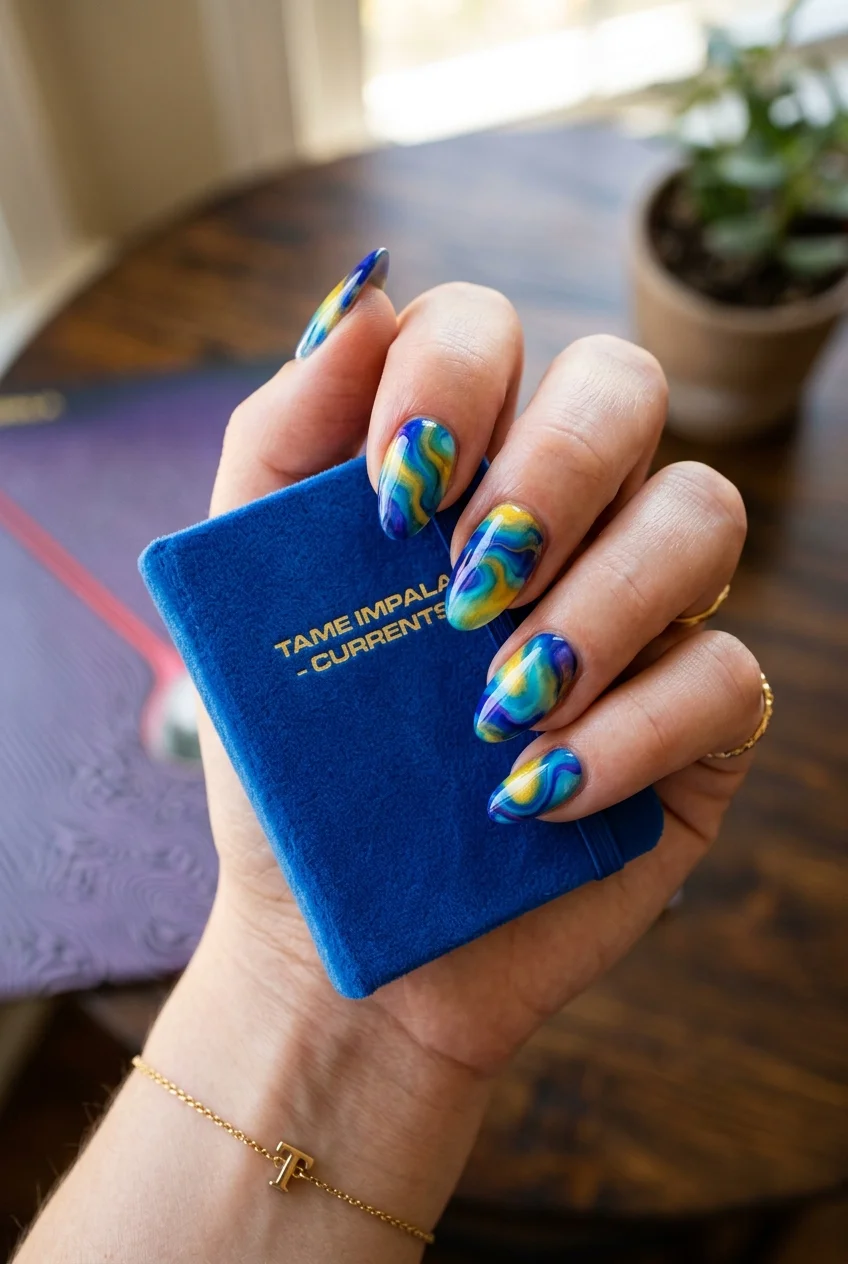
⏱️ Difficulty: Beginner | 🎯 Best For: Vibrant & Fun | ✨ Compliments: Very High
Short nails look incredible with a bright kaleidoscope gradient that mimics a trippy visualizer. Instead of buying expensive gradient sponges, a budget swap is to use a dense makeup sponge you already have at home.
Brands like Gelish blend beautifully when dabbed lightly over a white base. Finish with a high-gloss top layer to bring out the depth of the blending.
4. Abstract Linework Inspired by the Currents Album
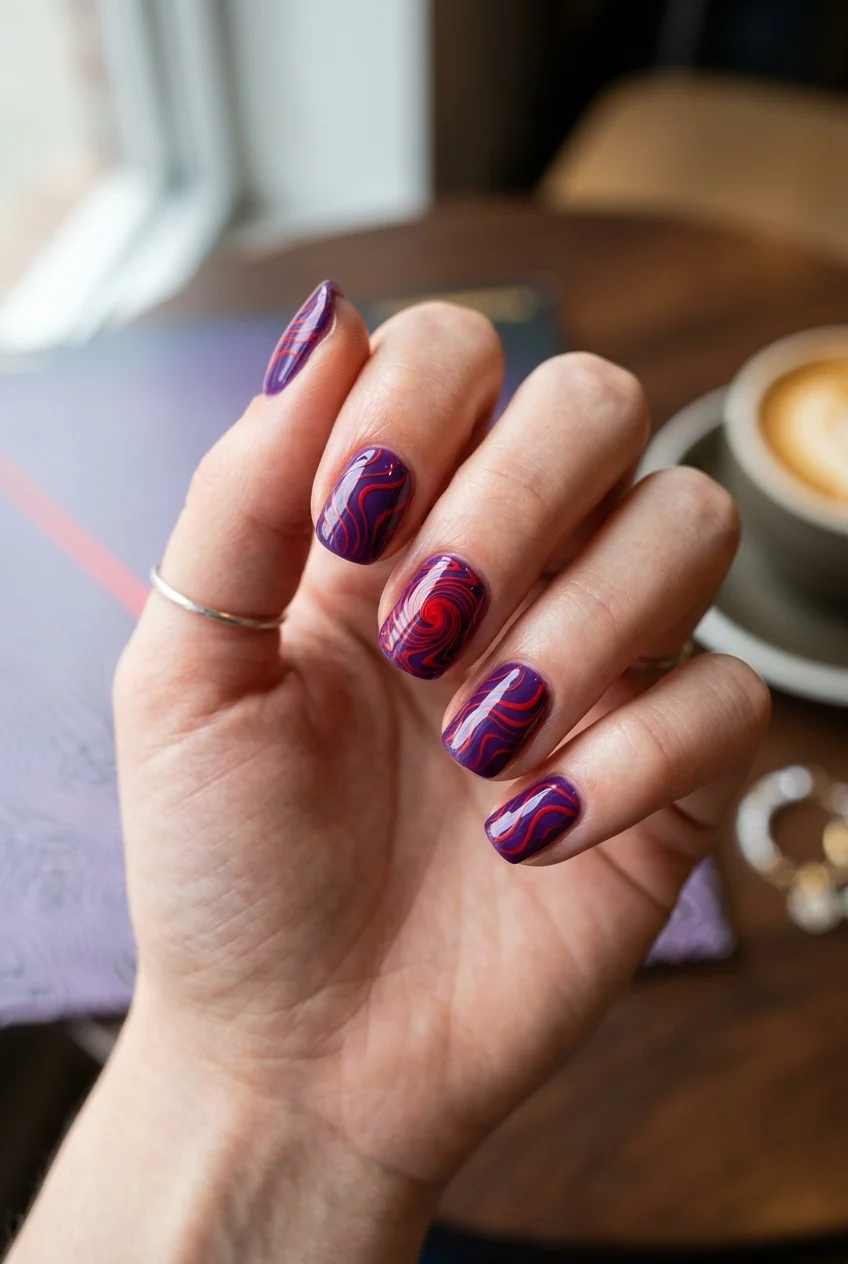
⏱️ Difficulty: Advanced | 🎯 Best For: Musical Homage | ✨ Compliments: Extreme
Paying homage to the iconic Currents album requires patience and a very steady hand for abstract linework. The key to this expert technique is to pull the brush across the nail without lifting it, creating one continuous, flowing wave.
You’ll want a very fine detailing brush and heavily pigmented gel. Curing each line individually prevents any accidental smudging if your hand slips.
5. 70s Retro Waves: A Nostalgic Touch
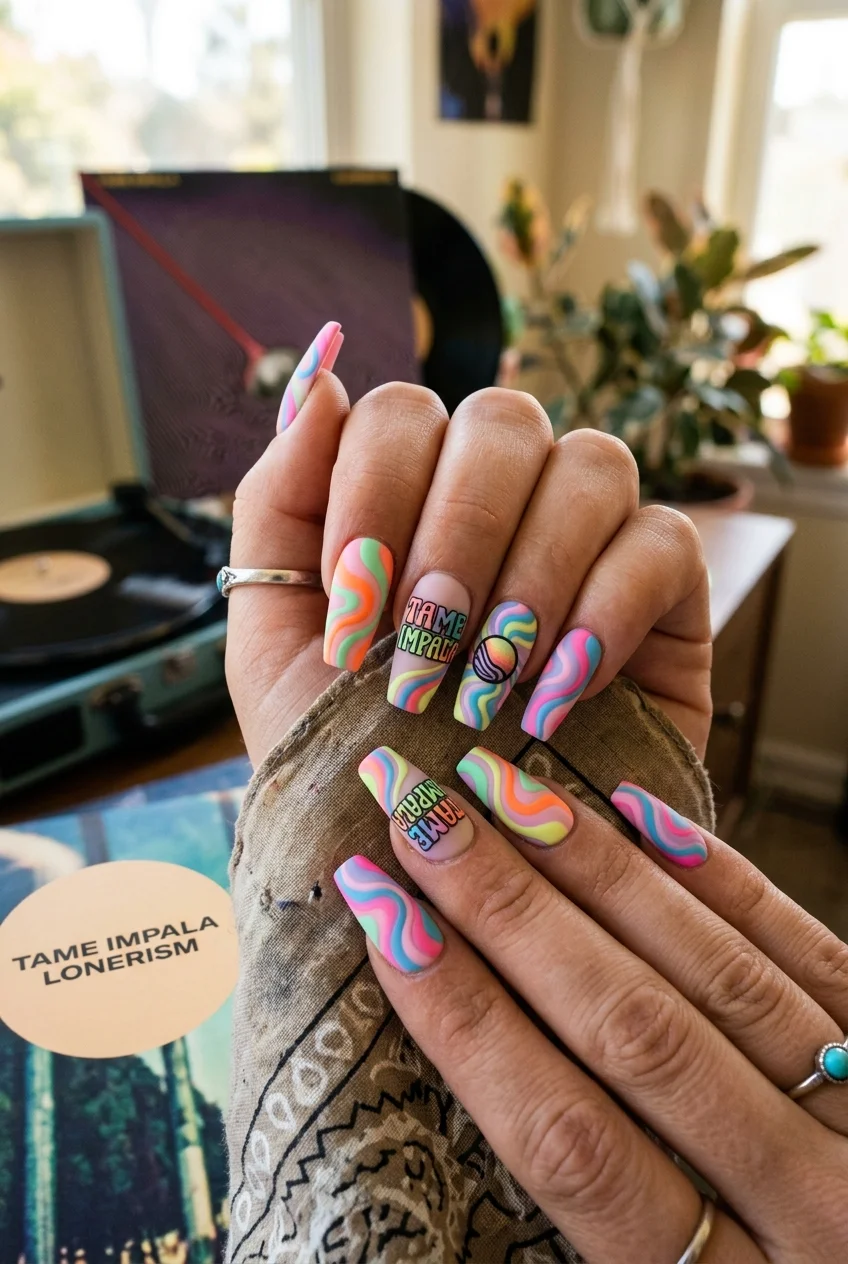
⏱️ Difficulty: Beginner | 🎯 Best For: Nostalgic Groove | ✨ Compliments: Moderate
For a quick fix before a concert, 70s retro waves offer maximum impact with minimal effort. The broad, swooping lines of mustard yellow, burnt orange, and brown instantly evoke a vintage vibe.
This design is incredibly forgiving because the waves are naturally organic and asymmetrical. Just a few strokes on a bare nail creates a stunning negative space effect.
6. Ethereal Aura Glow: Minimalist Trippy
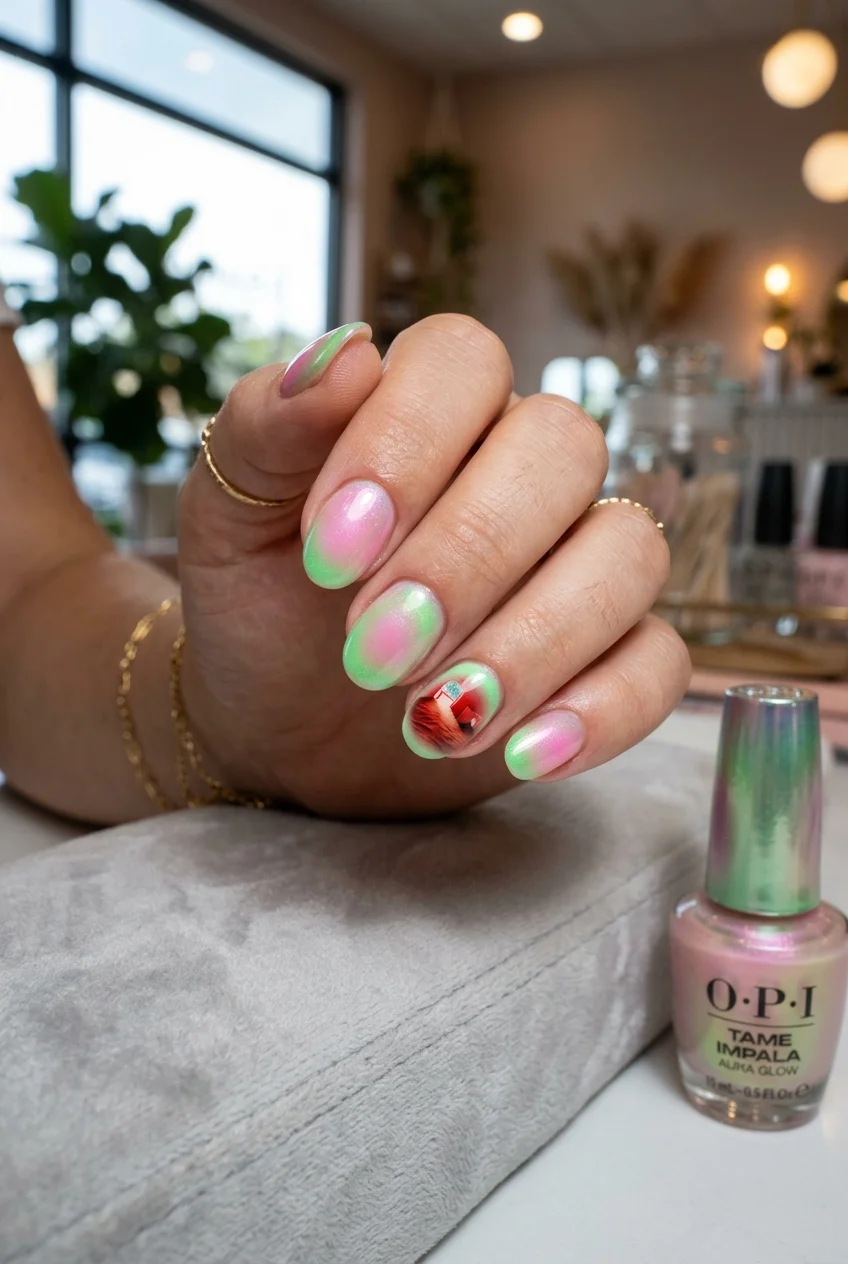
⏱️ Difficulty: Intermediate | 🎯 Best For: Soft & Dreamy | ✨ Compliments: High
Aura nails offer a softer, minimalist take on the psychedelic trend. A common beginner mistake is using too much polish on the sponge, which creates a harsh circle rather than a soft, glowing gradient.
Using professional-grade CND polishes helps achieve that seamless, airbrushed look. Lightly tapping the edges of the color ensures it fades perfectly into your natural nail bed.
7. Reverse Stamping for Groovy Floral Swirls
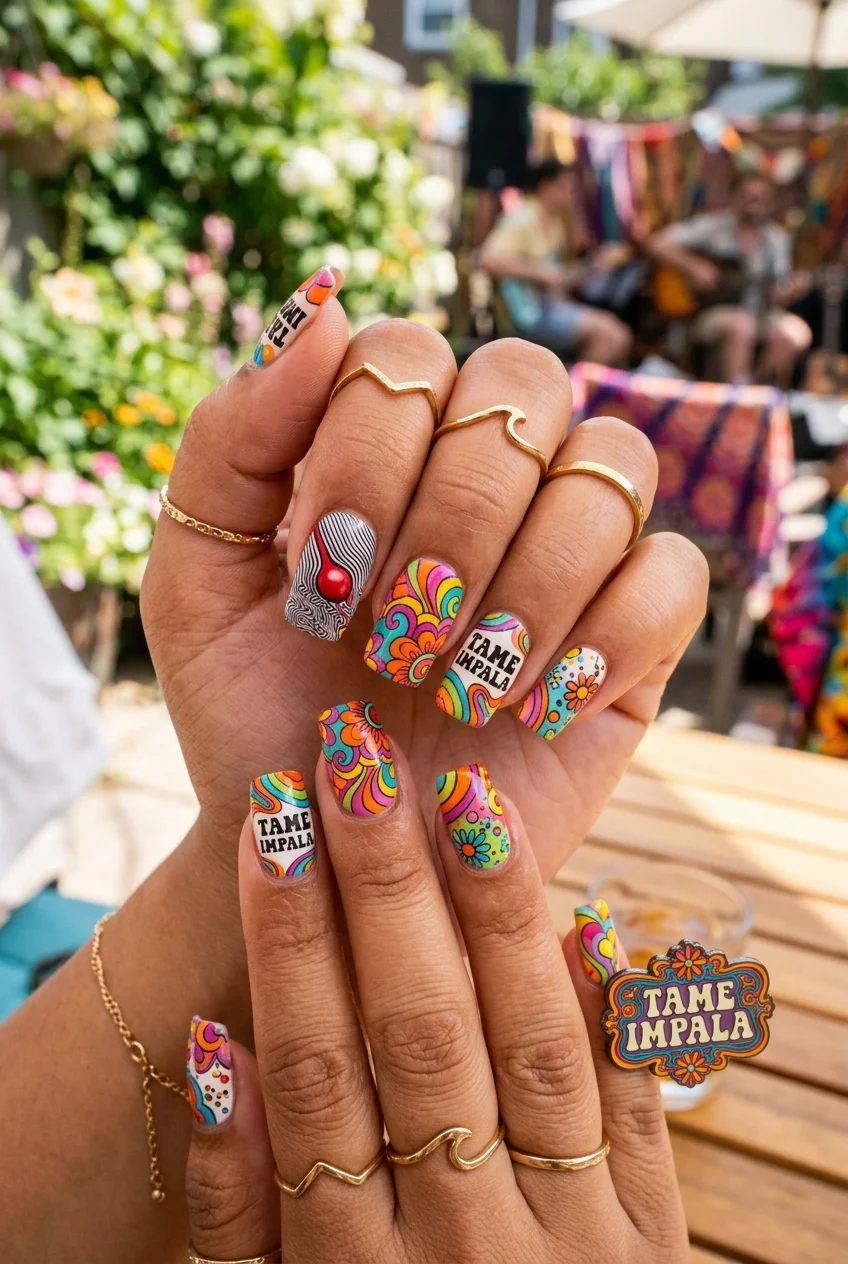
⏱️ Difficulty: Beginner | 🎯 Best For: Summer Festival | ✨ Compliments: Very High
When you want intricate 70s florals without hand-painting, reverse stamping is the ultimate time-saver. You pick up the design from a stamping plate and color it in directly on the stamper before applying it to your nail.
This allows you to create incredibly detailed, multi-colored groovy swirls in a fraction of the time. Seal the decal with a thick base layer before applying your final top coat.
8. Chrome Isolation: Melting Effects Catching the Light
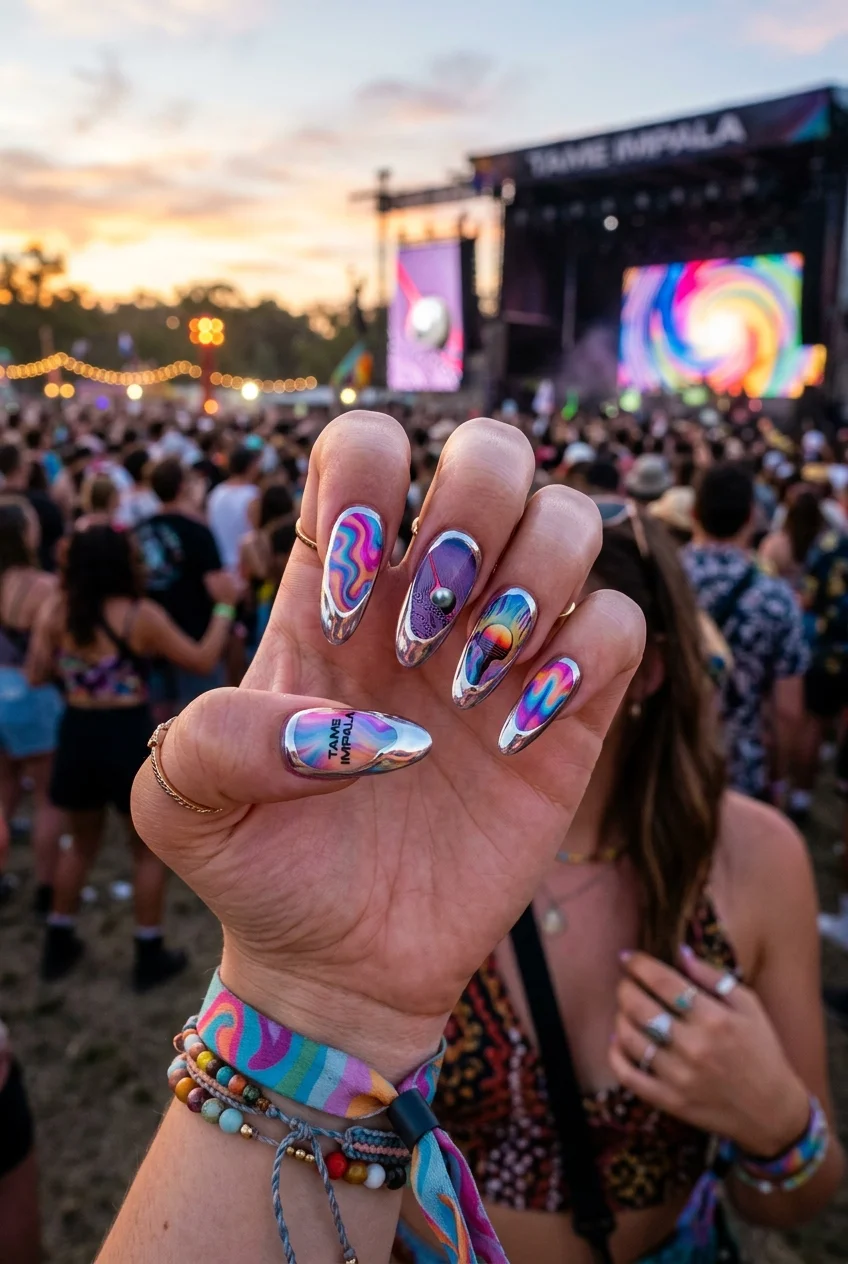
⏱️ Difficulty: Advanced | 🎯 Best For: High Impact | ✨ Compliments: Extreme
Adding metallic elements to your melting designs elevates the look to a true festival masterpiece. The expert technique of chrome isolation involves applying a matte top coat first, then drawing your design with a no-wipe gel.
Once you rub the chrome powder onto the nail, it only sticks to the glossy gel, creating sharp, reflective melting lines. It’s a jaw-dropping effect that looks professional and highly artistic.
9. Marbled Blue and Purple Polish Techniques

⏱️ Difficulty: Intermediate | 🎯 Best For: Fluid Art | ✨ Compliments: High
Creating a marbled look with deep blues and purples gives your nails an ethereal, liquid appearance. A great budget swap is to use a cup of room-temperature water to swirl your standard polishes instead of buying expensive blooming gels.
Dip your finger carefully to transfer the swirling film directly onto your nail. Cleanup can be messy, so applying liquid latex around your cuticles is highly recommended.
10. Thin Sound Wave Lines on a Black Base

⏱️ Difficulty: Intermediate | 🎯 Best For: Edgy Contrast | ✨ Compliments: High
A black base provides the perfect contrasting canvas for neon sound wave designs. A major paradigm shift in nail art is realizing that negative space or dark bases often make bright colors pop much more than white bases do.
Using a fine liner brush, gently drag thin, jagged lines across the nail to mimic audio frequencies. The contrast makes the neon colors look like they are literally glowing.
11. Optical Illusion Checkerboard with Neon Pops

⏱️ Difficulty: Advanced | 🎯 Best For: Mind-Bending | ✨ Compliments: Extreme
Warped checkerboards trick the eye and fit perfectly into the trippy aesthetic. The expert technique here requires mapping out your grid with a pencil lightly before committing with black gel.
Adding a single pop of neon pink to one square instantly modernizes the retro pattern. It requires intense focus, but the optical illusion payoff is absolutely worth the effort.
12. Tie-Dye Blooming Gel for Natural Nails

⏱️ Difficulty: Beginner | 🎯 Best For: Bohemian | ✨ Compliments: Moderate
If you’re short on time, tie-dye designs are a fantastic quick fix. By applying a layer of clear blooming gel and dropping in your colors, the polish naturally spreads outward into a beautiful, psychedelic wash.
You don’t need to blend anything yourself; the gel does all the heavy lifting. It’s the easiest way to get complex-looking watercolor effects in under ten minutes.
13. Cosmic Galaxy Nails: Dark Blue and Glowing Aura

⏱️ Difficulty: Intermediate | 🎯 Best For: Deep Space | ✨ Compliments: Very High
Galaxy nails are the epitome of space-rock aesthetics, perfectly matching the synthesizer sounds of the genre. For long-term care, ensure you encapsulate the tiny silver star glitters under a thick layer of builder gel so they don’t catch on clothing.
Sponge on deep magentas and teals over a midnight blue base to create the nebula clouds. A final glossy top coat gives the illusion of staring directly into space.
14. Mismatched Indie Concert Nail Art
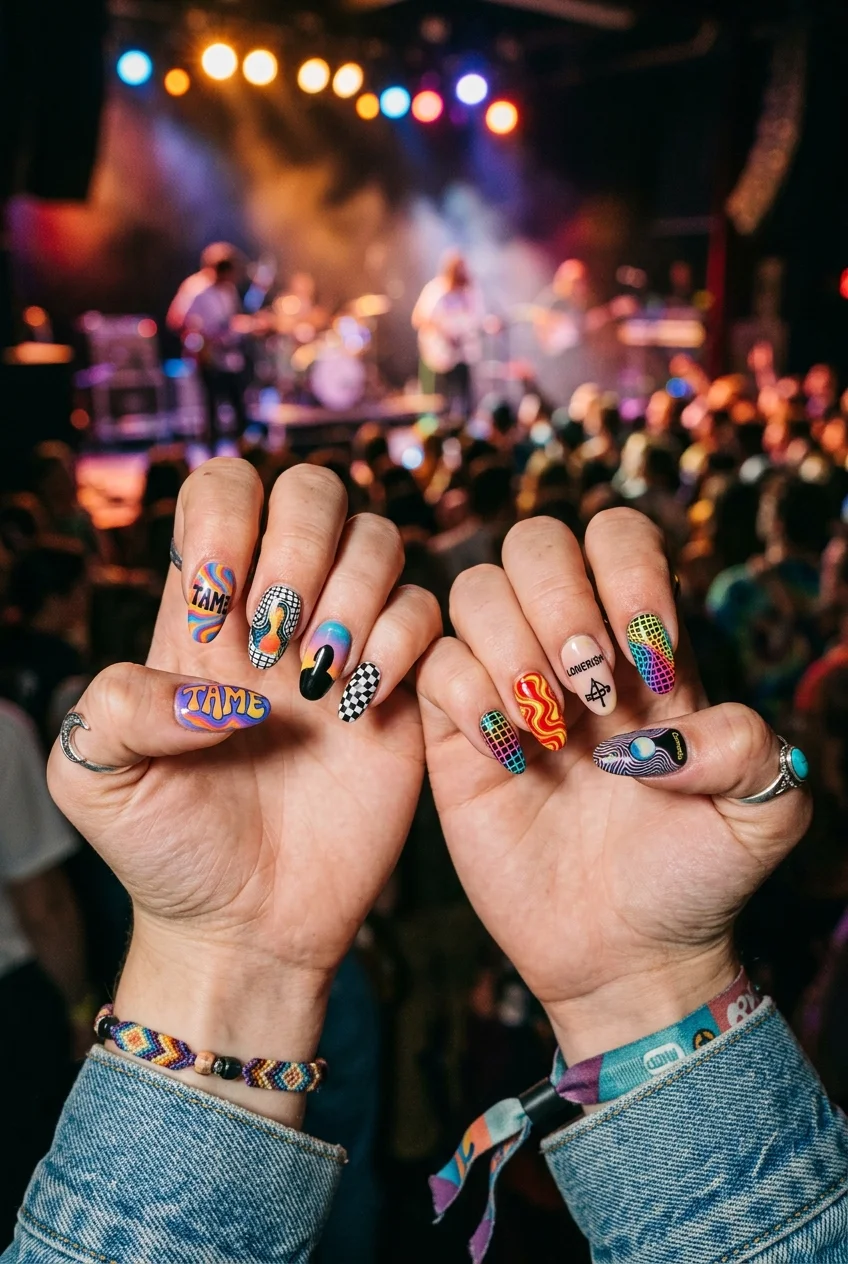
⏱️ Difficulty: Advanced | 🎯 Best For: Chaotic Good | ✨ Compliments: Extreme
Mismatched nails allow you to wear swirls, grids, and aura designs all at once. A common myth is that mismatched sets look messy, but as long as you stick to a cohesive color palette, the final look is highly curated.
This style is perfect for an indie pop concert where self-expression is key. It acts as a visual mood board for your favorite songs right at your fingertips.
15. Pastel Psychedelic Swirls for a Dreamy Vibe

⏱️ Difficulty: Beginner | 🎯 Best For: Soft Aesthetic | ✨ Compliments: High
Pastel swirls offer a softer, more wearable version of the intense psychedelic trend. A frequent beginner mistake is using colors that are too similar in tone, causing the swirls to disappear into each other.
Choose pastels with contrasting undertones—like a cool baby blue against a warm butter yellow. This ensures each swirl remains distinct and striking.
16. Dark Academia Marbling with Metallic Accents

⏱️ Difficulty: Intermediate | 🎯 Best For: Moody Glam | ✨ Compliments: High
Merging the dark academia aesthetic with psychedelic marbling creates a rich, sophisticated look. A budget swap for expensive gold leaf is to use a cheap metallic foil transfer from the craft store.
Swirl deep burgundy and forest green together, then gently press the foil into the sticky layer of the polish. It adds an instant touch of moody glamour to the fluid design.
17. Y2K Neon Slime Melting Effect on Coffin Nails

⏱️ Difficulty: Beginner | 🎯 Best For: Y2K Rave | ✨ Compliments: Very High
The dripping slime look is heavily inspired by Y2K rave culture and is incredibly fast to execute. As a time-saver, use a large dotting tool to place the bottom of the “drips” first, then connect them up to the cuticle.
Neon green over a stark black base creates the most authentic toxic slime aesthetic. It’s edgy, bold, and requires zero precision.
18. Simple Bright Orange Aura on Almond Shapes

⏱️ Difficulty: Beginner | 🎯 Best For: Minimalist Glow | ✨ Compliments: High
Sometimes less is more, especially with a vibrant neon orange aura. The paradigm shift is realizing that a single, powerful color gradient can be just as impactful as a highly detailed pattern.
An almond nail shape perfectly complements the circular glow of the aura, elongating the fingers. Keep the base completely sheer for that “glowing from within” appearance.
19. 3D Textured Clear Gel Swirls over Matte Base

⏱️ Difficulty: Advanced | 🎯 Best For: Tactile Art | ✨ Compliments: Extreme
Adding physical texture to your swirls brings a whole new dimension to the Tame Impala vibe. The expert technique involves curing a matte top coat completely before piping thick, clear builder gel over the top.
The glossy, raised clear gel stands out sharply against the flat matte background. It literally feels like liquid water frozen on top of your nails.
20. Iridescent Chrome over Wavy Designs

⏱️ Difficulty: Intermediate | 🎯 Best For: Color-Shifting | ✨ Compliments: Very High
Iridescent chrome powders create a mesmerizing color shift that perfectly mimics a psychedelic experience. A common myth is that you need a dark base for chrome, but applying it over pastel waves creates a stunning, pearlescent glow.
As you move your hands, the light catches the waves, shifting the colors from teal to purple. Ensure you wipe away any excess powder before sealing to prevent a grainy finish.
21. Neon Yellow and Purple High Gloss Waves

⏱️ Difficulty: Beginner | 🎯 Best For: High Energy | ✨ Compliments: High
Contrasting neon yellow with deep purple creates an electric, high-energy vibration on the nail. A budget swap is to mix a tiny bit of white polish into your yellow if it isn’t popping brightly enough on its own.
The high gloss finish is non-negotiable for this look; it needs to look wet and vibrant. The complementary colors will naturally draw attention from across the room.
22. 1970s Vintage Wallpaper Mustard and Brown Swirls
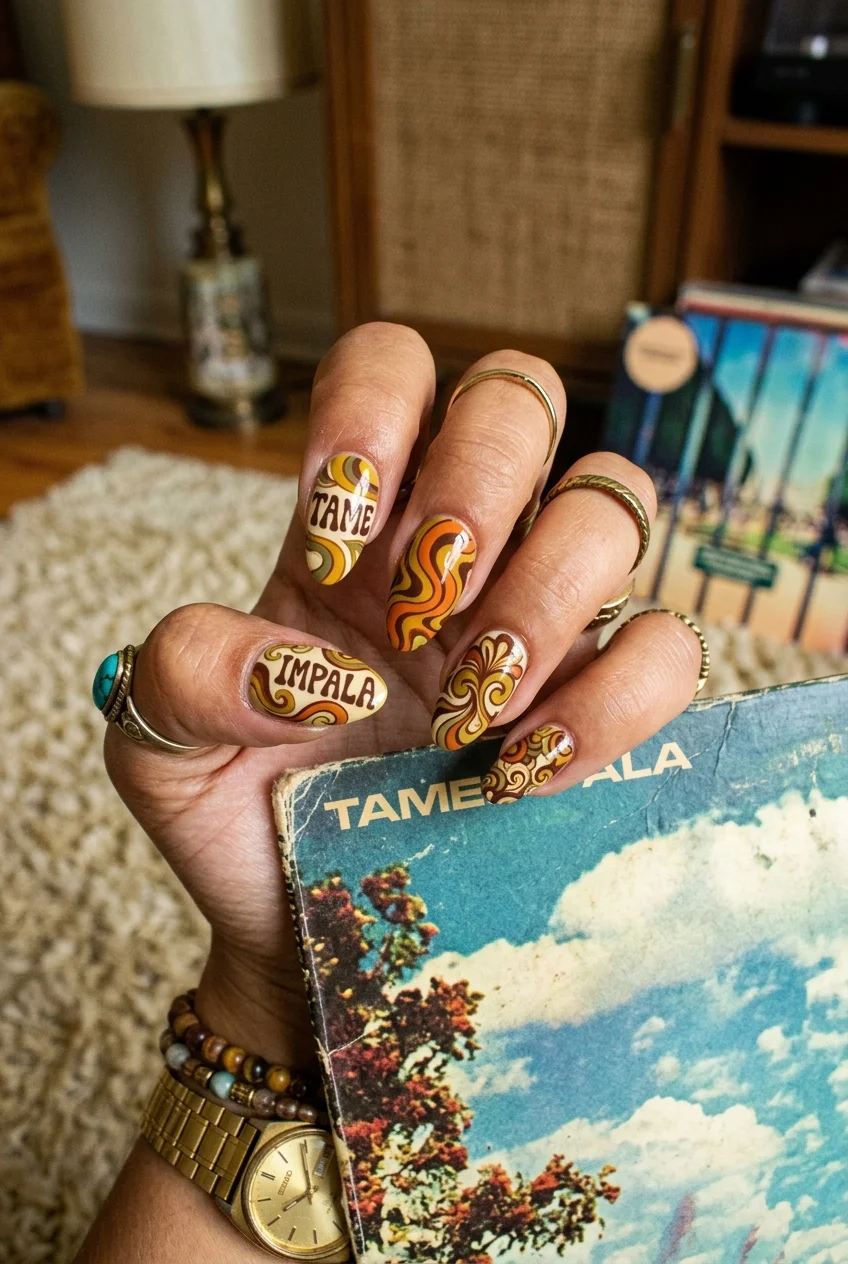
⏱️ Difficulty: Beginner | 🎯 Best For: Retro Warmth | ✨ Compliments: Moderate
Embracing the earthy tones of the 1970s gives a warm, grounded feel to the psychedelic aesthetic. This is a great quick fix because mustard, olive, and brown look incredibly stylish even if the swirls aren’t perfectly uniform.
These muted tones are deeply nostalgic and pair beautifully with gold jewelry. It’s a subtle nod to the retro era without relying on blinding neon.
23. Lava Lamp Jelly Nails with Floating Neon Blobs
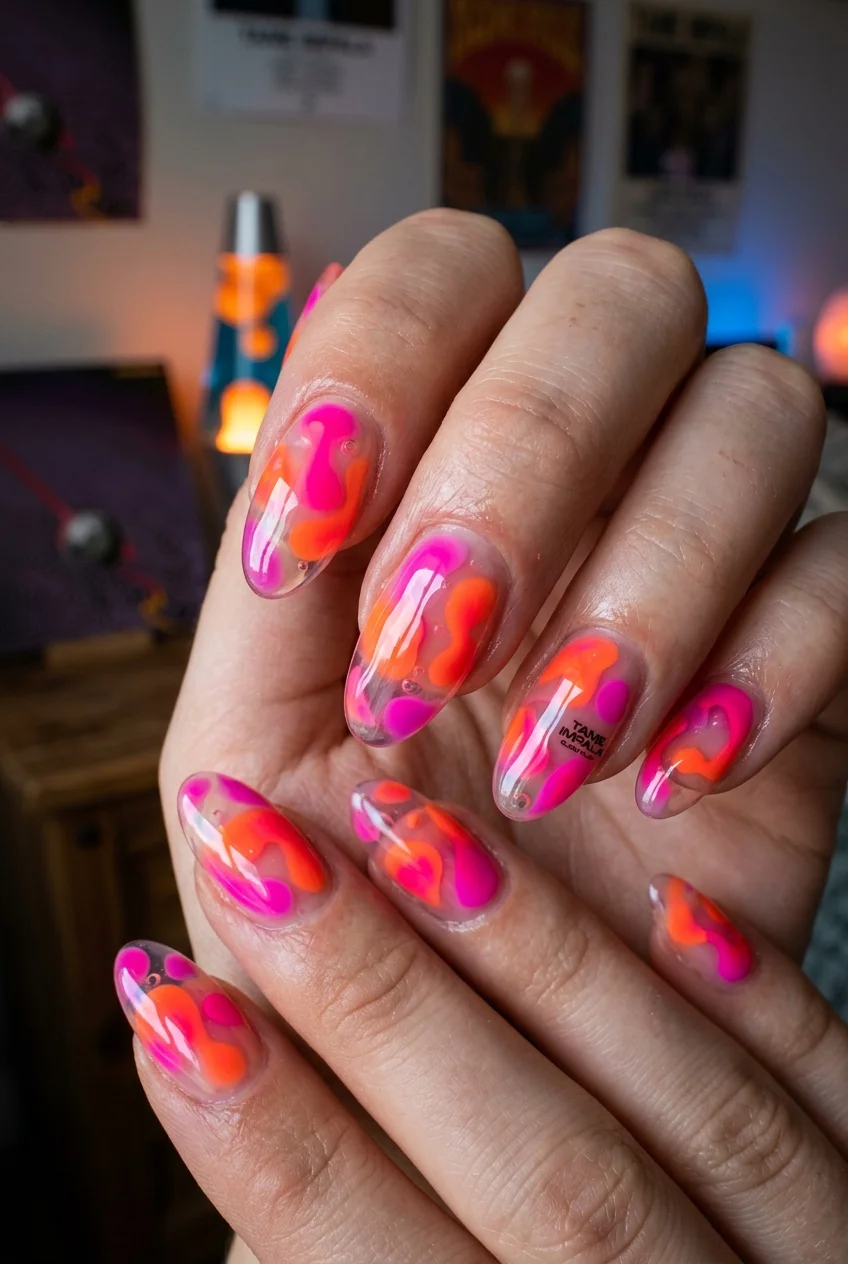
⏱️ Difficulty: Advanced | 🎯 Best For: Mesmerizing | ✨ Compliments: Extreme
Jelly polishes have a translucent, glass-like finish that is perfect for mimicking a lava lamp. The expert technique is to encapsulate small drops of opaque neon polish between layers of sheer jelly polish.
This creates a genuine 3D effect where the blobs look like they are floating deep inside the nail. It requires multiple UV lamp curing cycles, but the final mesmerizing depth is unparalleled.
24. Dripping Rainbow Chrome for Edge

⏱️ Difficulty: Intermediate | 🎯 Best For: Festival Ready | ✨ Compliments: Very High
Combining the melting aesthetic with holographic rainbow chrome creates the ultimate festival look. A beginner mistake is applying the chrome powder too aggressively, which can cause the delicate dripping lines to peel off.
Use a soft sponge applicator and a very gentle hand to burnish the powder in. The resulting rainbow reflection makes the drips look like melted, liquid metal.
25. Wavy Pastel Lines on a Clear Minimalist Base

⏱️ Difficulty: Beginner | 🎯 Best For: Clean Girl Trippy | ✨ Compliments: High
For those who prefer a cleaner aesthetic, floating pastel waves over bare nails is a beautiful compromise. The paradigm shift here is letting the negative space be the main focus of the design rather than packing in color.
Use striping tape to ensure the edges of your waves stay sharp and crisp. A thorough buffing with a nail buffer beforehand ensures your natural nail looks flawless underneath.
26. Holographic Glitter with Warped Checkerboard

⏱️ Difficulty: Advanced | 🎯 Best For: Futuristic | ✨ Compliments: Extreme
Pairing holographic glitter with a stark black warped grid is highly futuristic and deeply trippy. For long-term care, cap the free edge of the nail extensively to prevent the glitter from chipping and exposing the grid.
The glitter base reflects a full spectrum of light, making the black grid appear to bend and move as you shift your hand. It’s a bold statement perfect for any psychedelic music lover.
27. Sponge Blended Deep Space Nebula Nails
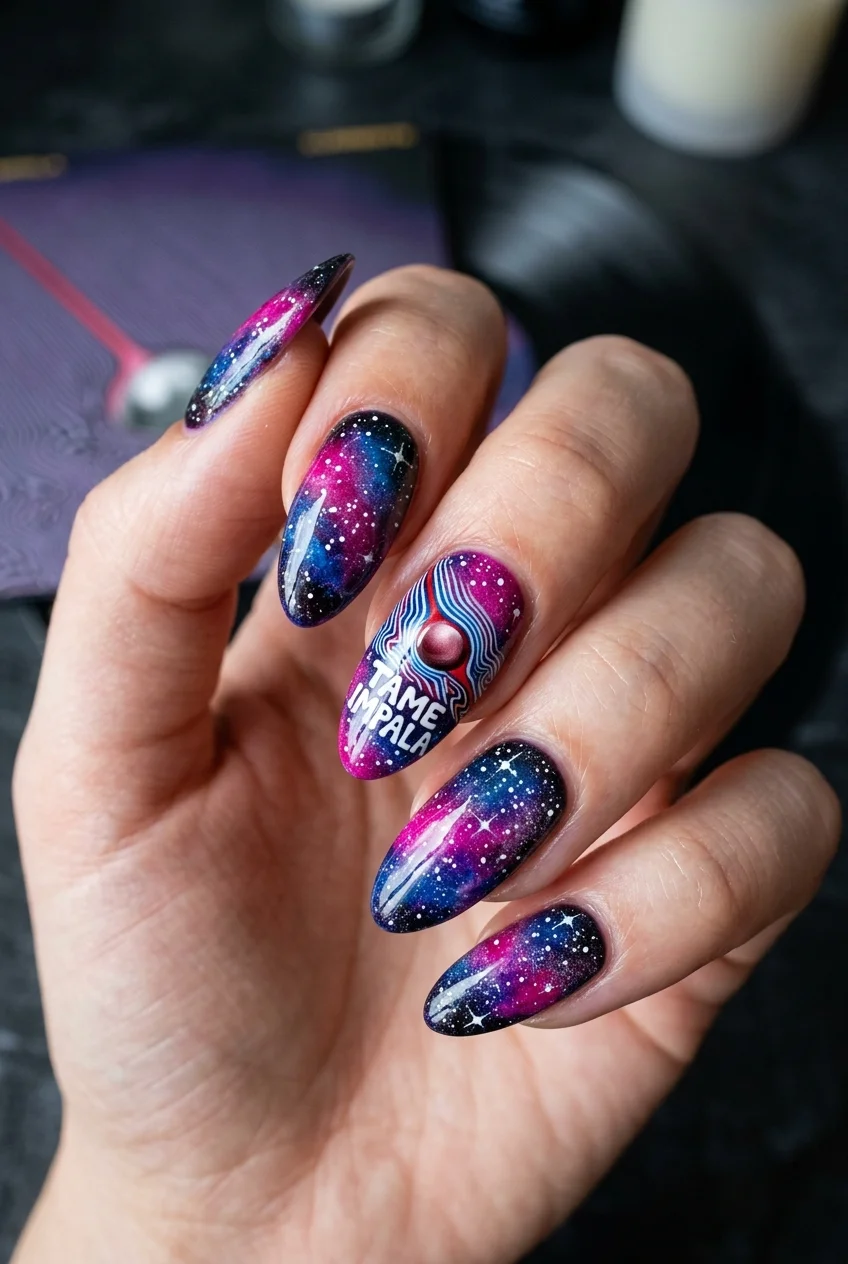
⏱️ Difficulty: Intermediate | 🎯 Best For: Galactic | ✨ Compliments: Very High
Nebula nails capture the expansive, cosmic feel of space rock perfectly. As a time-saver, you don’t need to be precise; randomly dabbing dark blues, purples, and magentas with a sponge creates the most realistic gas clouds.
Finish with scattered white dots to simulate distant stars. The beauty of this design lies in its organic, unpredictable blending.
28. Retro Vinyl Record Concentric Circles in Red

⏱️ Difficulty: Beginner | 🎯 Best For: Musical Retro | ✨ Compliments: High
Concentric circles mimic the grooves of a vinyl record, offering a direct homage to physical music media. A budget swap for a fine liner brush is to use a toothpick to drag the circular lines gently into the wet polish.
Using a bright, cherry red base gives it a vibrant, pop-art feel. It’s a playful and incredibly simple way to show your love for retro audio.
29. Glowing Neon Airbrush Effect on Matte Black

⏱️ Difficulty: Advanced | 🎯 Best For: Nightclub | ✨ Compliments: Extreme
The airbrush aesthetic has made a massive comeback and looks incredible when contrasted against a pitch-black background. The expert technique is to use actual pigment powders heavily brushed into the sticky layer of the base coat before sealing.
This creates a fuzzy, glowing edge that mimics a neon sign in a dark alley. Finishing it off with a matte top coat removes all reflection, allowing only the neon color to shine.
30. Watercolor Bleeding Edges in Soft Blues and Pinks

⏱️ Difficulty: Intermediate | 🎯 Best For: Ethereal Wash | ✨ Compliments: High
Watercolor nails offer a dreamy, washed-out look that feels very soft and romantic. A common myth is that you need acrylic paints to achieve this; you can actually just dilute your gel polish with a high percentage of rubbing alcohol.
When you drop the diluted color onto the nail, it instantly bleeds out into delicate, sheer layers. It perfectly captures the fluid, flowing essence of psychedelic art.
Frequently Asked Questions (FAQ)
What are Tame Impala nails?
Tame Impala nails refer to a music-inspired nail art trend characterized by psychedelic swirls, melting grid patterns, and vibrant kaleidoscope colors. The aesthetic draws heavy inspiration from the band’s album covers, specifically the flowing lines of the Currents album and the retro 70s indie pop visual style.
How do you do psychedelic swirl nail art at home?
Pro Tip: To create psychedelic swirls at home, you need a high-quality base coat, a fine detailing brush, and heavily pigmented polish. Apply your base, then use the thin brush to drag wavy lines across the nail without lifting the brush. For the best results, use a gel polish so you can wipe it away and retry if you make a mistake before curing it under a UV lamp.
Are blooming gels necessary for the watercolor effect?
While blooming gel makes achieving the watercolor or tie-dye effect much easier by naturally dispersing the polish, it isn’t strictly necessary. A great Expert Tip is to dilute standard gel polish with rubbing alcohol or a clear base coat to manually create soft, bleeding edges that mimic a dreamy aura wash.
What nail shape works best for retro 70s designs?
While retro 70s waves look great on any shape, elongated shapes like coffin or almond nails provide a larger canvas for the flowing designs. Almond nails, in particular, complement the circular, glowing gradient of aura nails, while square or coffin shapes look striking with sharp, warped optical illusion grids.
Get our latest guides, news, and insights highlighted in your Google Search & AI Overviews.