Are you tired of fighting with stubborn wax remnants that cling to your waxing pot like an unwelcome houseguest? Fear not! In our guide, “How to Clean a Wax Pot: Easy Maintenance Tips,” we’ll transform that sticky situation into a breezy clean-up. Keeping your wax pot in tip-top shape not only ensures hygiene but also enhances your waxing experience, becuase nobody wants to wrestle with old wax while they’re on a beauty mission. So, let’s roll up our sleeves (and maybe put on some protective gear) as we dive into simple yet effective cleaning hacks that will make your pot shine like it just stepped off the waxing runway! Say goodbye to the stickiness and hello to effortless maintenance!
Contents of Article
- How to Clean a Wax Pot: Understanding the importance of Proper Maintenance
- Key Features of Wax Pots and Why Regular cleaning Matters
- Benefits of Cleaning Your Wax Pot: Enhance Performance and Longevity
- Common challenges and Misconceptions About Wax Pot Care
- Practical Applications: Integrating Wax Pot maintenance into Your Beauty Routine
- Actionable Tips for Effective Wax Pot Cleaning and Maintenance Strategies
- Frequently Asked Questions
- How often should I clean my wax pot?
- What products are best for cleaning a wax pot?
- Are there specific steps to follow for cleaning my wax pot effectively?
- What should I do if the wax pot has stubborn residue?
- What mistakes should I avoid while cleaning my wax pot?
- How can I ensure my wax pot lasts longer?
- Final Thoughts
How to Clean a Wax Pot: Understanding the importance of Proper Maintenance
Why Proper Maintenance Matters
Cleaning your wax pot is essential for both hygiene and performance. A well-maintained wax warmer ensures that the wax adheres properly to the skin and provides a smoother application. Neglecting to clean your pot regularly can lead to contamination, which may cause skin irritations or infections, especially in sensitive areas like the bikini line. By keeping your wax pot in top condition, you also prolong its lifespan and maintain optimal heating efficiency.
How Often to Clean Your Wax Pot
Generally, it’s recommended to perform deep cleaning at least once a week. Though, if you’re using the wax pot frequently, like in a busy salon, you might need to clean it every time you finish a pot, which could be every 5-10 days depending on your workload. A good practice is to remove excess wax daily and tackle a thorough cleaning routine weekly.
Steps for Cleaning Your Wax Pot
- Unplug and cool Down: Always make sure your wax pot is unplugged and cooled down before starting the cleaning process.
- Remove Excess Wax: Use a wax spatula or scraper to carefully remove any leftover wax from the pot.
- Use a Cleaner: Employ a specialized wax cleaner, such as Starpil Post-Wax Oil, to dissolve any residue.Avoid harsh chemicals.
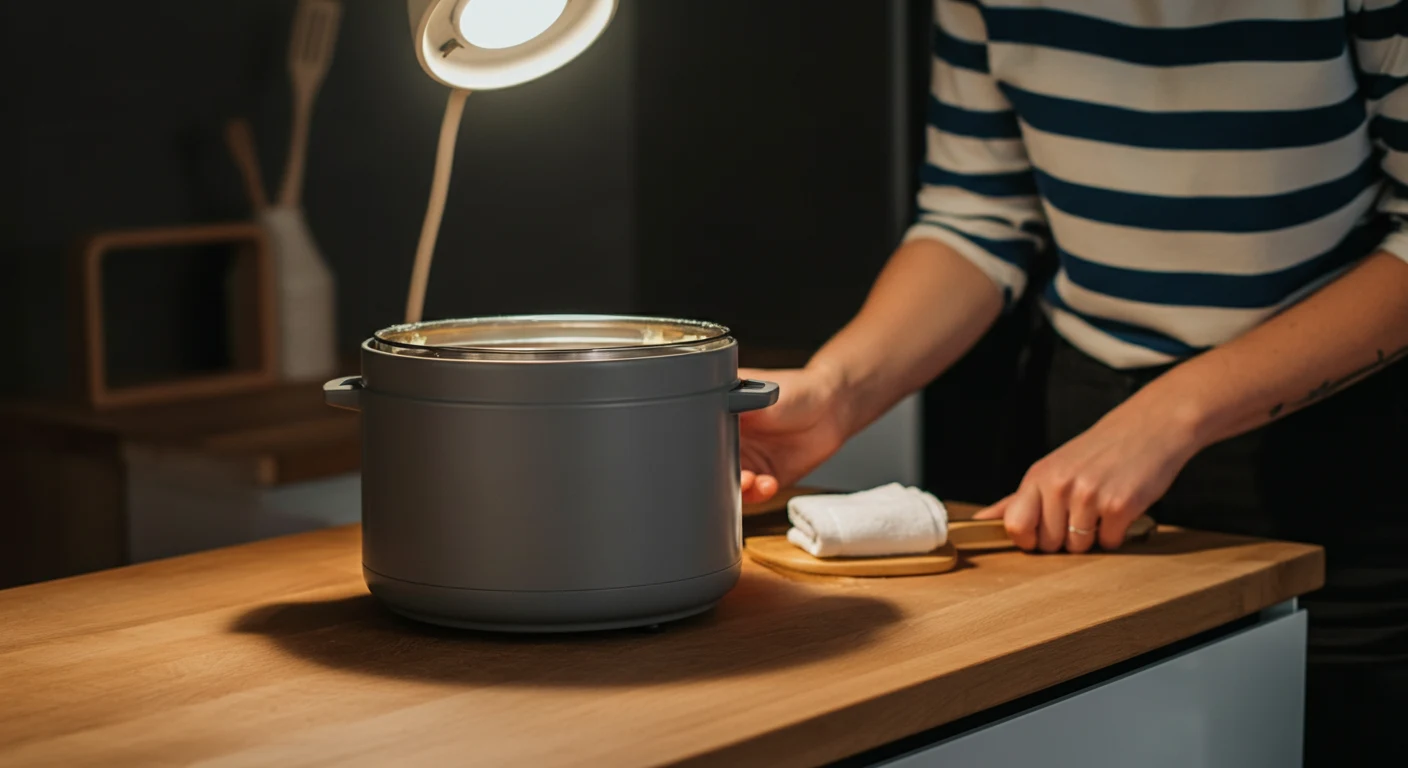
- Wipe down: Use a microfiber cloth to wipe down the interior and exterior of the pot thoroughly.
- Inspect Grommets and Heating Elements: Ensure that no wax has dripped onto the electrical components, as this can cause malfunctions.
Best Practices for long-Term Care
To ensure your wax pot remains in pristine condition, develop a consistent cleaning schedule and follow the manufacturer’s guidelines. Periodically,check for any wear and tear. Taking these small yet notable steps not only contributes to better service for your clients but also safeguards your equipment investment.

Key Features of Wax Pots and Why Regular cleaning Matters
Key Features of Wax Pots
Wax pots are essential tools for achieving effective hair removal. They provide a controlled environment for melting various types of wax, ensuring even consistency and optimal results. Here are some key features:
- Temperature Control: Most modern wax pots come with adjustable temperature settings, allowing you to customize the heat according to the wax type, whether it’s hard or soft wax.
- Capacity: Wax pots are available in different sizes, accommodating varying amounts of wax, which is crucial for different salon settings.
- Ease of Use: Their design often includes a simple on/off switch and indicator lights to signal when the wax is ready for use.
- Cleaning ease: Many models are designed with removable components that make the cleaning process smoother and more efficient.
Importance of Regular Cleaning
Regular cleaning of your wax pot is not just about maintaining hygiene; it’s also about preserving the quality of your wax and enhancing the overall waxing experience.
Hygiene and Safety
Sanitation is critical when it comes to any beauty service. Residual wax can harbor bacteria and fungi, which can lead to skin irritation or infections. Cleaning after each use minimizes these risks.
Performance and Durability
Accumulated wax can interfere with the temperature regulation of the pot, leading to uneven melting and poor application. By incorporating a speedy cleaning routine into your process, you ensure that the wax pot operates effectively, extending its lifespan.
Cleaning Steps
To keep your wax pot in prime condition, consider the following cleaning tips:
- Always start with the wax pot turned off and unplugged.
- After the wax has melted, use a cloth or cotton swab to wipe excess wax.
- Weekly deep cleans using a professional wax cleaner can definitely help maintain the pot’s condition.
| Frequency | Cleaning Action |
|---|---|
| After Each Use | Quick wipe down to remove excess wax. |
| Weekly | Deep cleaning with specialized products. |
| Monthly | Full inspection and thorough clean. |
Benefits of Cleaning Your Wax Pot: Enhance Performance and Longevity
Improved Performance
Regularly cleaning your wax pot is vital for maintaining optimal performance. Residual wax can cause inconsistent heating, affecting the quality of your waxing sessions. When you keep your wax pot clean, you ensure that the wax heats evenly, allowing for a smooth, efficient application. This not only enhances the client’s experience but also saves you time and reduces the risk of irritation or skin issues arising from improperly melted wax.
Prolonged Longevity
Investing a little time in cleaning your wax pot can significantly extend its lifespan. Build-up from various waxes can lead to malfunctioning parts and degradation of the heating element. By keeping your pot clean, you help prevent damaging the internal components, thereby preserving your investment for years to come. A well-maintained wax pot operates more effectively and requires fewer repairs, translating to a lower overall cost of ownership.
Health and Safety
Maintaining a clean wax pot is not just about performance—it’s also a matter of hygiene. Bacteria can thrive in old wax, potentially leading to skin infections and other health issues for clients. regular cleaning minimizes the risk of cross-contamination and promotes a safer waxing environment. This can enhance your reputation and encourage repeat business, as clients are more likely to return to a salon that prioritizes cleanliness.
Quick Maintenance Tips
- Heat the wax pot on high and wipe out the remnants with a paper towel.
- For stubborn residue, use a cloth or cotton swab dipped in nail polish remover or a specialized cleaner.
- Consider regular cleaning schedules between clients to keep the pot impeccable.
- Use wax-specific cleaning products to ensure the longevity of your equipment.
| Task | Frequency | Recommended Cleaning Method |
|---|---|---|
| Deep Cleaning | Weekly | Nail polish remover or wax cleaner |
| Wipe Down | Daily | Paper towels and cleaner |
| inspect Components | Monthly | Visual check for wear and tear |

Common challenges and Misconceptions About Wax Pot Care
Understanding Common Challenges
When it comes to maintaining your wax pot, several common challenges can lead to misconceptions about care and cleaning habits. A prevalent issue is the belief that cleaning the pot is only necessary when changing wax types or visibly dirtying. in reality, frequent cleaning after each client helps to maintain hygiene and prolong the lifespan of your equipment. Wax residue can solidify and become more challenging to remove over time,leading to potential damage if not addressed regularly.
Debunking Misconceptions
Another misconception is the idea that any cleaning solution is appropriate for removing wax build-up. Many practitioners may use general household cleaners, but these can leave behind harmful residues or damage the surface of the pot. instead,experts recommend using isopropyl alcohol or products specifically designed for wax removal. These cleaners not only effectively dissolve wax but also ensure that your pot remains in optimal condition for long-term use [[2]].
Essential Tips for Care
- Always clean your wax pot after each use
- Utilize isopropyl alcohol for effective cleaning
- Consider using a soft cloth or paper towel to avoid scratches
- Avoid using abrasive cleaning materials or harsh chemicals
Maintenance Frequency
While it might seem time-consuming, routine maintenance can save you from more extensive cleaning down the road. Experts suggest a quick wipe after every session,with a more thorough cleaning weekly. This balance of attention ensures that your wax pot operates efficiently and that you provide the best experience for your clients.
| Cleaning Frequency | Recommended Action |
|---|---|
| After Each Client | Quick wipe down |
| Weekly | Deep clean with appropriate cleaner |

Practical Applications: Integrating Wax Pot maintenance into Your Beauty Routine
Essential steps for Maintaining your Wax Pot
To seamlessly integrate wax pot maintenance into your beauty routine, it’s crucial to follow a series of simple steps. Regularly cleaning your wax pot not only ensures hygiene but also enhances the performance and lifespan of your device. Here’s a straightforward guide:
- Unplug and Cool down: Always unplug your wax warmer and allow it to cool wholly before cleaning. This prevents burns and ensures safety.
- Remove Residual Wax: Use a spatula or popsicle stick to gently scrape out any leftover wax. Dispose of the wax in a waste bin.
- deep Clean: For thorough cleaning, soak a paper towel or cloth in a gentle wax remover or rubbing alcohol, then wipe the interior and exterior of the pot.
- Dry and Reassemble: Once clean, dry the pot securely before reassembling and using it again.
Cleaning Tips for Different Wax Types
Different types of wax may require specific cleaning approaches. Here’s a quick comparison:
| Wax Type | Cleaning Method |
|---|---|
| Soft Wax | Use a gentle wax remover or oil to dissolve and wipe easily. |
| Hard Wax | Scrape off cooled wax and wipe the pot with alcohol to remove residue. |
| Beads or Pellets | remove leftovers with a spatula and clean with a soft cloth. |
Incorporating Maintenance into Your Routine
Integrating these maintenance practices into your beauty routine is essential for effective skincare. Here’s how to set a schedule:
- Schedule weekly cleanings after your waxing sessions to keep your pot in prime condition.
- Keep a cleaning kit readily available, including wipes, a spatula, and remover, to make the process easier.
- Set reminders on your phone to maintain consistency, ensuring your waxing tools are always ready for use.

Actionable Tips for Effective Wax Pot Cleaning and Maintenance Strategies
Essential Cleaning Steps
To keep your wax pot in pristine condition, follow these essential cleaning steps regularly. proper maintenance not only extends the life of your equipment but also ensures hygiene and efficacy during wax treatments.
- Heat the Wax: Turn on your wax pot and let the remaining wax melt slightly. This will make it easier to clean up residue.
- Use Proper Cleaners: Apply a wax cleaner or a mixture of baby oil with wax cleaner to the pot’s interior. This solution effectively breaks down the wax.
- Wipe It Down: Use absorbent materials like couch roll or kitchen towels to carefully wipe the inside of the pot.
- Alcohol for Edges: For any stubborn spots around the edges, dampen a cloth with isopropyl alcohol and wipe thoroughly to disinfect and remove residue.
Deep Cleaning Routine
From time to time, a more thorough deep cleaning is necessary to maintain the quality of your waxer. Here’s how you can do it effectively:
Frequency of Deep Cleaning
| Usage Frequency | Recommended Deep Cleaning Frequency |
|---|---|
| Daily Use | Weekly |
| Weekly Use | Bi-Weekly |
| Occasional use | Monthly |
Deep Cleaning Process
- Unplug the Device: Always ensure your wax pot is unplugged before performing a deep clean.
- Remove Wax Containers: If your wax pot has removable containers, take them out for easier cleaning.
- Scrub with Care: Use warm, soapy water to scrub the outside and any removable parts, then dry them thoroughly.
- Final Wipe: After the entire pot has cooled down, give it a final wipe with a disinfectant to ensure it’s ready for the next use.
Storage and Maintenance Tips
After cleaning your wax pot, consider these tips to keep it in top shape:
- Keep it covered: Use a dust cover when not in use to prevent any contaminants from settling inside.
- Store in a cool place: Avoid direct sunlight or extreme temperatures to protect the wiring and components.
- Regular Inspections: Periodically check for any wear or damage to the cord or pot, addressing issues immediately to maintain safety.
Frequently Asked Questions
How often should I clean my wax pot?
Keeping your wax pot clean is essential for maintaining hygiene and ensuring the best results during waxing sessions. Ideally, you should clean your wax pot every time you finish using a full pot of wax. For many professionals, this means cleaning it out every 5 to 10 days, depending on how busy your salon is. Regular cleaning prevents the buildup of old wax, which can lead to contamination and affect the quality of waxing services provided to clients [[1]].
When you clean your wax pot frequently, you can also avoid the frustrating task of scrubbing off hard, dried wax. Frequent maintenance helps to keep your equipment in top condition, ensuring a better experience for both you and your clients. The importance of cleanliness in any beauty treatment cannot be overstated, as it is crucial for avoiding skin irritations or infections.
What products are best for cleaning a wax pot?
When it comes to cleaning a wax pot, using the right products will make your life easier and more efficient. You can use a specialized wax remover or solvents like Goo Gone or any orange oil-based cleaner,which are effective at breaking down and removing wax residues [[2]]. Using paper towels helps, as they can easily absorb the melted wax and cleanup the edges.
It’s wise to heat your wax pot on a high setting before cleaning. This allows the wax to soften, making it easier to wipe away any remaining residues. After you’ve removed the bulk of the wax, spray your chosen cleaner onto a cloth or paper towel and give the pot a thorough wipe-down. This prevents any residue from hardening and ensures that your wax pot is ready for the next use.
Are there specific steps to follow for cleaning my wax pot effectively?
Yes, there are specific steps you can follow to ensure your wax pot is cleaned effectively. Here is a simple five-step process that many professionals recommend:
- Prepare Your Area: Remove any clutter around your waxing station and gather your cleaning supplies, like paper towels and your chosen cleaner.
- Heat the Wax Pot: Turn on the wax pot to a high setting. This helps melt any wax residue, making it easier to clean.
- Wipe Out Excess Wax: use a paper towel to wipe away any excess wax. Be thorough to ensure you remove all remnants.
- Apply Cleaner: Next, spray your cleaner onto a cloth or paper towel and wipe down the interior and exterior of the pot. Pay attention to any sticky spots.
- final Inspection: Allow the pot to cool for a moment,then inspect it for any leftover wax or cleaner,ensuring it’s ready for the next use.[[3]].
Following these steps will help you maintain a clean work environment, which is vital for client trust and satisfaction.
What should I do if the wax pot has stubborn residue?
Stubborn residue in your wax pot can be quite a hassle but don’t worry; there are strategies to tackle this issue. Start by heating your wax pot on high to soften the wax. Once it’s warm, use a paper towel to wipe away the majority of the softened wax. For tougher spots, you might need to let the wax heat up for an additional few minutes.
If some residue still remains, apply your cleaner directly to the tough spot. Allow it to sit for a minute to penetrate the residue, then take a clean paper towel to scrub it gently. If necessary, repeat this process until the pot is fully clean. In some instances, you may also use a plastic spatula to scrape off the remaining wax, but ensure you do this carefully to avoid scratching the pot.
What mistakes should I avoid while cleaning my wax pot?
When cleaning your wax pot, there are a few common mistakes you should avoid to ensure you’re doing it effectively and safely. one of the primary pitfalls is not heating the pot sufficiently before cleaning. If the wax is hard, it will be significantly more difficult to clean. Always remember to do a pre-clean heat-up.
Another mistake is using inappropriate cleaners.Strong chemical substances that are not designed for use on wax pots can damage the heating element or the pot’s interior. Stick to gentle, wax-specific cleaners or natural options like orange oil that are effective and safe [[2]].
Lastly, neglecting to clean after every major use can lead to significant buildup, making the cleanup much harder down the line. Taking the time, even during busy periods, to clean thoroughly after each use is crucial in maintaining your wax pot’s longevity and effectiveness.
How can I ensure my wax pot lasts longer?
To ensure your wax pot lasts as long as possible, it’s vital to establish a consistent cleaning routine. As mentioned previously, cleaning after each full use will help maintain its condition. in addition to this, always store your wax pot in a cool, dry place when not in use and avoid exposing it to extreme temperatures.
Be mindful of the amount of wax you use each time; overfilling the pot can lead to wax spillage and eventual buildup. you should also handle the pot with care, avoiding dropping it or subjecting it to harsh impacts. consider periodic professional servicing if your wax pot is used frequently in a busy setting to catch any issues early on before they escalate.
Final Thoughts
As you wrap up your journey through our maintenance tips for cleaning a wax pot, it’s crucial to remember that proper care will not only extend the life of your waxing equipment but also enhance the overall waxing experience. By following the straightforward steps outlined—preparing your workspace, selecting the right cleaning products, and establishing a regular cleaning routine—you’ll be well on your way to a hygienic and efficient waxing process.
Keeping your wax pot clean helps prevent contamination and ensures that each session is as smooth and comfortable as possible. With just a little effort each week, you can maintain a spotless environment that reflects your commitment to quality and care.Now that you have the knowledge, it’s time to take action! Dive into your cleaning routine with confidence, knowing that a well-maintained wax pot leads to the best results for you and your clients. Happy waxing!
Get our latest guides, news, and insights highlighted in your Google Search & AI Overviews.