✨ This article was AI edited. Editorial responsibility: Britany Marshall Beauty.
Every foolproof makeup tutorial starts with understanding skin prep chemistry, light-reflecting placement, and brush physics rather than piling on heavy layers of pigment. After testing dozens of backstage studio methods across dry, oily, and textured complexions, we curated fifteen high-impact application upgrades that prevent cakey separation and midday creasing. Whether you want a breathable daytime glow or a sixteen-hour event base, these step-by-step techniques deliver undetectable, camera-ready polish.
| # | Makeup Tutorial / Technique | Skill Level | Solves Problem | Finish / Payoff |
|---|---|---|---|---|
| 1 | Jawline-to-Chest Undertone Matching | Beginner | Floating orange or ashy foundation mask | Undetectable neck-to-chest shade harmony |
| 2 | Silicone vs. Water Primer Compatibility | Beginner | Foundation pilling, rolling, and patchy separation | Grippy, crease-resistant 12-hour base |
| 3 | Damp Sponge vs. Kabuki Brush Physics | Beginner | Streaky brush marks and emphasized enlarged pores | Airbrushed micro-stippled skin texture |
| 4 | Inner-Corner & Temple Concealer Dot Hack | Beginner | Creasing under-eye bags and heavy cakey concealer | Instant lifted cheekbone and bright tear trough |
| 5 | Setting Spray Sandwiching Tutorial | Intermediate | Midday T-zone melting and transfer onto collars | Water-resistant second-skin polymer seal |
| 6 | Velour Puff Pressing vs. Loose Baking | Beginner | Dry crepey under-eye flashback and smile line cracking | Velvety blurred pores with zero dry cast |
| 7 | Hooded Eye Open-Eye Bat-Wing Liner | Intermediate | Winged eyeliner disappearing or warping in eyelid folds | Crisp, straight cat-eye flick with eyes relaxed |
| 8 | Precision Nose Contour Mapping | Intermediate | Muddy side stripes that make the nose look wider | Soft anatomical shadow and lifted button tip |
| 9 | No-Foundation Clean Girl Aesthetic | Beginner | Heavy clogged pores and visible daytime makeup texture | Breathable glass-skin luminosity in 5 minutes |
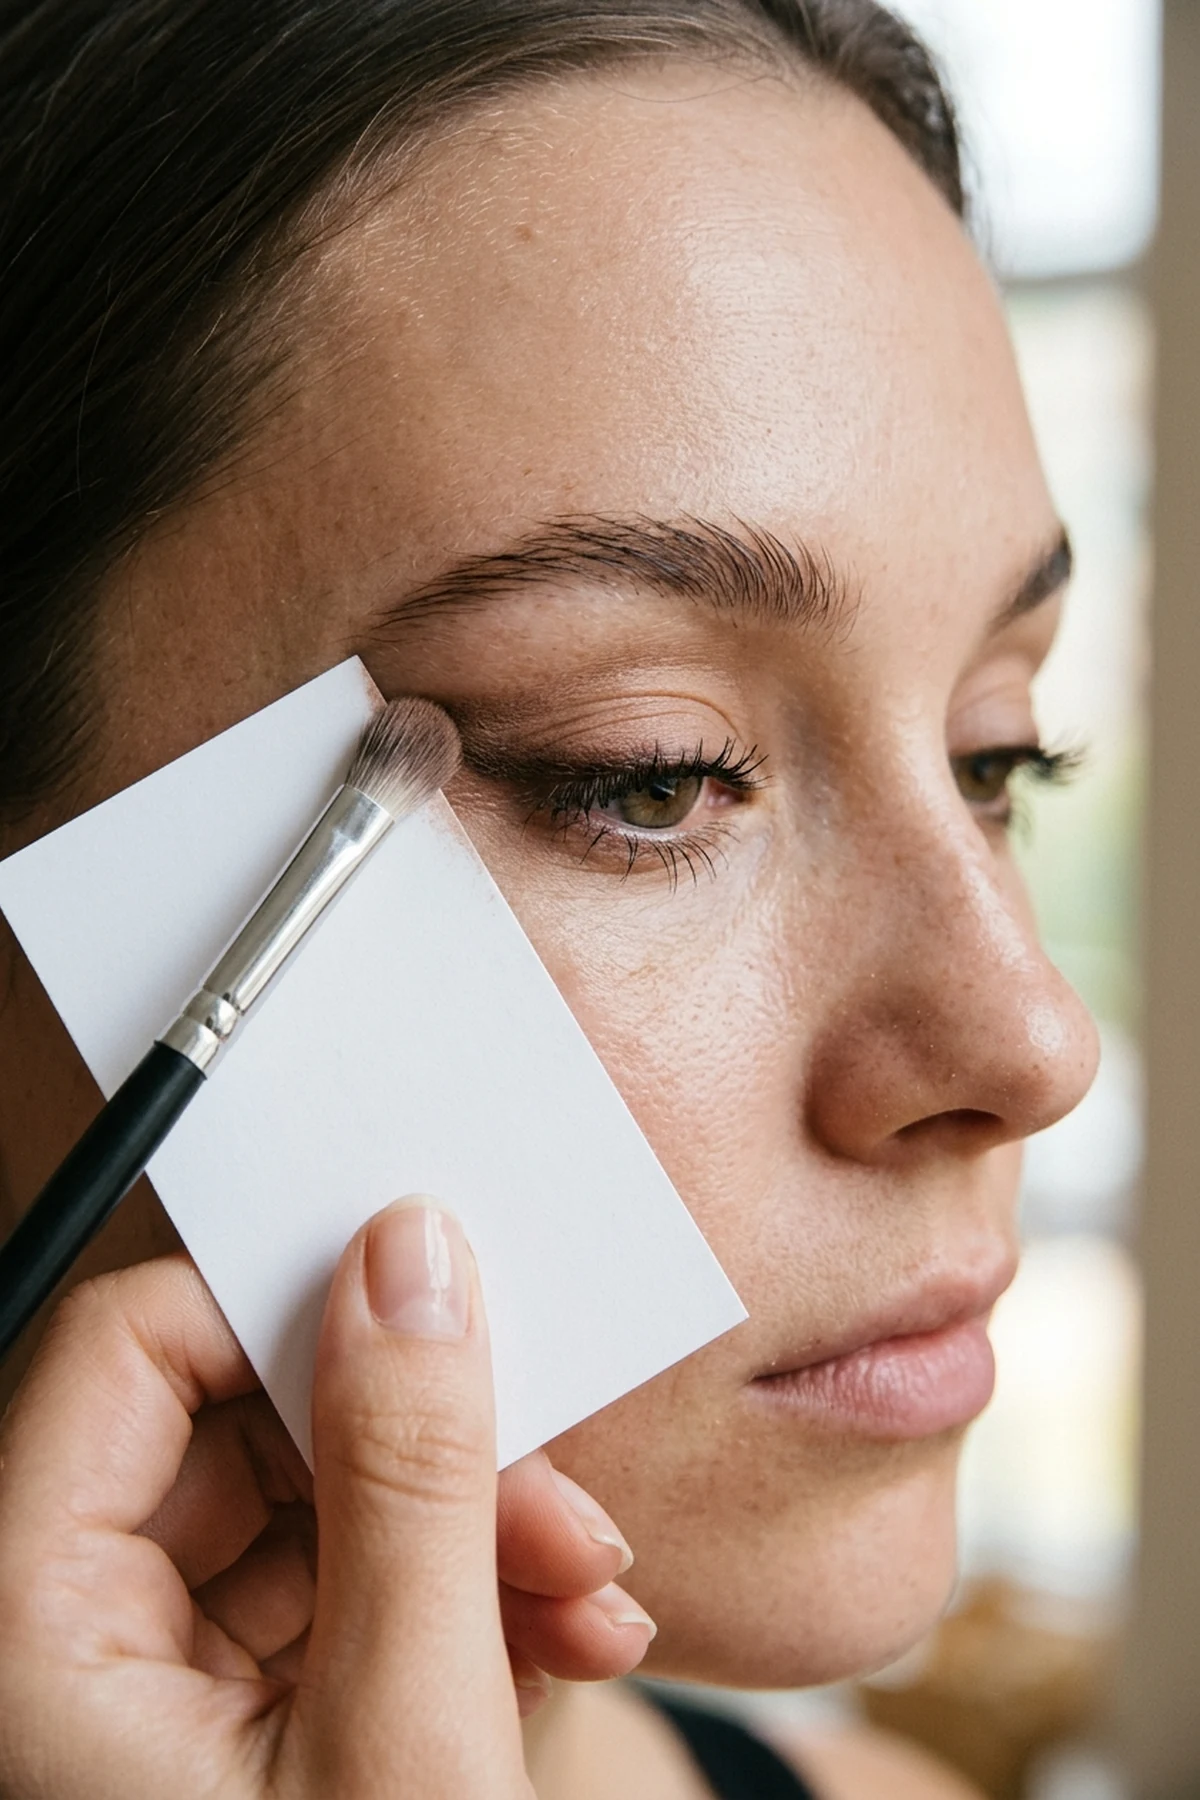
| 10 | Credit Card & Spoon Winged Liner Stencil | Beginner | Shaky hands and uneven asymmetrical eyeliner flicks | Symmetrical winged eyeshadow or liner in 10 seconds |
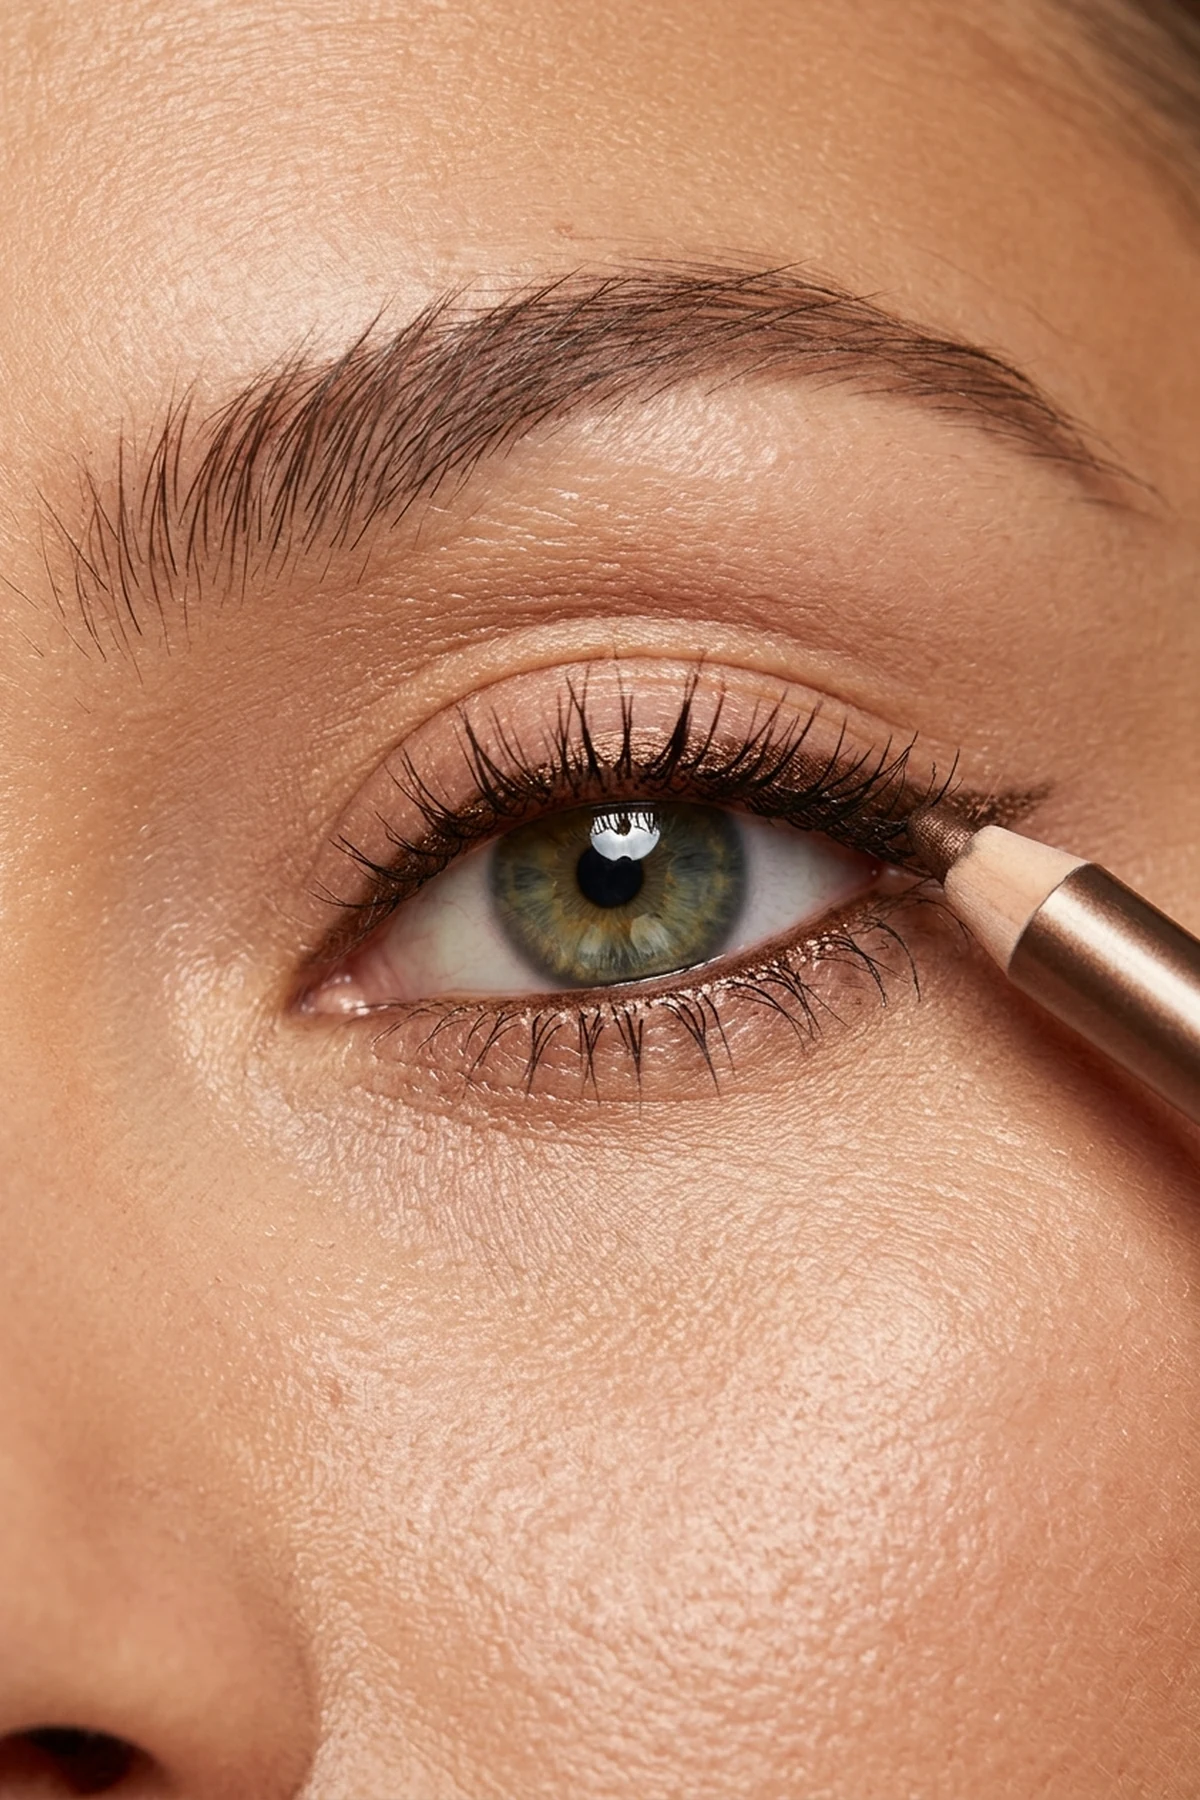
| 11 | Upper Waterline Tightlining Hack | Beginner | Flesh-colored gaps between lashes and sparse lash roots | Full lash-root definition without losing lid space |
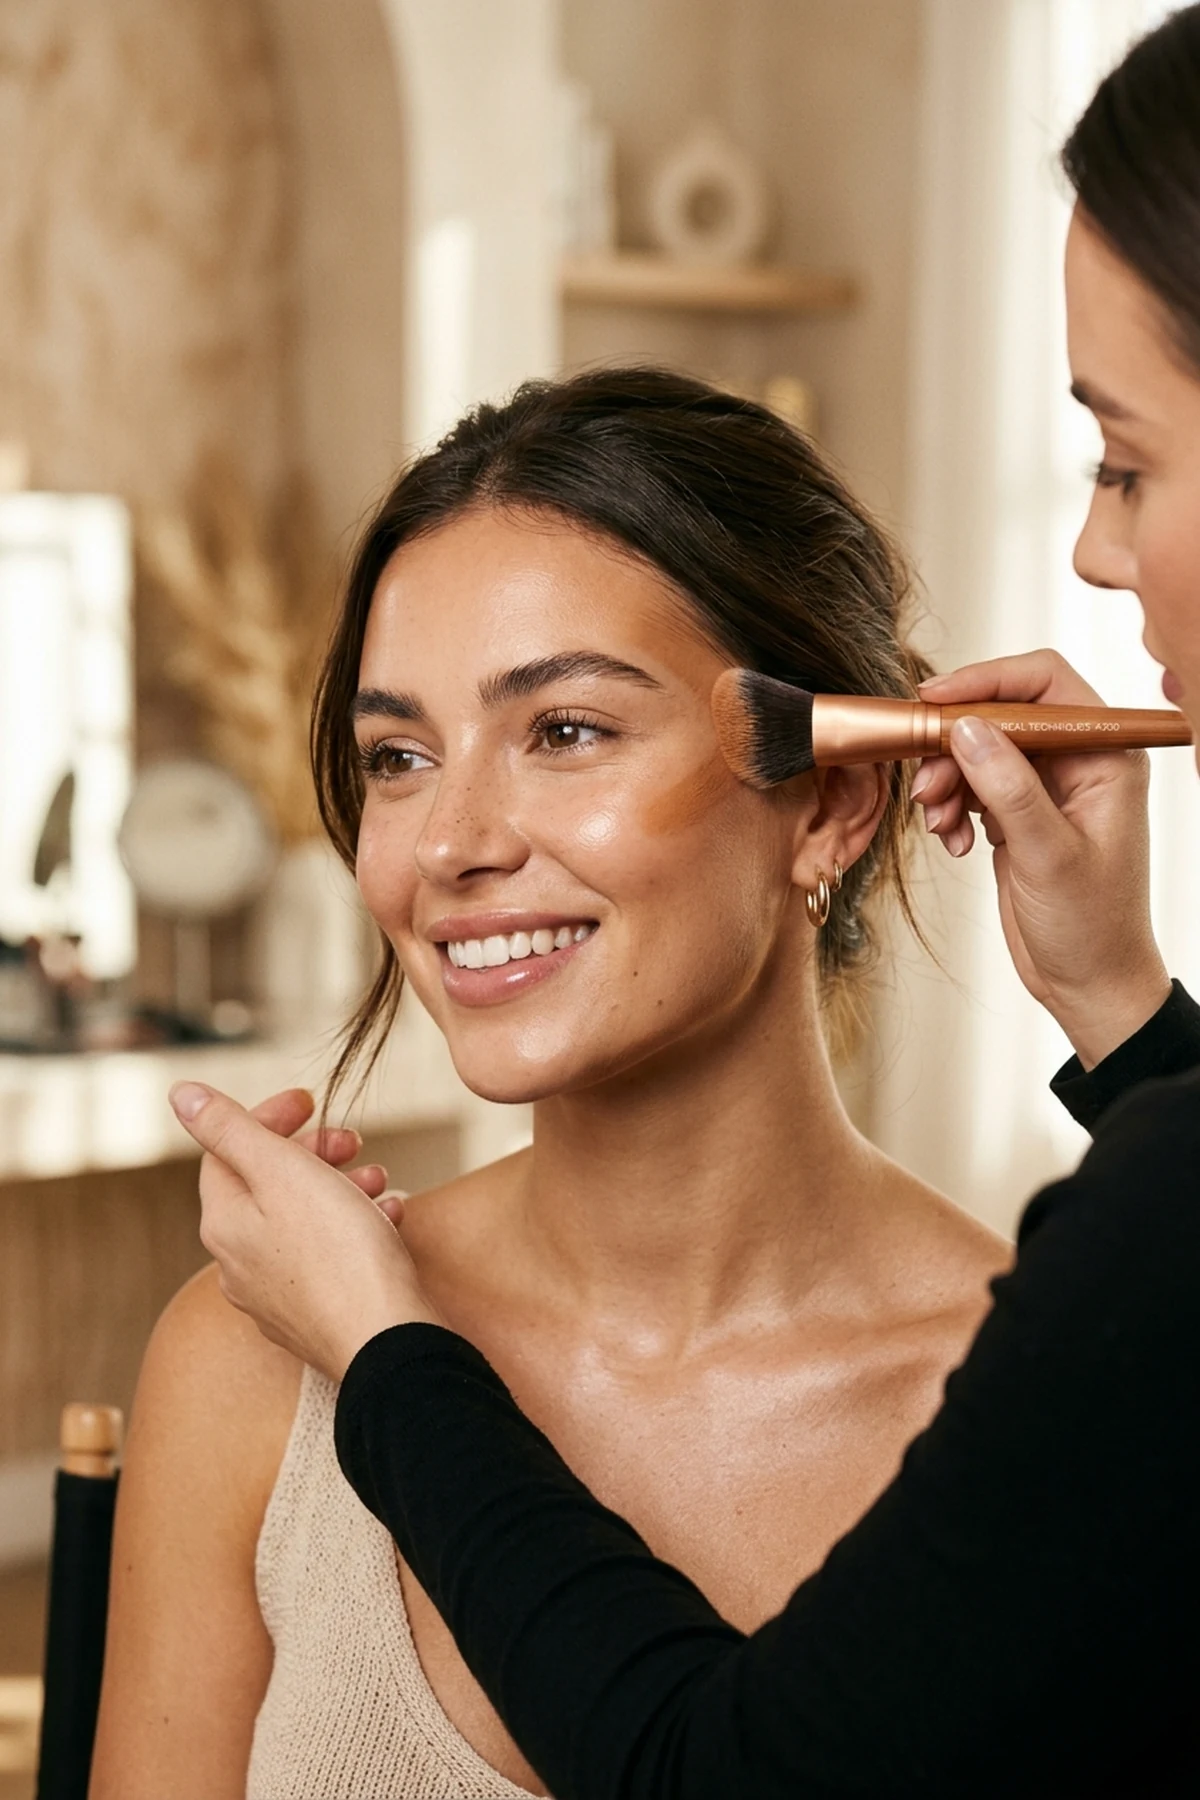
| 12 | Three-Stroke Cream Bronzer Sculpting | Beginner | Dragged-down cheekbones and muddy orange bronzer patches | Sun-kissed sculpted facial architecture |
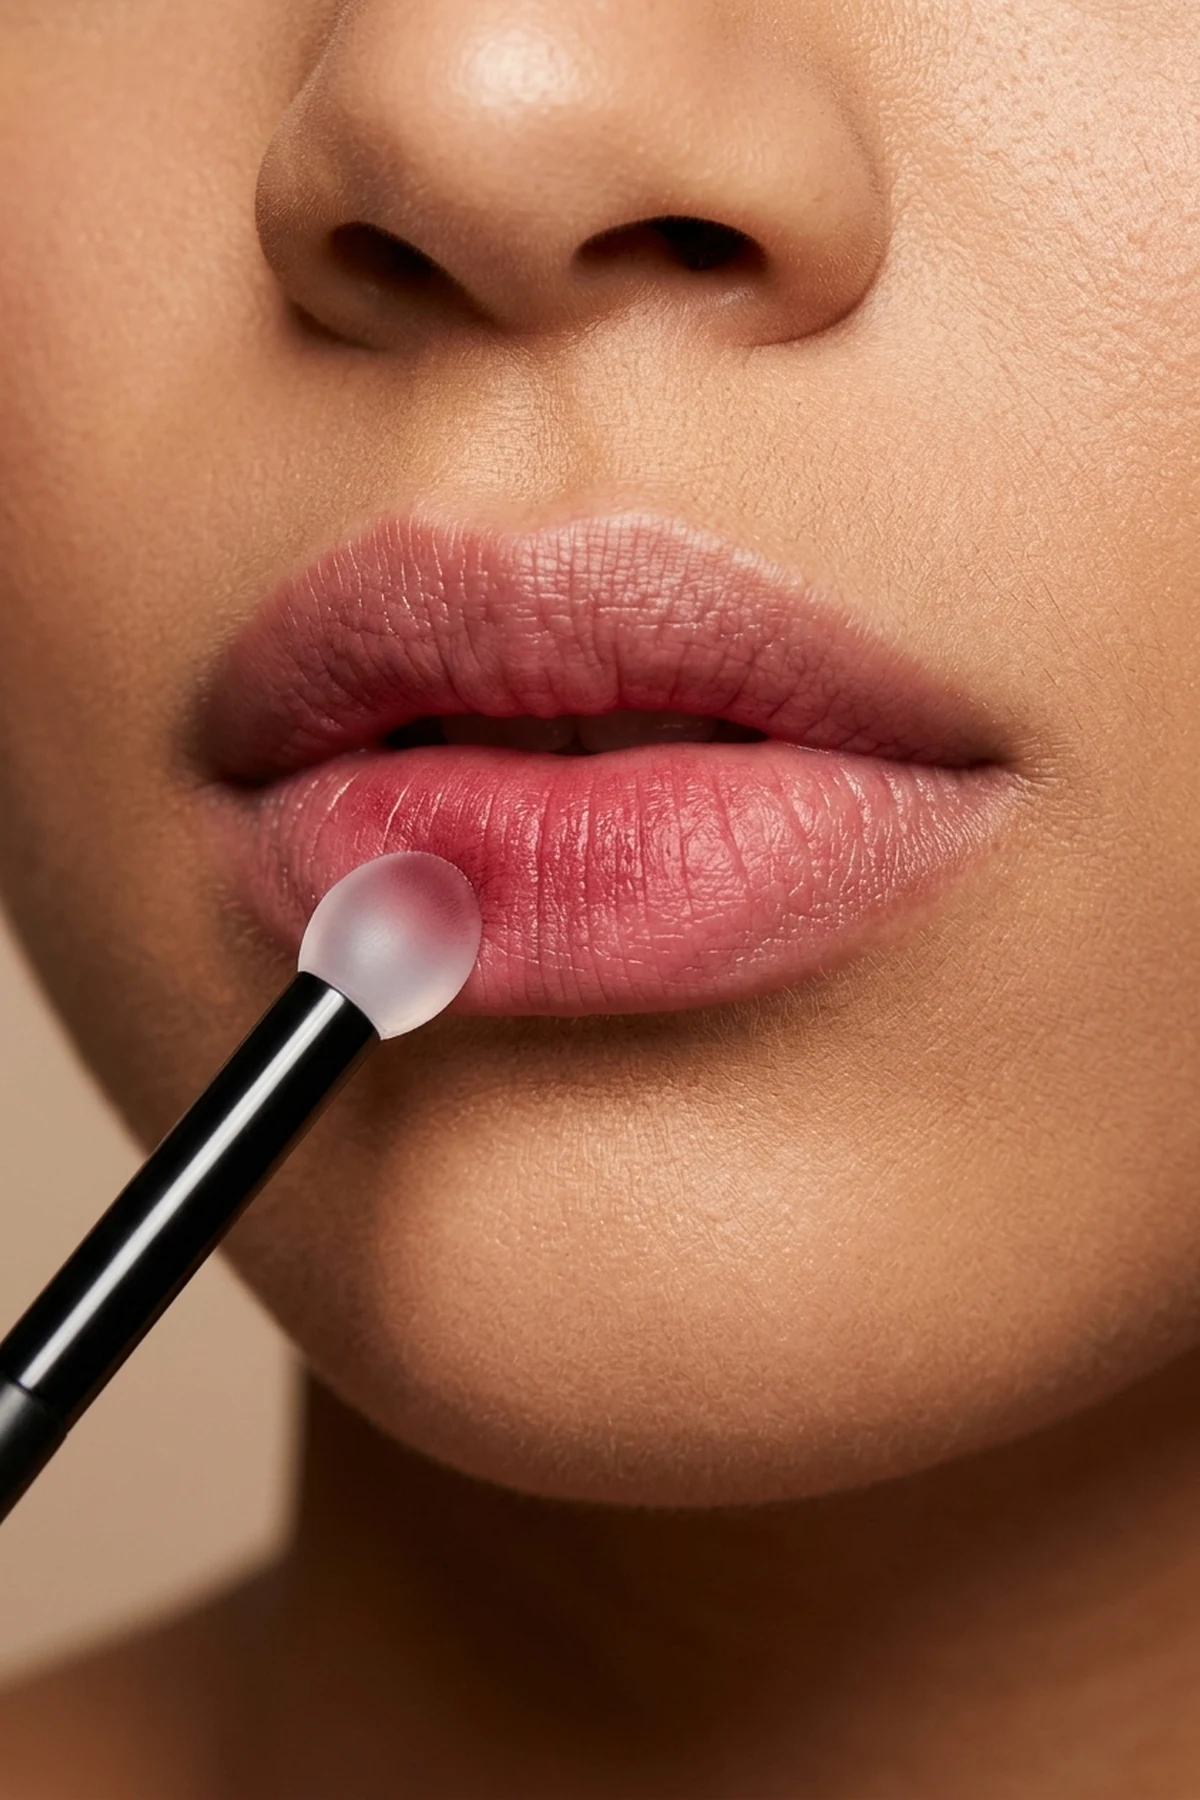
| 13 | Douyin Soft-Focus Gradient Lip Blurring | Beginner | Harsh 90s lip liner rings and thin upper lip proportions | Plush cushiony blurred petal lips |
| 14 | Peach Color-Correcting Dark Circles | Beginner | Gray cast showing through concealer on blue/purple shadows | Neutralized bright under-eyes with ultra-thin layers |
| 15 | Tissue-Pressed Powder Lash & Lip Lock | Beginner | Fading lipstick on coffee cups and flat sparse eyelashes | Transfer-proof velvet lips and 2x lash volume |
Contents of Article
- 1. Jawline-to-Chest Undertone Matching Tutorial for a Seamless Base
- 2. Silicone vs. Water-Based Primer Compatibility Hack to Stop Separation
- 3. Damp Sponge vs. Dense Kabuki Brush Physics for Poreless Blending
- 4. Inner-Corner & Temple Concealer Dot Hack vs. Heavy Triangle Caking
- 5. Setting Spray Sandwiching Tutorial for 16-Hour Melt-Proof Wear
- 6. Velour Puff Pressing vs. Loose Powder Baking for Crease-Free Under-Eyes
- 7. Hooded Eye Makeup Tutorial: The Open-Eye Bat-Wing Liner Mapping Hack
- 8. Precision Nose Contour Mapping Tutorial for Narrow & Button Bridges
- 9. Clean Girl Aesthetic Makeup Tutorial Without Foundation and Concealer
- 10. Easy Eye Makeup Tutorial: The Credit Card & Spoon Winged Liner Stencil
- 11. Upper Waterline Tightlining Hack for Instant Lash-Line Density
- 12. Three-Stroke Temple-to-Jawline Cream Bronzer Sculpting Tutorial
- 13. Douyin Makeup Tutorial: Soft-Focus Gradient Lip Blurring & Cupid’s Bow Overlining
- 14. Natural Makeup Tutorial for Beginners: Peach Color-Correcting Dark Circles
- 15. Simple Makeup Tutorial: Tissue-Pressed Translucent Powder Lash & Lip Lock
- Frequently Asked Questions
- What is the correct step-by-step order to apply makeup for beginners?
- Why does my foundation look cakey or separate around my nose and chin?
- Should you put concealer on before or after foundation?
- How do I keep winged eyeliner from smudging or disappearing on hooded eyes?
- How can I remove waterproof tightliner and polymer-sealed makeup without tugging my lashes?
1. Jawline-to-Chest Undertone Matching Tutorial for a Seamless Base
🎯 Solves Problem: Floating orange or ashy foundation mask
✨ Finish / Payoff: Undetectable neck-to-chest shade harmony
Few steps are more beginner friendly than mastering jawline-to-chest undertone swatching before committing to a full bottle of foundation. Testing liquid pigments on the back of your hand or inner wrist almost always misleads you because extremities carry different vascular tones and sun exposure than your face and collarbone.
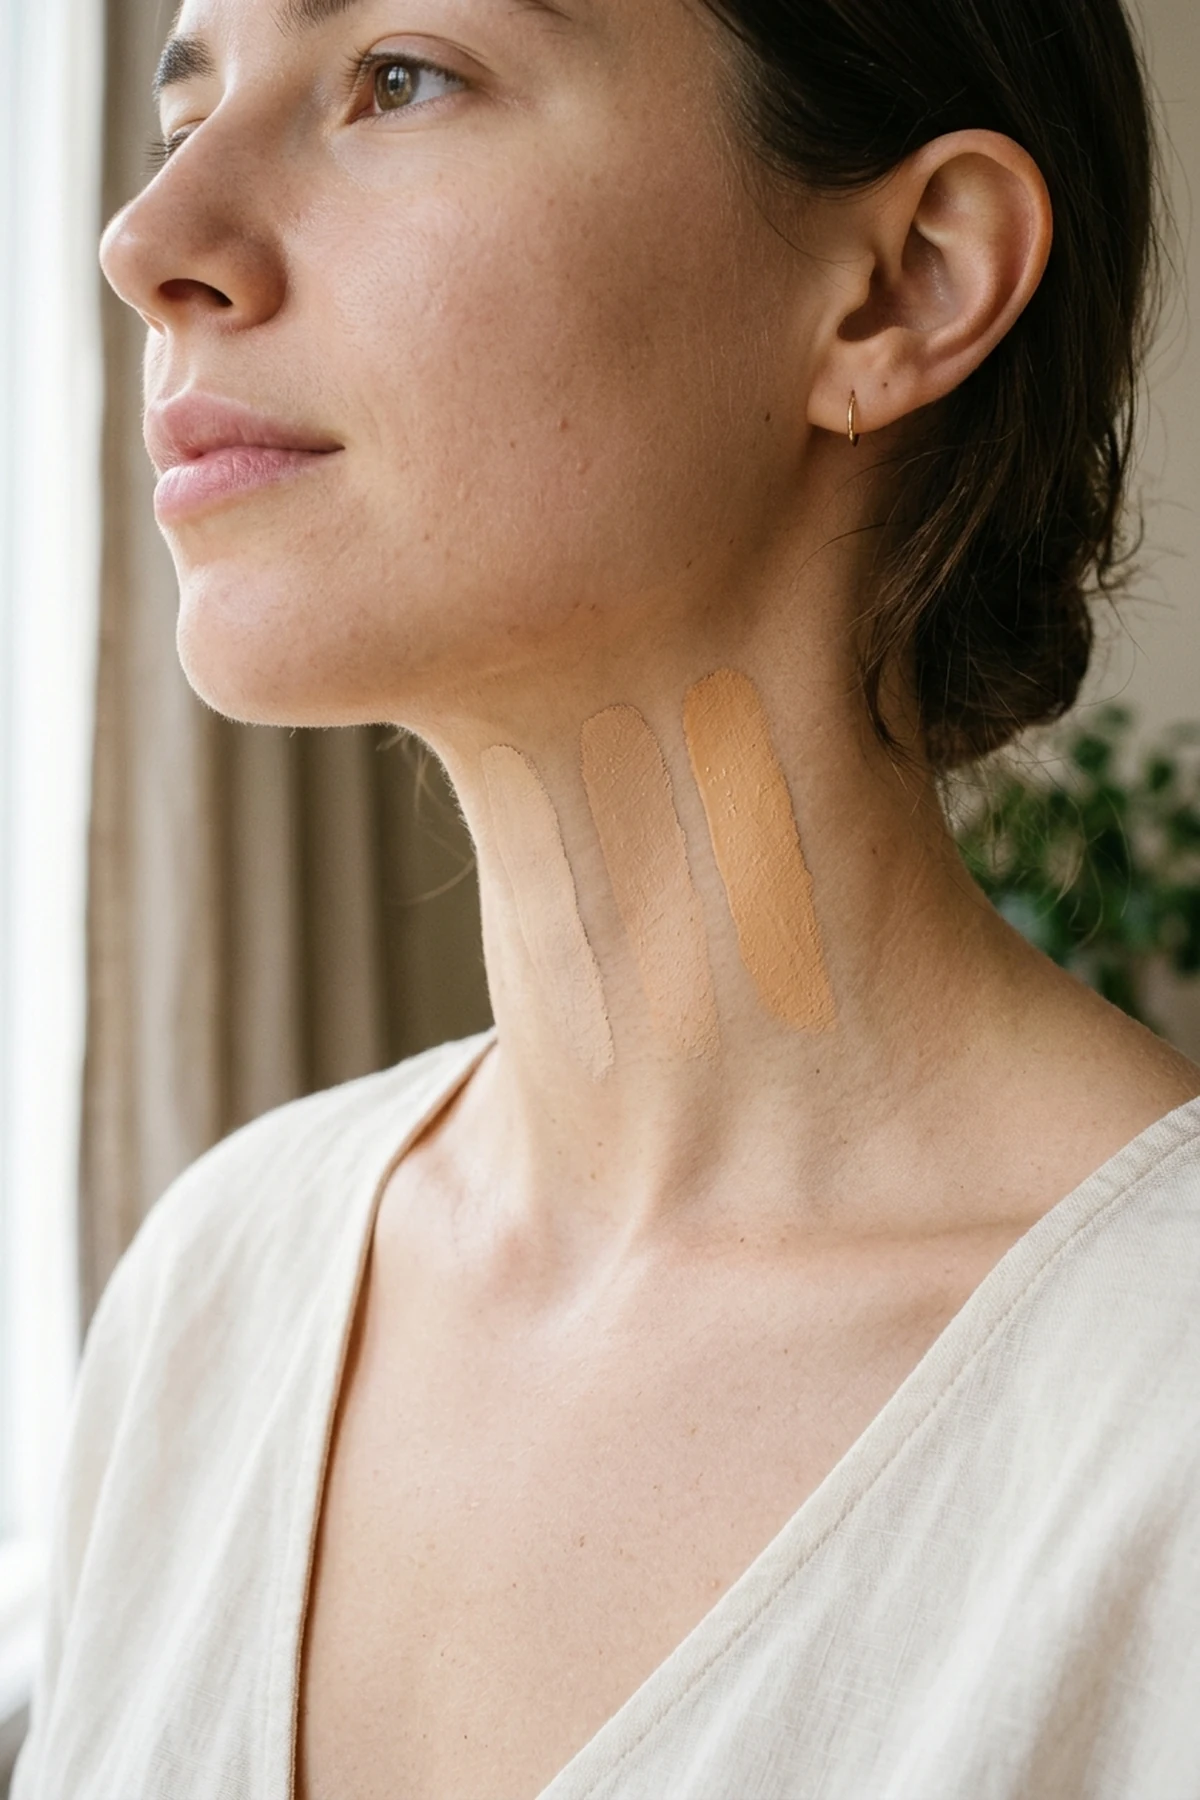
Swipe three candidate shades of a sheer buildable serum skin tint or medium-coverage liquid foundation in vertical stripes starting at your lower cheek, crossing the jawbone, and extending down toward the center of your collarbone. Wait ten full minutes before judging the match so volatile silicones evaporate and iron oxides settle into their true dried-down hue under natural window daylight.
Professional studio artists always match the chest and neck rather than over-correcting facial redness, which immediately eliminates the dreaded floating mask effect in flash photography. Once the correct undertone disappears seamlessly into your skin between the jaw and chest, a single thin layer across the center of the face ties your entire complexion together effortlessly.
2. Silicone vs. Water-Based Primer Compatibility Hack to Stop Separation
🎯 Solves Problem: Foundation pilling, rolling, and patchy separation
✨ Finish / Payoff: Grippy, crease-resistant 12-hour base
This expert pick solves the most frustrating mystery in everyday routines: why expensive foundation suddenly balls up and flakes around the nostrils and chin within twenty minutes. The culprit is rarely your skin texture, but rather a chemical clash between incompatible base layers that repel one another on contact.
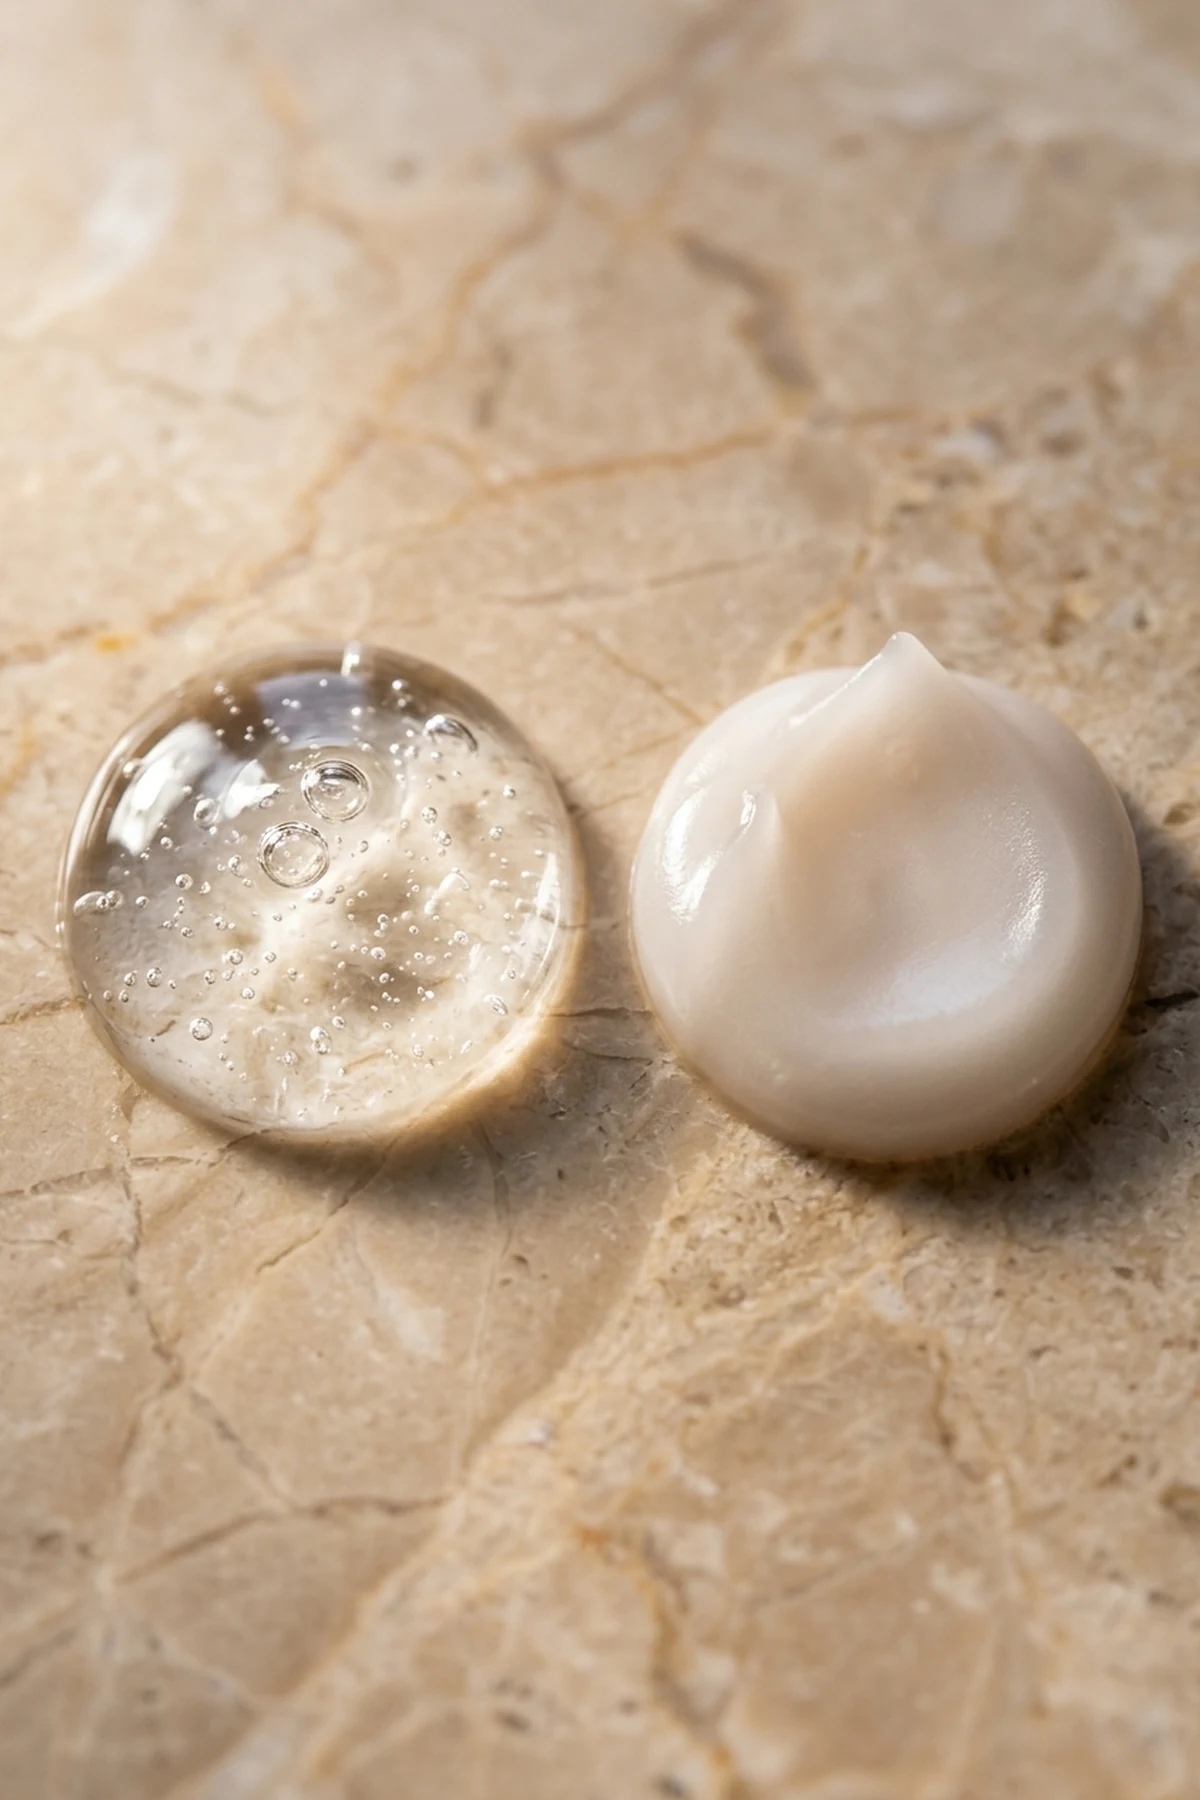
For a foolproof silicone-water emulsion pilling fix, check the first five ingredients on your bottles before layering. Pair water-based foundations with a silicone-free gripping hydro primer rich in aloe, glycerin, or prickly pear extract, and reserve dimethicone-heavy blurring primers exclusively for foundations listing cyclopentasiloxane or dimethicone near the top of the formula.
In professional editorial prep, artists also enforce a ninety-second absorption pause between moisturizer, sunscreen, and primer for reliable cakey base separation prevention. Letting each thin film set until slightly tacky ensures your pigment locks onto the skin rather than sliding across unabsorbed emollients.
3. Damp Sponge vs. Dense Kabuki Brush Physics for Poreless Blending
🎯 Solves Problem: Streaky brush marks and emphasized enlarged pores
✨ Finish / Payoff: Airbrushed micro-stippled skin texture
Understanding tool physics is a massive time-saver when you want an airbrushed finish without spending twenty minutes fixing streaks. Every applicator exerts different shear force against your pores, meaning how you press or sweep pigment determines whether dry flakes lie flat or lift up.
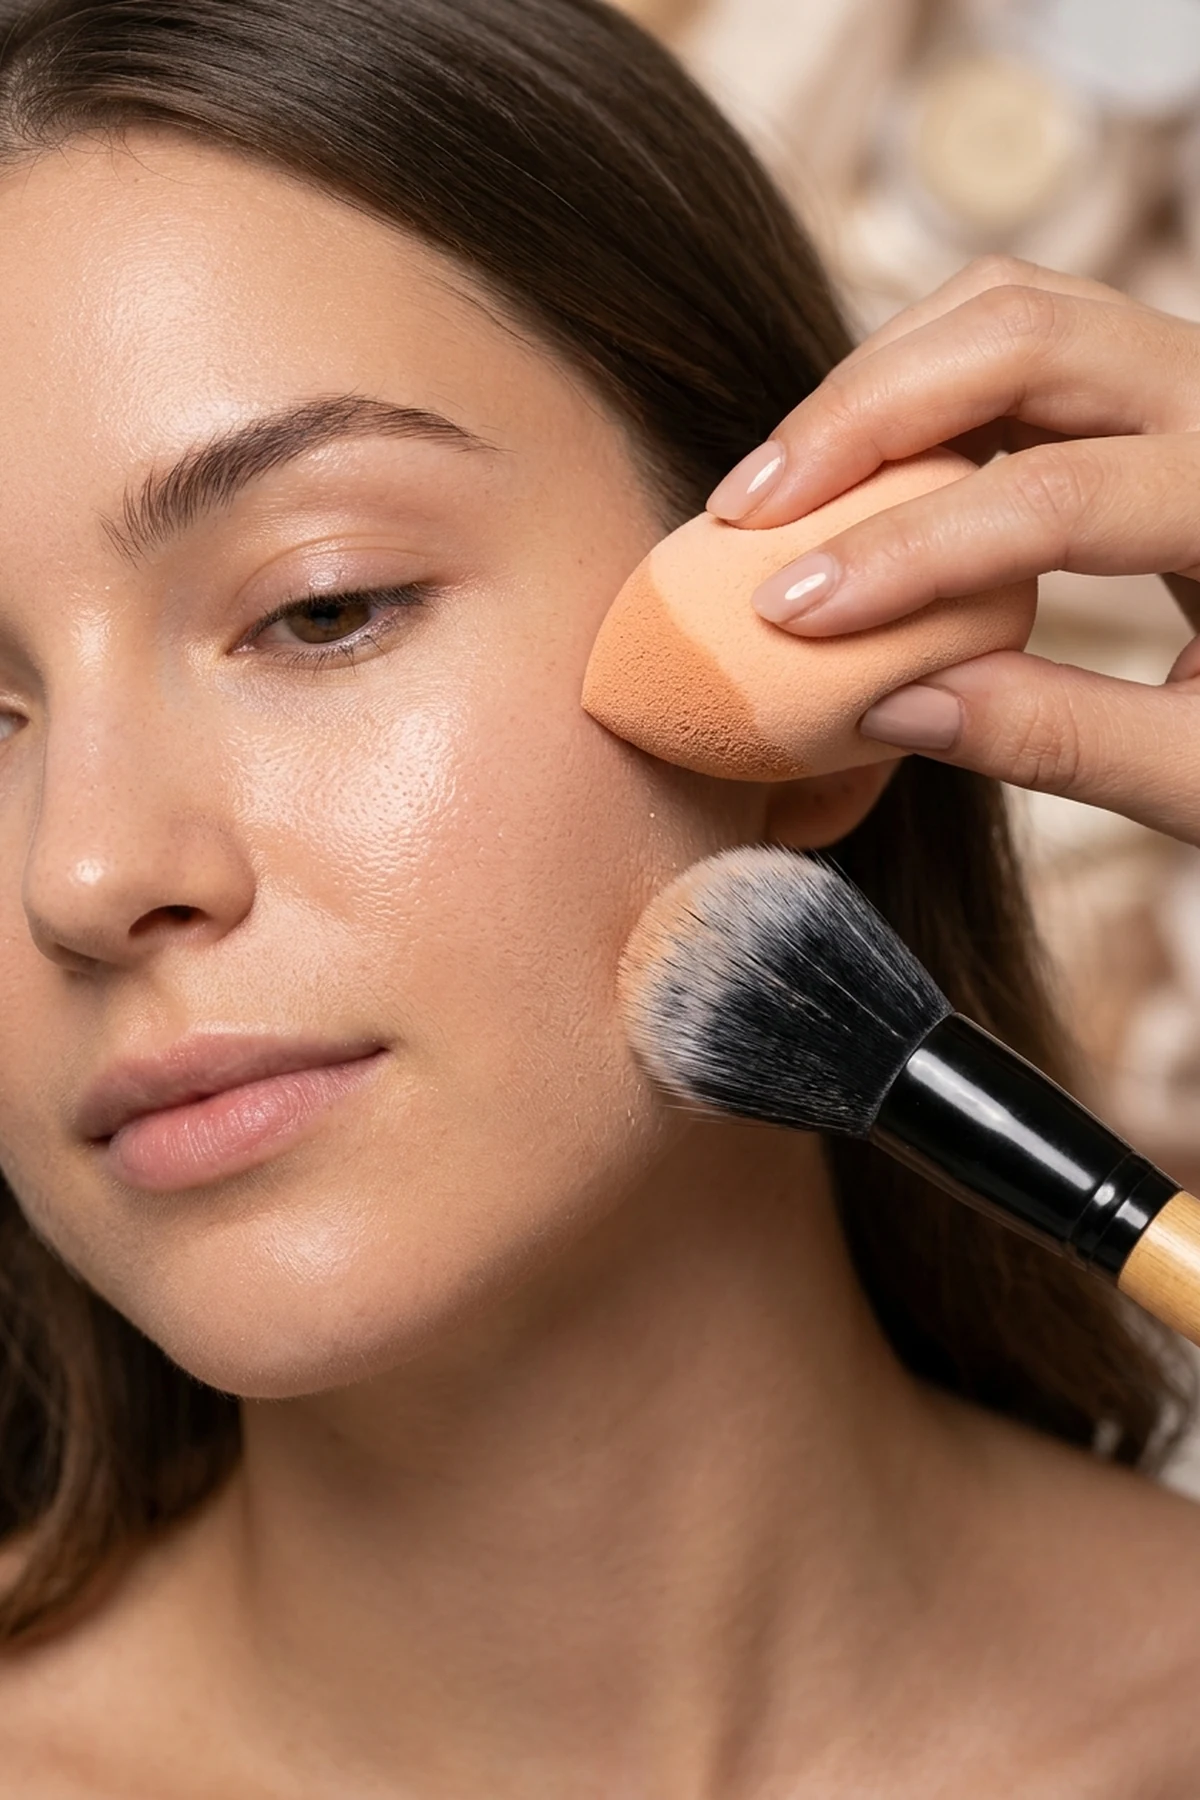
Start by pressing foundation across the cheeks and nose using a dense angled kabuki buffing brush in vertical tapping motions rather than harsh circular swirling, which micro-exfoliates dry patches. Immediately follow up with a damp open-cell blending sponge squeezed inside a clean towel so it holds zero dripping water, bouncing it lightly across transition zones to absorb excess oil and erase bristle tracks.
For DIY home routines, tool hygiene directly impacts how smoothly your base blends, as dried foundation buildup stiffens synthetic fibers and drags pigment out of enlarged pores. Make sure you clean and disinfect makeup brushes weekly so every stipple deposits a whisper-thin, poreless veil.
4. Inner-Corner & Temple Concealer Dot Hack vs. Heavy Triangle Caking
🎯 Solves Problem: Creasing under-eye bags and heavy cakey concealer
✨ Finish / Payoff: Instant lifted cheekbone and bright tear trough
As a major trend alert in modern beauty, the heavy inverted triangle of concealer painted from the lower lash line to the nostril has officially been retired. Packing thick pigment across the entire mobile under-eye zone guarantees creasing because the orbicularis oculi muscle contracts thousands of times every single hour.
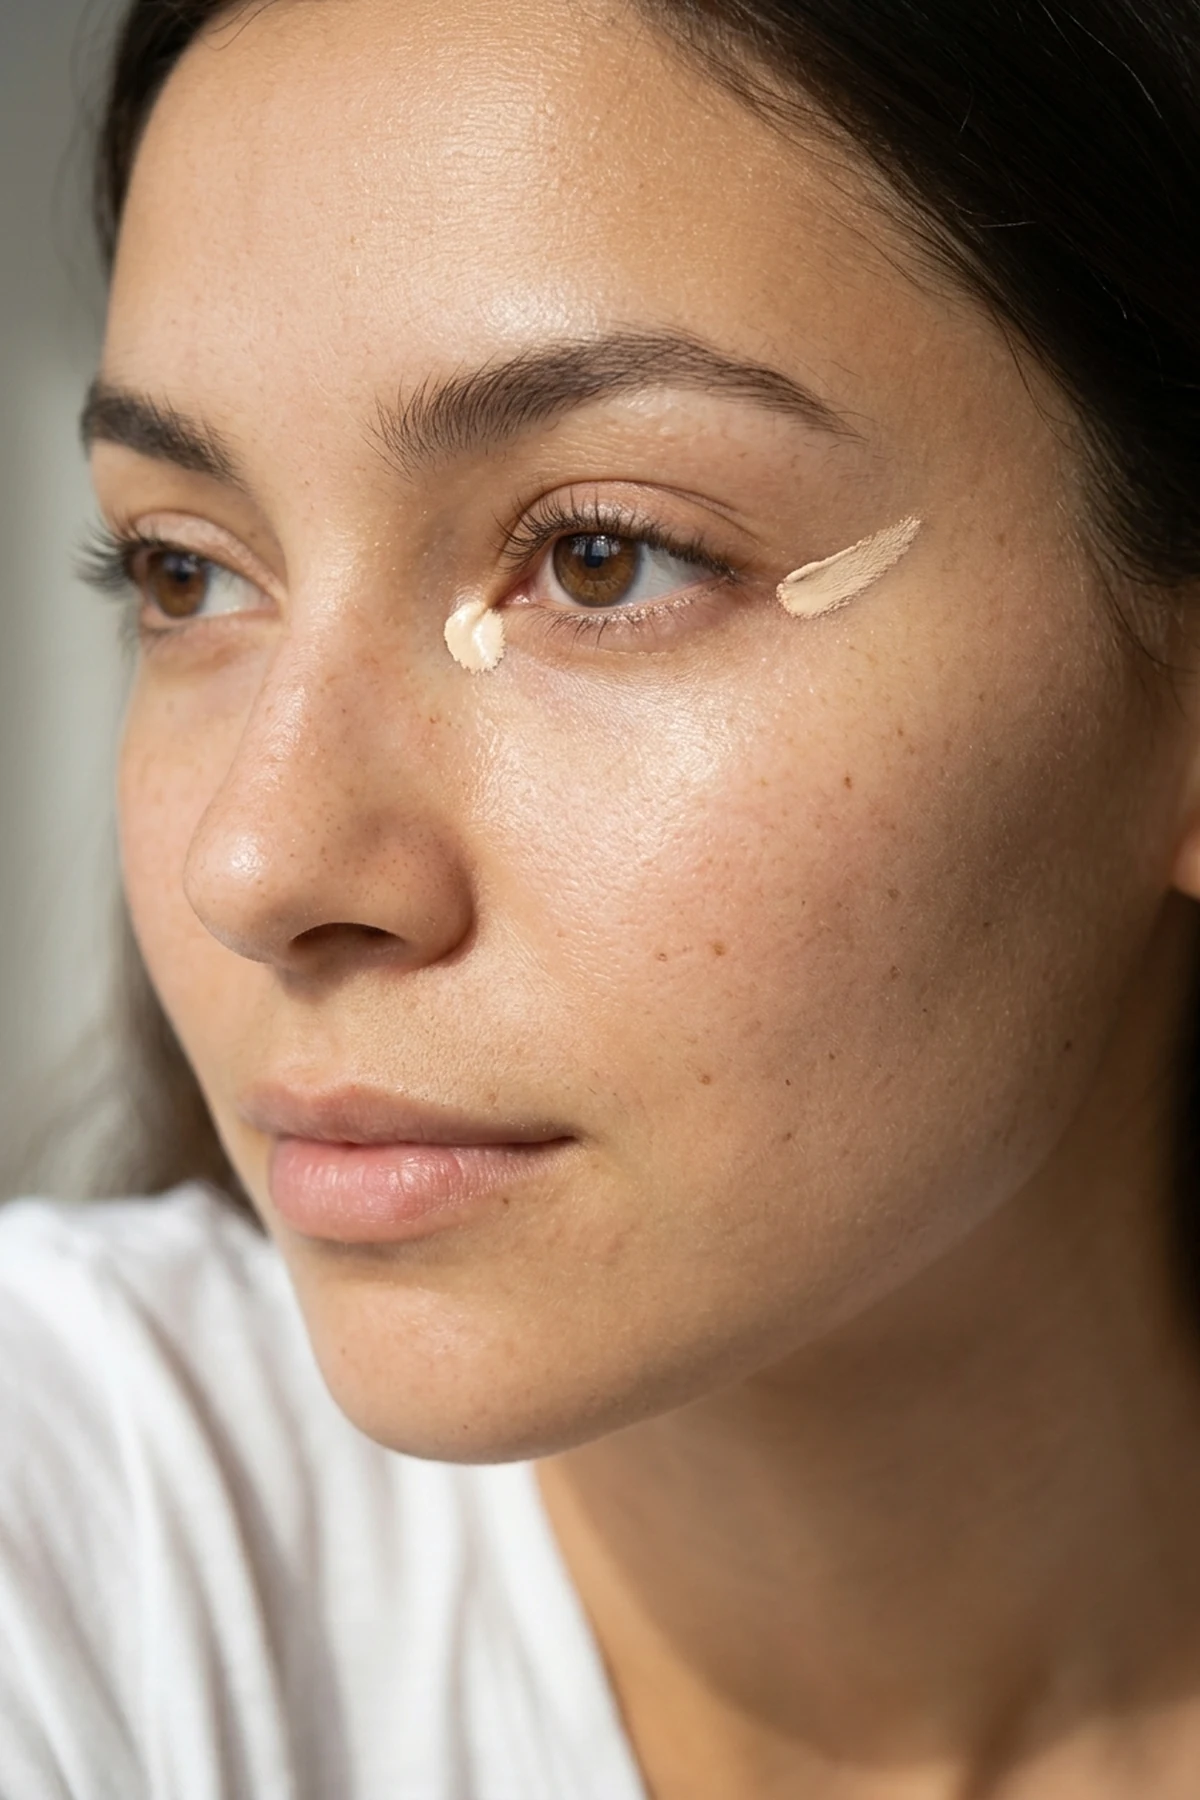
Replace that outdated block with the upward temple concealer dot hack by placing just two micro-dots of creamy medium-coverage concealer: one tucked into the deepest inner tear trough hollow, and a second flicked diagonally upward from the outer eye corner toward the temple. Let the pigment sit untouched for forty-five seconds to thicken slightly before tapping it in place with your ring finger or a small dome brush.
This minimalist placement is one of the most transformative pro complexion makeup tips because it concentrates brightness strictly where shadows recess while leaving expressive fine lines bare. You get an instant optical cheekbone lift using eighty percent less product and zero midday caking.
5. Setting Spray Sandwiching Tutorial for 16-Hour Melt-Proof Wear
🎯 Solves Problem: Midday T-zone melting and transfer onto collars
✨ Finish / Payoff: Water-resistant second-skin polymer seal
Misting your face once at the very end of your routine only coats the outer layer of powder, leaving the cream foundation underneath free to slide around. The hidden gem secret behind red-carpet longevity is treating your mist like structural mortar between each cosmetic texture.
To execute the setting spray sandwiching technique, mist a light X-and-T pattern over bare primed skin, apply and blend your liquid base, cream bronzer, and blush, and then mist a second time before touching any setting powder. Once that mid-layer of bi-phase polymer setting spray dries down for thirty seconds, press translucent powder only into high-shine zones and seal the finished look with one final micro-mist held ten inches away.
During humid seasonal shifts or outdoor summer weddings, this multi-layer polymer mesh fuses cream and powder particles into a single flexible film that moves with your facial expressions. Your complexion stays fresh, dimensional, and transfer-resistant for up to sixteen hours without ever feeling tight or crusty.
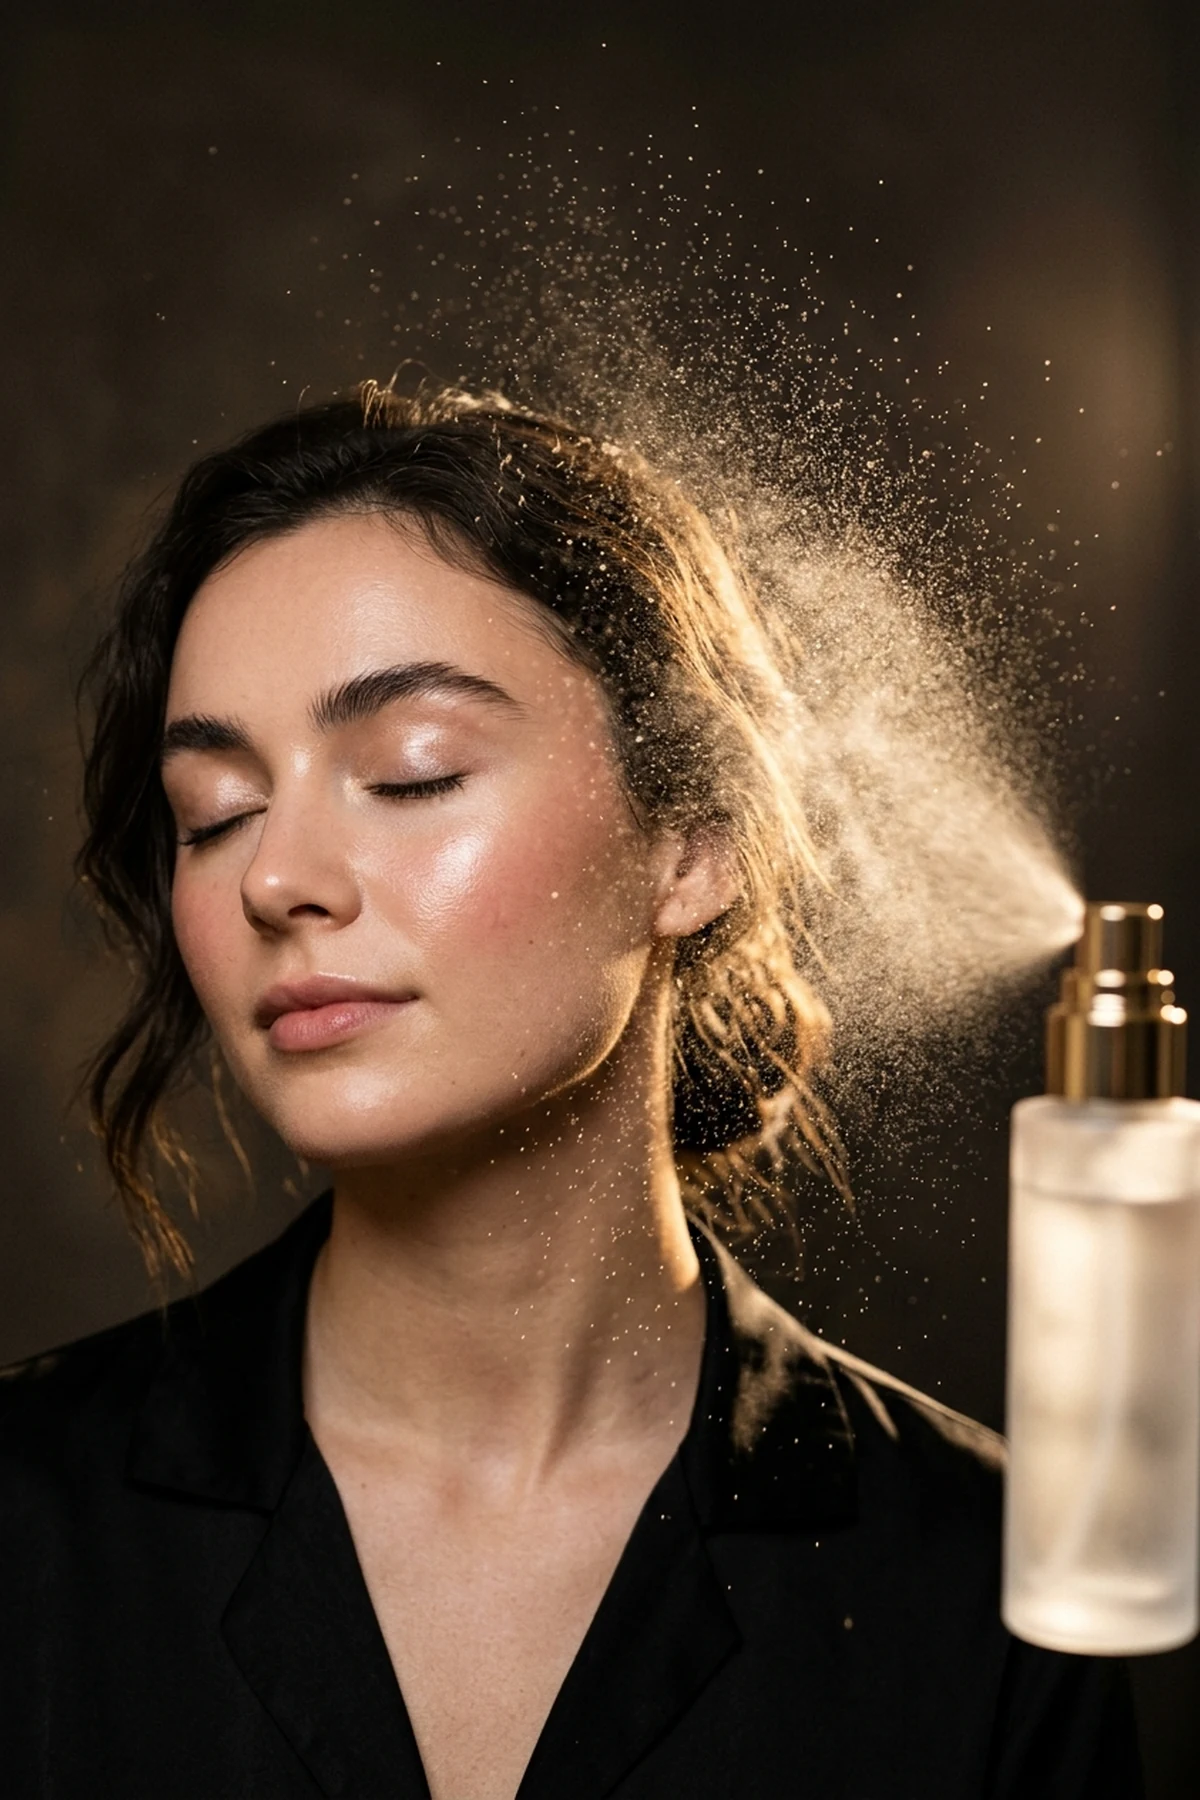
6. Velour Puff Pressing vs. Loose Powder Baking for Crease-Free Under-Eyes
🎯 Solves Problem: Dry crepey under-eye flashback and smile line cracking
✨ Finish / Payoff: Velvety blurred pores with zero dry cast
Swapping a thirty-dollar powder brush for a two-dollar velour triangle powder puff is the smartest budget swap you can make for your under-eye routine. Traditional loose powder baking—where heavy piles of talc sit under the eyes for five minutes—sucks every drop of moisture out of delicate skin and exaggerates fine lines under daylight.
Instead, dip the pointed corner of your puff into a micro-fine translucent setting powder, then firmly tap and roll the puff across the back of your clean hand for five seconds. This crucial priming step forces the loose silica particles deep into the velour fibers so no dry surface dust hits your concealer directly.
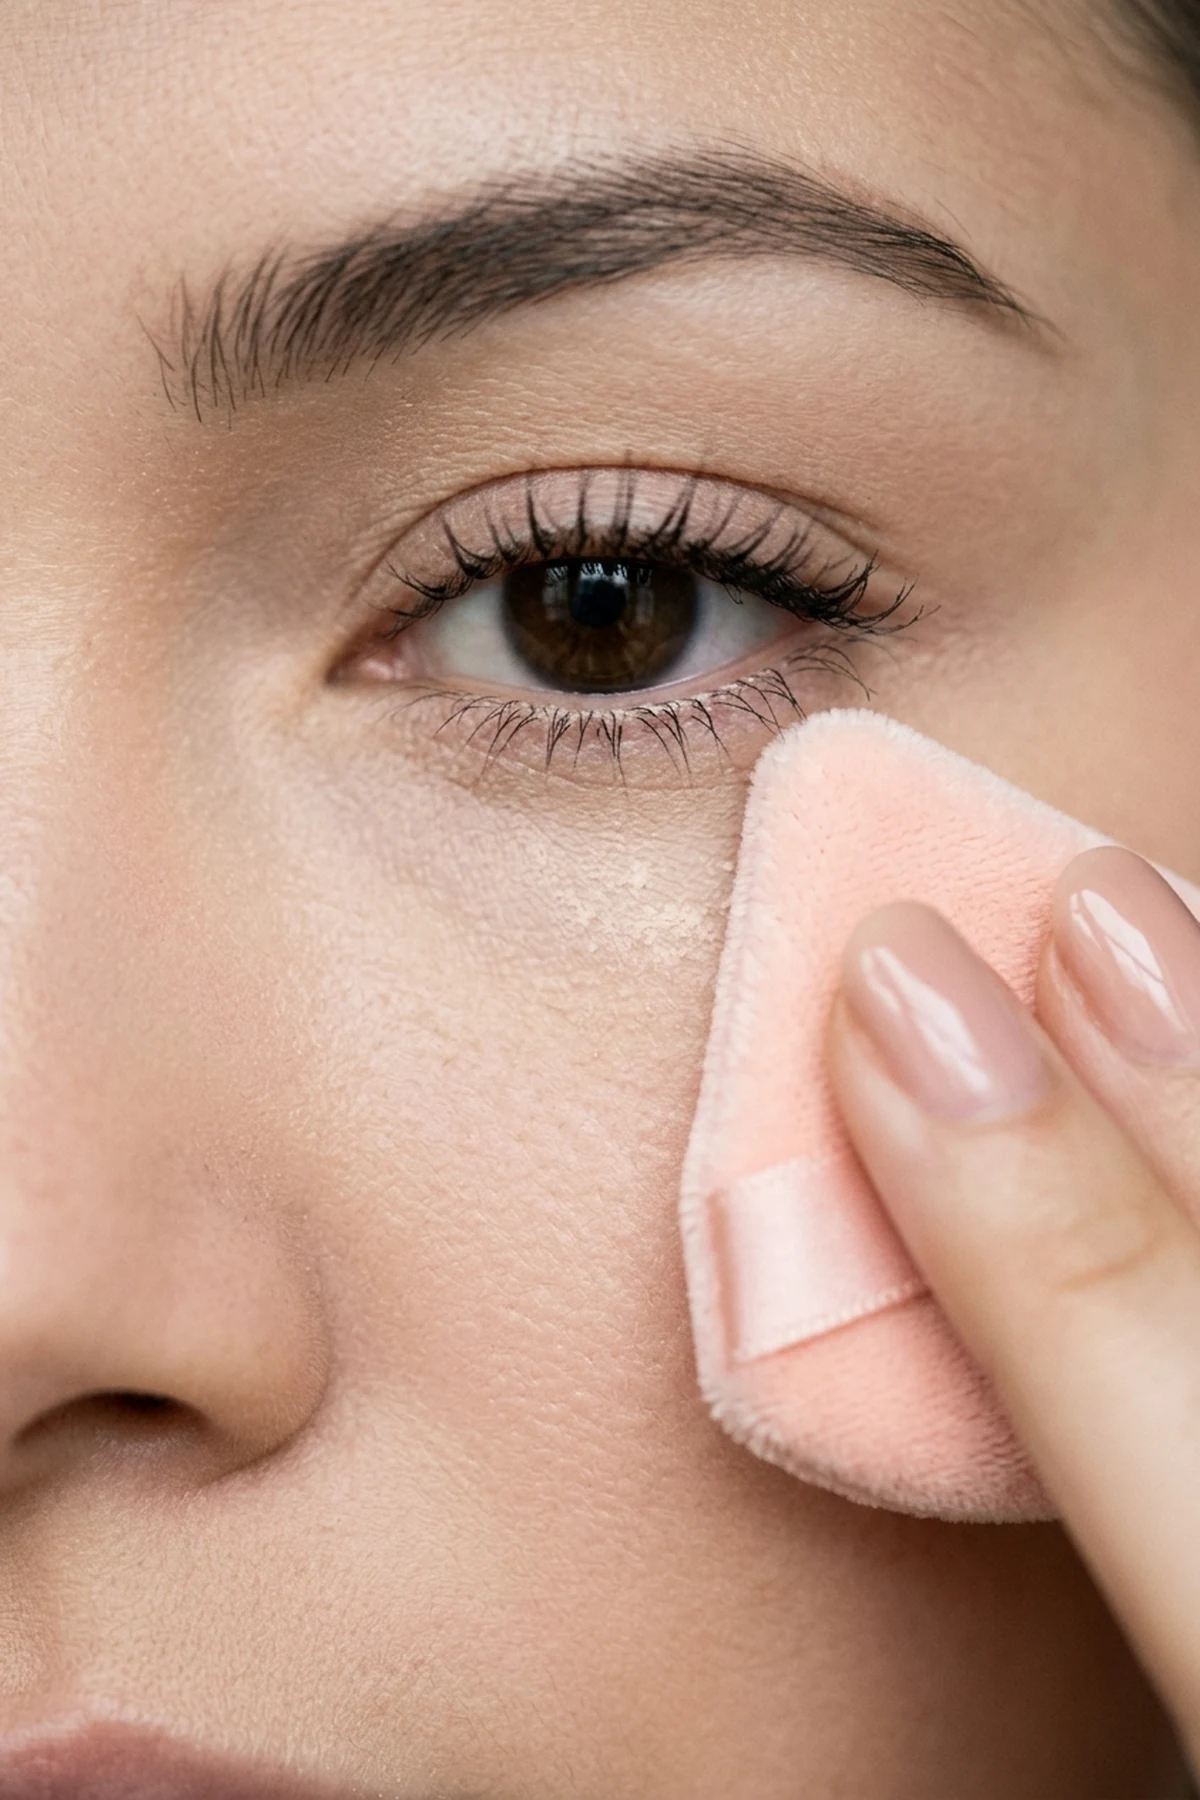
In professional studio work, artists look upward toward the ceiling to stretch the lower lid flat, tap out any last-second concealer creases, and press the loaded puff gently from the inner tear trough to the side of the nostril. You get an instant airbrushed filter that locks concealer in place without chalky white camera flashback.
7. Hooded Eye Makeup Tutorial: The Open-Eye Bat-Wing Liner Mapping Hack
🎯 Solves Problem: Winged eyeliner disappearing or warping in eyelid folds
✨ Finish / Payoff: Crisp, straight cat-eye flick with eyes relaxed
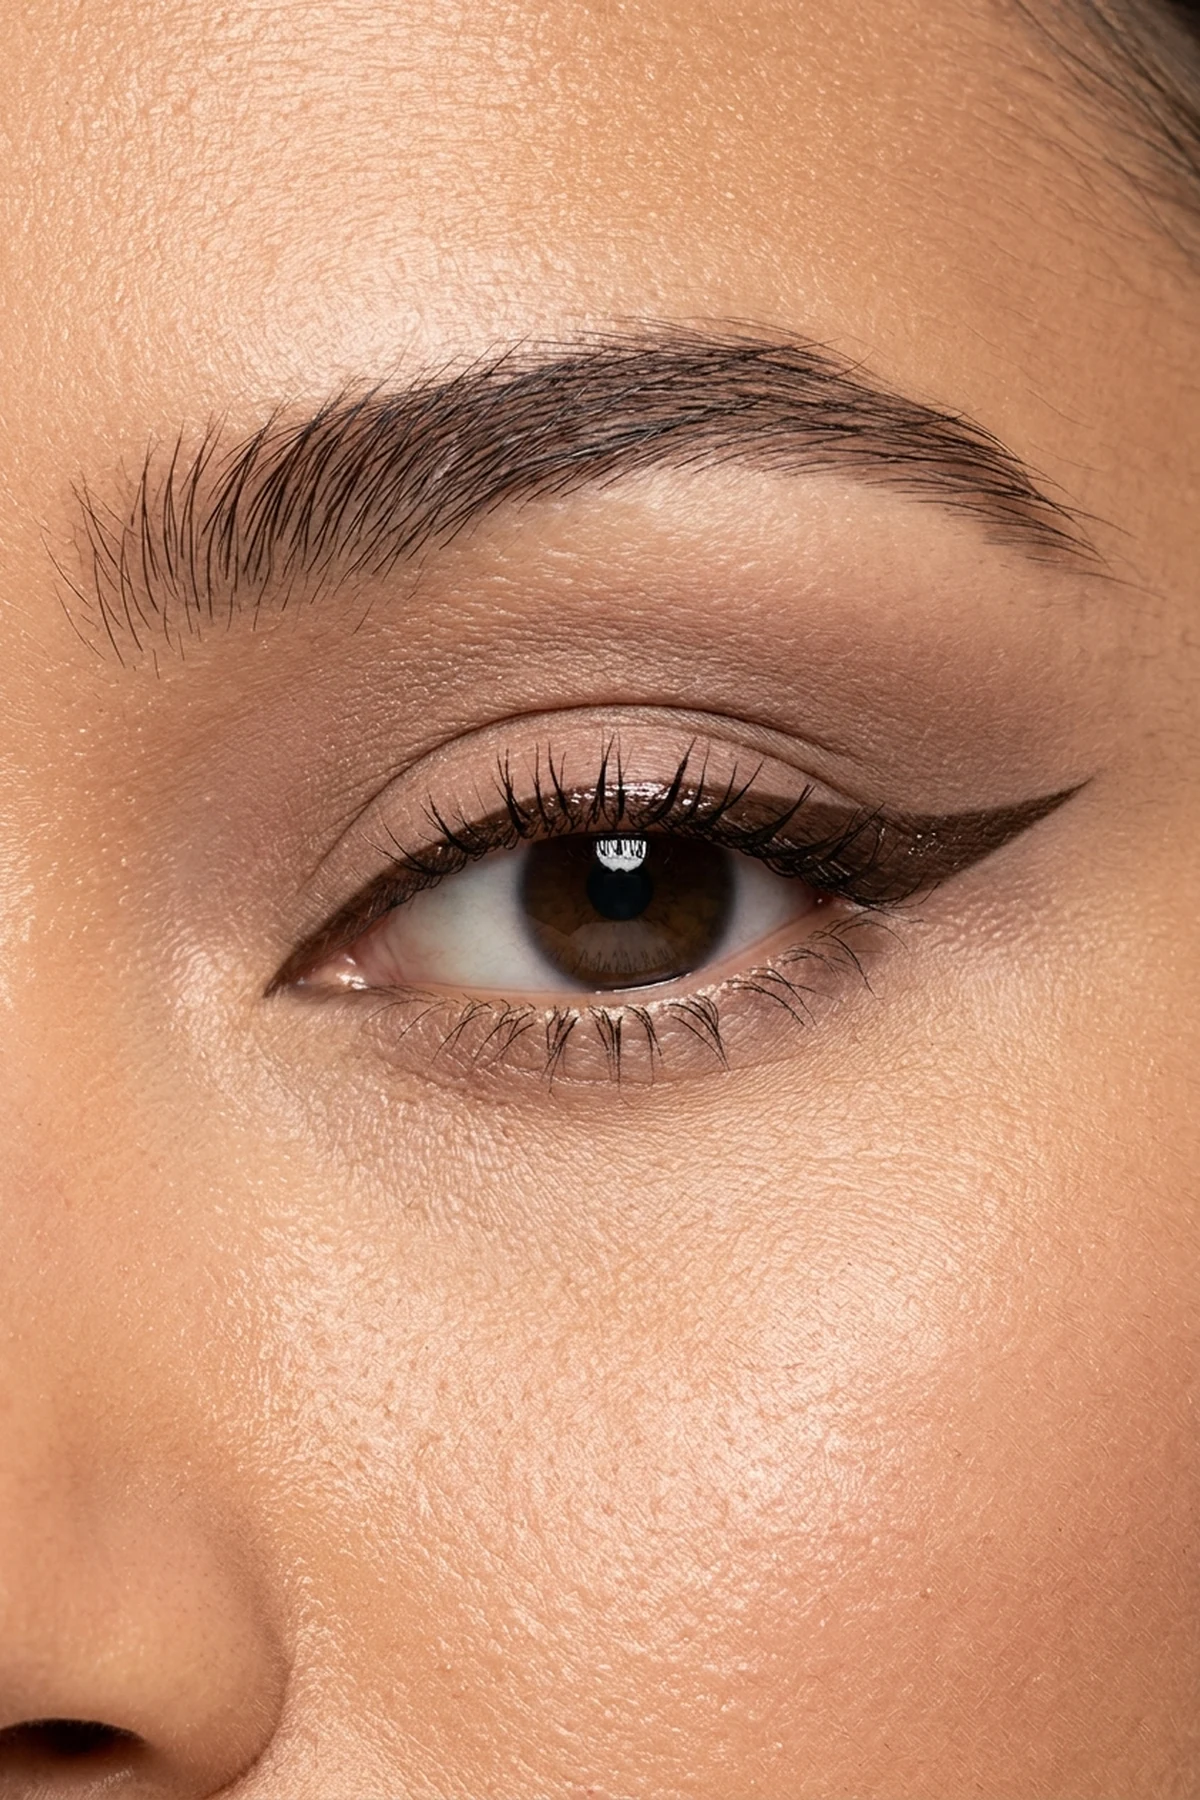
If your carefully drawn cat-eye curves into a crooked hook the moment you relax your eyebrows, this expert pick will change how you approach eyeliner forever. Most standard tutorials fail hooded and deep-set eyes because they instruct you to close your lid or pull the outer corner taut while drawing.
Master hooded eye bat-wing liner mapping by keeping your chin level and staring straight ahead into a mirror with your eyes completely relaxed and open. Sketch your outer flick first as a continuation of your lower lash line, drawing straight across the overhanging skin fold rather than going around it, and then connect the tip back toward the center of your lash line.
When you close your eyes during DIY practice, the shape resembles a stepped geometric bat wing, which looks unconventional up close but aligns into a razor-sharp continuous flick whenever your eyes are open. Bookmarking step-by-step eye makeup tuts built specifically for folded lids saves you from thick black bands that swallow your mobile lid space.
8. Precision Nose Contour Mapping Tutorial for Narrow & Button Bridges
🎯 Solves Problem: Muddy side stripes that make the nose look wider
✨ Finish / Payoff: Soft anatomical shadow and lifted button tip
A major trend alert in modern facial sculpting is ditching the two harsh brown parallel lines drawn down the sides of the nose, which actually drag the eye outward and make the bridge appear wider. Authentic shadow mapping relies on cool-toned grey-taupe pigment placed strictly along the top ridge of your nasal bone.
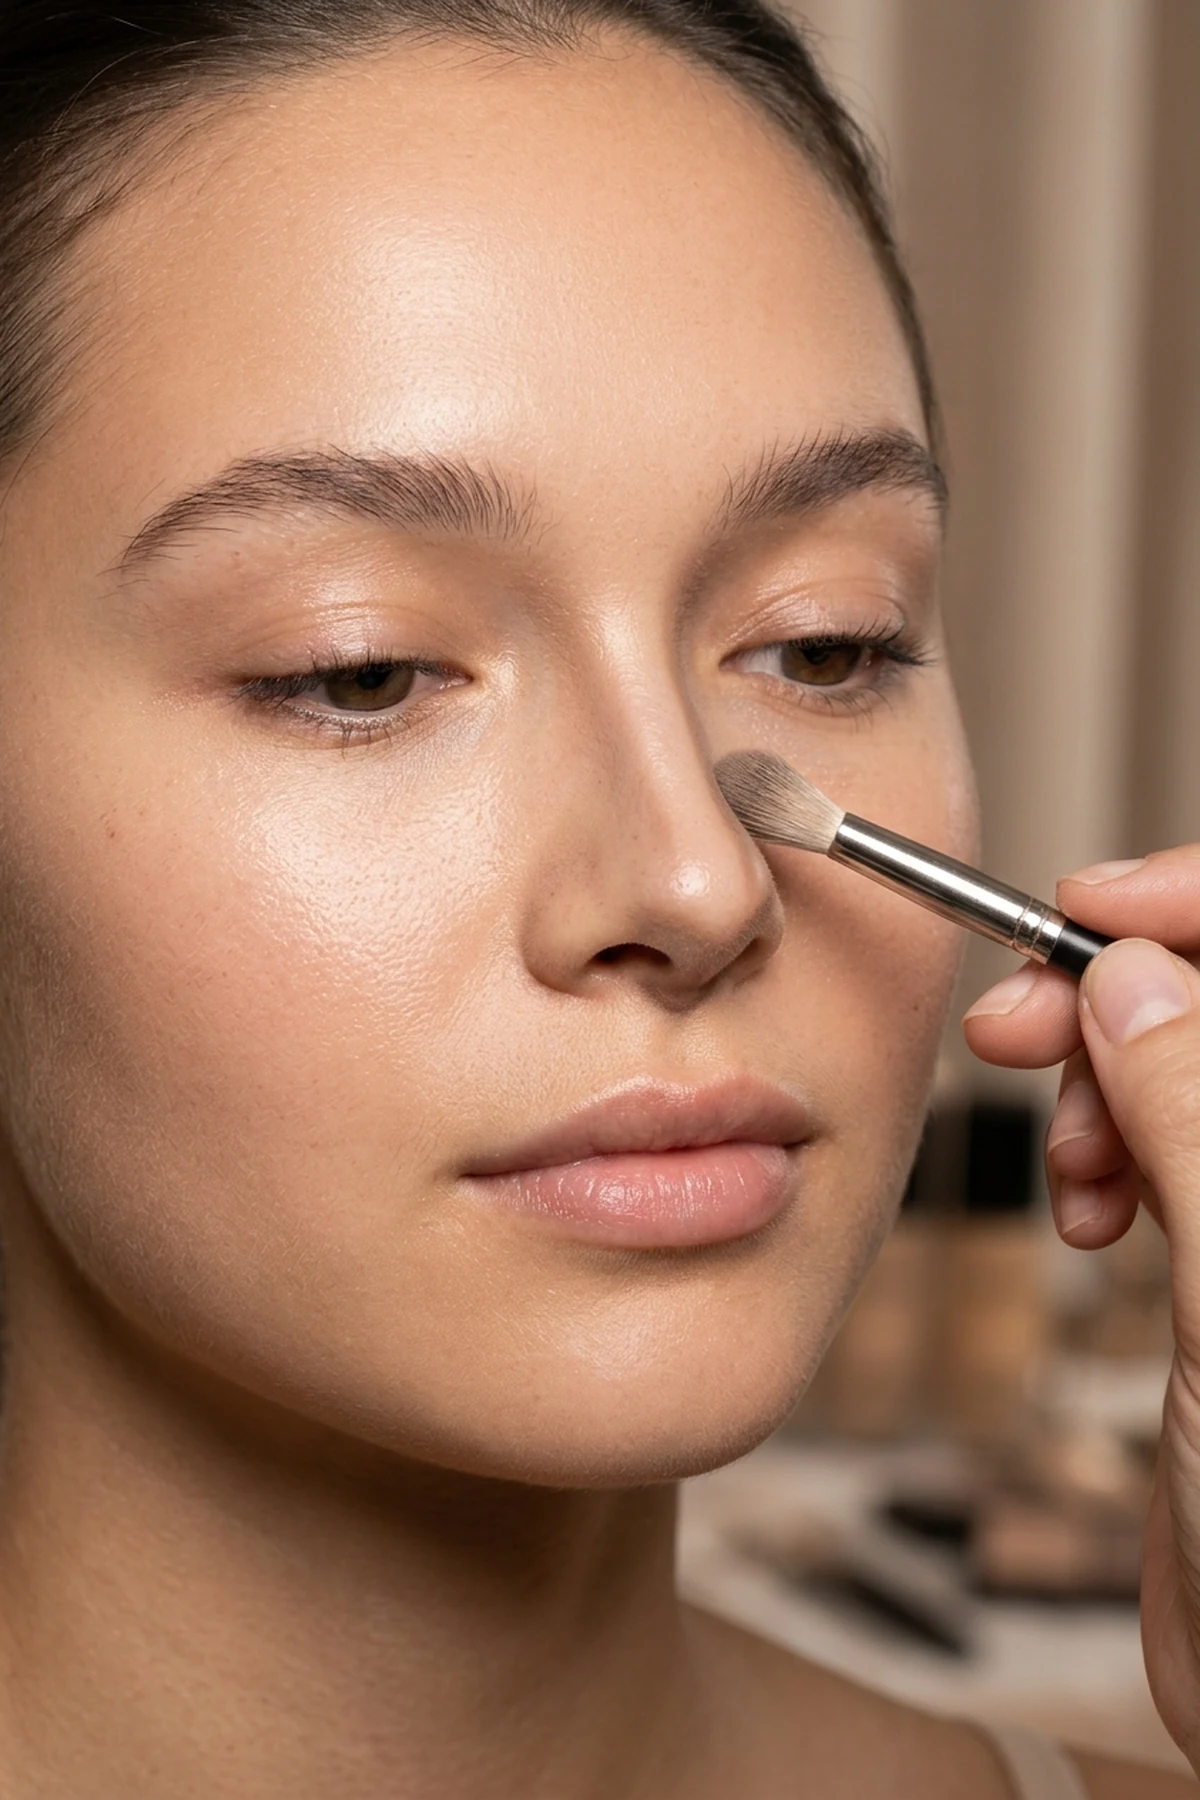
Pick up a whisper of cool contour powder on a small tapered crease blending brush and sketch two softly curved parenthesis brackets just beneath the inner brow heads, plus a delicate horizontal V-shadow right at the lower tip of the nose. Leave the middle bridge untouched by dark lines, and diffuse the edges inward toward the center highlight rather than downward onto the cheeks.
Inspired by cultural editorial artistry from Seoul and Shanghai, finishing the center of the bridge and button tip with a pinpoint dot of satin balm creates a soft-focus cloud skin finish that looks completely natural in person. Your nose appears subtly lifted and refined without a single visible stripe of makeup.
9. Clean Girl Aesthetic Makeup Tutorial Without Foundation and Concealer
🎯 Solves Problem: Heavy clogged pores and visible daytime makeup texture
✨ Finish / Payoff: Breathable glass-skin luminosity in 5 minutes
Skipping traditional liquid coverage is the ultimate beginner friendly shortcut for hot mornings, gym days, or anyone prone to congested pores. When you let your natural skin texture breathe, you eliminate ninety percent of midday touch-ups while still looking polished and awake in five minutes flat.
Instead of opaque base layers, massage a pearl-sized drop of luminizing SPF moisturizer or an ultra-lightweight sheer buildable serum skin tint across damp, freshly prepped skin, then brush your brows upward with clear laminating wax. Tap a dewy berry or rosewood liquid cheek tint high on the apples of your cheeks and across the bridge of the nose for a sun-flushed monochromatic glow.
Among the best minimalist pro complexion makeup tips is curling your bare lashes for ten seconds at the root and swiping peptide lip oil over your natural lip tone before heading out the door. When you want to elevate this bare-skin base for dinner or date night, explore our curated pretty soft glam makeup looks for effortless shimmer pairings.

10. Easy Eye Makeup Tutorial: The Credit Card & Spoon Winged Liner Stencil
🎯 Solves Problem: Shaky hands and uneven asymmetrical eyeliner flicks
✨ Finish / Payoff: Symmetrical winged eyeshadow or liner in 10 seconds
Freehanding matching eyeliner wings at seven in the morning is a recipe for frustration when one flick points toward your eyebrow and the other droops downward. Using household geometry is a foolproof time-saver that guarantees identical angles on both eyes in under ten seconds.
Among the most viral step-by-step eye makeup tuts for shaky hands, press the straight edge of a sanitized business card or credit card from the outer corner of your lower lash line up toward the tail end of your eyebrow. Sweep dark espresso or charcoal eyeshadow along the card’s edge using a tapered crease blending brush, moving inward toward the middle of your eyelid for a smoky, diffused wing.
For DIY liquid liner lovers, hold the curved bowl of a metal teaspoon against your outer lid to trace a crisp upward flick after stamping the straight stem along the bottom edge. Remove the stencil immediately to reveal a symmetrical, smudge-free cat-eye that never requires cotton swabs or micellar water corrections.
11. Upper Waterline Tightlining Hack for Instant Lash-Line Density
🎯 Solves Problem: Flesh-colored gaps between lashes and sparse lash roots
✨ Finish / Payoff: Full lash-root definition without losing lid space
Drawing a thick stripe of eyeliner across the top of your eyelid often makes small or hooded eyes look heavy and closed off. The hidden gem secret to thicker-looking eyelashes is filling the invisible mucosal rim underneath your upper lashes rather than painting over the mobile lid.
Place a mirror flat on a table below chin level so you are looking downward, gently lift the center of your eyelid with one clean finger, and glide a waterproof gel tightlining pencil in rich espresso or carbon black right between the lash roots. Wiggle the creamy tip in short micro-strokes from the outer corner to where your lashes begin near the tear duct, stopping before the wet inner punctum so pigment never migrates.
Unlike heavy dramatic step-by-step eye makeup tuts, this minimalist technique erases the pale gap of skin showing beneath curled lashes while leaving a hundred percent of your upper eyelid free for shimmer or bare-skin sheen. Wait ten seconds before blinking hard so the polymer wax sets completely transfer-proof against your lower waterline.
12. Three-Stroke Temple-to-Jawline Cream Bronzer Sculpting Tutorial
🎯 Solves Problem: Dragged-down cheekbones and muddy orange bronzer patches
✨ Finish / Payoff: Sun-kissed sculpted facial architecture
Swirling bronzer into the deep hollows beneath your cheekbones actually ages the face by pulling your natural volume downward toward the corners of your mouth. This expert pick replaces old-school hollow contouring with elevated three-stroke sun placement that lifts your entire facial structure.
Warm a cream bronzer stick on the back of your hand first, then pick up the pigment with a dense angled kabuki buffing brush rather than swiping the stick directly onto your foundation. Stipple the warmth in three high zones: along the outer hairline temple, right on the upper shelf of your cheekbone (never dropping below the tip of your nose), and softly underneath the jawline hinge to sharpen your profile.
In professional studio sessions—as seen across professional makeup artist aesthetics—artists finish by bouncing a damp open-cell blending sponge along the lower edges of the bronzer to melt the transition into your base. Your cheekbones look naturally sculpted and sun-kissed without a single harsh demarcation line.
13. Douyin Makeup Tutorial: Soft-Focus Gradient Lip Blurring & Cupid’s Bow Overlining
🎯 Solves Problem: Harsh 90s lip liner rings and thin upper lip proportions
✨ Finish / Payoff: Plush cushiony blurred petal lips
Tracing a sharp, dark pencil all the way to the outer corners of your mouth can make thin lips look tense and overly drawn on in daylight. The biggest trend alert in East Asian beauty is the plush, pillow-blurred gradient lip that concentrates fullness right at the center of the pout.
Begin by tapping leftover foundation sponge residue over the outer vermilion border of your lips to mute your natural edge, then dab a rosewood or berry velvet matte liquid lip stain strictly along the inner wet-dry line. Using a round silicone lip brush or your ring fingertip, feather the pigment outward over the center peaks of your Cupid’s bow and the middle curve of your bottom lip while keeping the outer mouth corners soft and sheer.
This cultural staple pairs effortlessly with a soft-focus cloud skin finish because the diffused lip edge echoes the airy, poreless texture of modern complexion work. Add a single drop of clear honey gloss strictly to the center of your lower lip to create a three-dimensional, plush optical illusion.
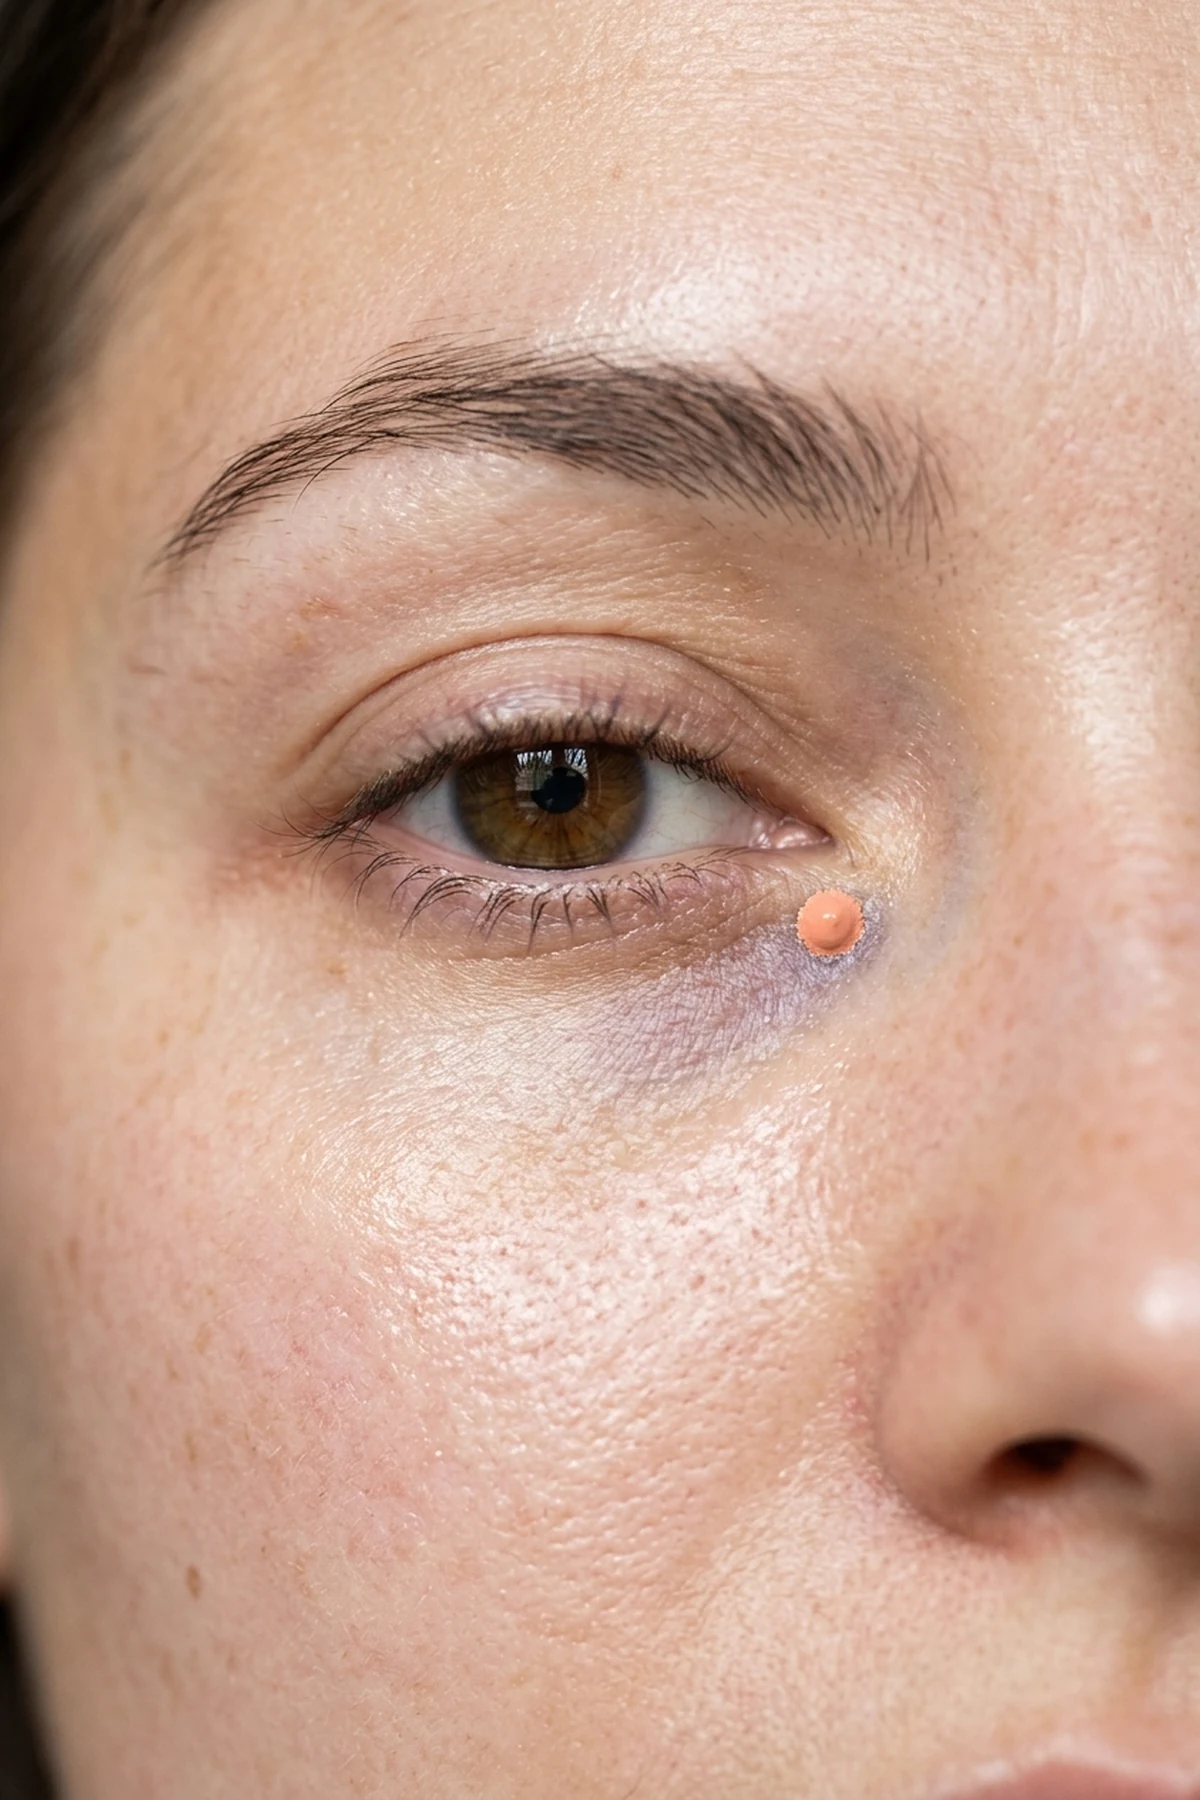
14. Natural Makeup Tutorial for Beginners: Peach Color-Correcting Dark Circles
🎯 Solves Problem: Gray cast showing through concealer on blue/purple shadows
✨ Finish / Payoff: Neutralized bright under-eyes with ultra-thin layers
Layering three coats of light beige concealer over deep blue or purple hereditary dark circles never hides them—it simply turns the shadow an unnatural ashy gray. This beginner friendly color-wheel approach neutralizes cool vascular discoloration before your regular concealer ever touches the skin.
Warm a pinhead-sized dot of peach corrector under-eye pigment (choose bisque-peach for fair-to-light skin or rich terracotta-orange for medium-deep and deep complexions) between your ring fingers and press it exclusively onto the darkest bluish-purple vein along the inner tear trough. Never drag corrector across your entire lower lid where skin is already warm-toned.
Once that micro-veil sets for thirty seconds during your DIY morning routine, follow up with the upward temple concealer dot hack using a shade that matches your surrounding cheek skin. Because the complementary peach tone already cancelled the darkness, you need barely a whisper of concealer for wide-awake, crease-free brightness.
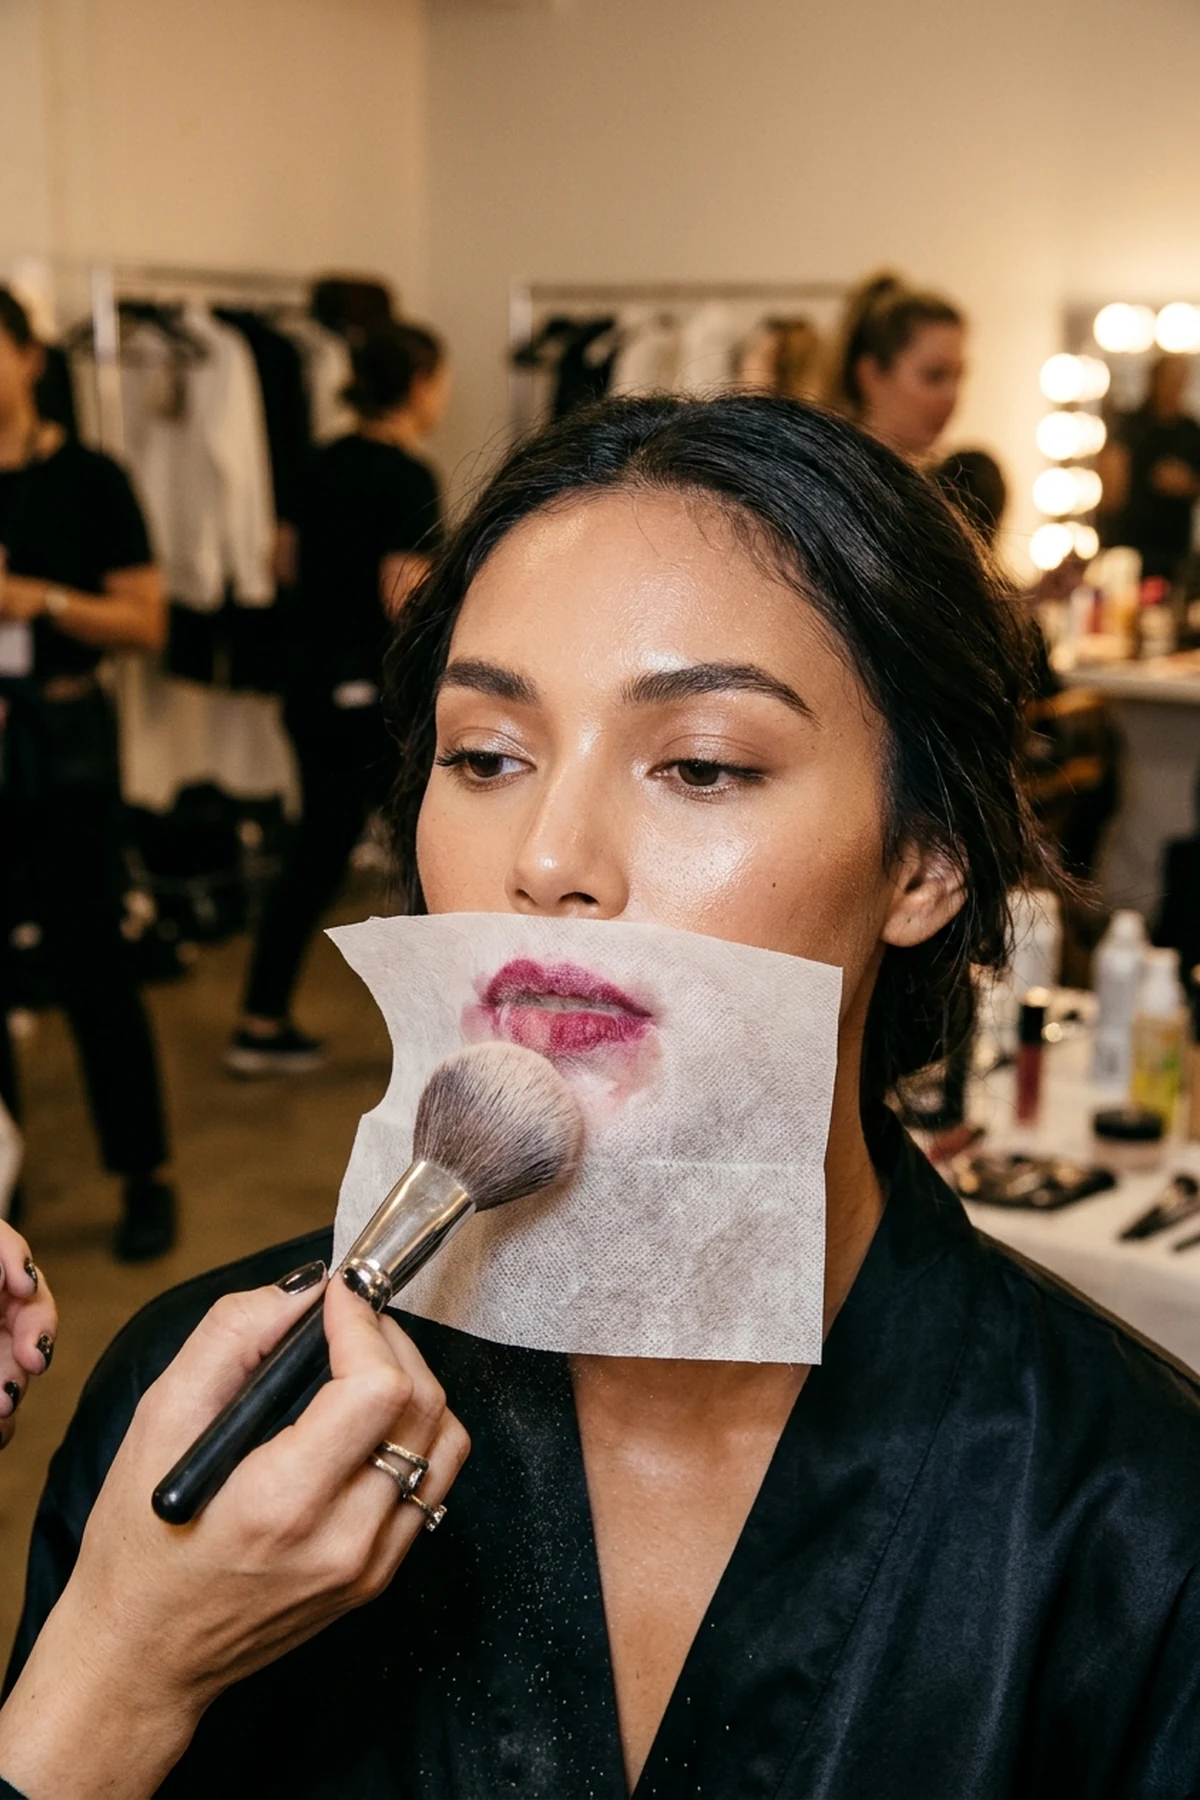
15. Simple Makeup Tutorial: Tissue-Pressed Translucent Powder Lash & Lip Lock
🎯 Solves Problem: Fading lipstick on coffee cups and flat sparse eyelashes
✨ Finish / Payoff: Transfer-proof velvet lips and 2x lash volume
Before you spend money on specialized lash fibers or drying long-wear lip sealers, reach for a regular two-ply facial tissue and your everyday loose powder. This classic backstage budget swap doubles as both a lipstick lock and an instant lash-thickening primer.
After applying your favorite creamy satin lipstick or velvet matte liquid lip stain, separate a facial tissue into a single ultra-thin ply, lay it flat across your lips, and dust a fluffy brush loaded with micro-fine translucent setting powder right over the paper. The tissue acts as a micron-level sieve that allows only invisible oil-absorbing silica particles through, turning any bullet lipstick into a transfer-proof velvet stain that survives espresso cups and multi-course dinners.
For maximalist evening lashes, lightly tap that same powder-dusted brush tip across your first wet coat of mascara before sweeping on a second coat. The microscopic powder grains grip the mascara polymers to build dramatic false-lash thickness without clumping or flaking onto your cheeks.
Frequently Asked Questions
What is the correct step-by-step order to apply makeup for beginners?
Always follow the liquid-before-powder rule so your products blend smoothly without clumping. Start with moisturizer, sunscreen, and a compatible primer, then apply liquid foundation, color corrector, cream concealer, and cream bronzer or blush. Once all wet formulas are blended, press translucent setting powder into your T-zone and under-eyes before finishing with brow gel, eyeshadow, eyeliner, mascara, lip color, and setting spray.
Why does my foundation look cakey or separate around my nose and chin?
Cakey separation happens when you layer a silicone-based foundation over a water-based primer (or vice versa), or when you apply base makeup before your skincare has fully absorbed. Wait ninety seconds after applying sunscreen, match water-based tints with a silicone-free hydro primer, and press pigment into pores with a damp sponge rather than swirling heavy layers with a dry brush.
Should you put concealer on before or after foundation?
Applying foundation or skin tint first is almost always better because it evens out eighty percent of your redness and discoloration right away. When you follow up with the two-dot concealer placement at the inner tear trough and outer temple, you use less than half the product and prevent thick under-eye creasing.
How do I keep winged eyeliner from smudging or disappearing on hooded eyes?
Map your outer flick with your eyes completely open and relaxed using the bat-wing technique so the line bridges directly over your natural crease fold. Prep your eyelids with a tiny tap of translucent powder to absorb surface oils, and choose a waterproof gel pencil or quick-dry liquid brush pen rather than creamy kohl liners.
How can I remove waterproof tightliner and polymer-sealed makeup without tugging my lashes?
Never scrub waterproof mascara or gel tightliner with harsh soap, which snaps delicate eyelashes and irritates your waterline. Instead, melt away long-wear polymers and pigment in seconds using a lipid-rich oil cleanser—read our guide on castor oil for makeup removal to dissolve stubborn eye makeup while conditioning your lashes.
Get our latest guides, news, and insights highlighted in your Google Search & AI Overviews.