✨ This article was AI edited. Editorial responsibility: Britany Marshall Beauty.
| Nail Enhancement Type | Chemical Structure | Acetone Permeability | Required Removal Technique | Natural Plate Damage Risk |
|---|---|---|---|---|
| Soft Builder Gel (BIAB / Bottle Builder) | Short-chain cross-linked urethane acrylates with solvent-sensitive plasticizers | High (Permeable when debulked) | 180-grit surface debulk + 15–20 min foil acetone soak + wooden pusher | Very Low (If not scraped aggressively) |
| Hard Builder Gel (Potted Extension Gel) | Tightly woven 3D molecular cross-links with zero solvent-dissolvable pathways | Zero (Impermeable to Acetone) | Controlled hand-filing or E-file (leaving 10% base coat barrier); Never soak | Moderate to High (Requires precise motor control) |
| Traditional Gel Polish (Base + Color) | Thin polymer film with high solvent-receptive monomer ratio | Complete (Dissolves rapidly) | Light buff + 10 min foil wrap + gentle wipe | Minimal |
| Dip Powder / Liquid Monomer Acrylic | Polyethylmethacrylate (PEMA) polymer bead matrix | Moderate to High | 100-grit debulk + 25–30 min acetone soak with heat | Moderate (Severe dehydration risk) |
[HERO_IMAGE]
1. Forensic Chemistry: Hard Gel vs. Soft Builder Gel (BIAB)
Before picking up a single file or opening a bottle of acetone, you must determine whether the builder gel on your nails is chemically soluble. In salon terminology, “builder gel” is frequently used as an umbrella term for two completely distinct polymer architectures:
- Soft Gel / Builder in a Bottle (BIAB): Formulated with flexible oligomers and targeted porosity channels. When the protective topcoat is filed away and exposed to acetone, the solvent molecules penetrate the polymer matrix, breaking down the adhesion bonds between the gel and the keratin surface. It turns gummy, flaky, and crumbly, allowing it to slide away effortlessly.
- Hard Gel (Traditional Potted Extension Gel): Synthesized with extremely dense, tightly cross-linked molecular bonds. Hard gel will not dissolve in acetone, no matter how many hours you soak your fingers. Soaking hard gel in acetone simply dehydrates the surrounding skin, parches the nail matrix, and yields zero product breakdown. Hard gel must be filed down by 90%, leaving a microscopic protective base layer that grows out naturally with the nail plate.
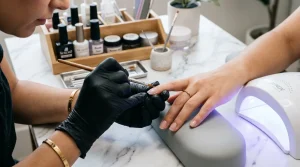
Diagnostic Test: If you applied your builder gel from a polish bottle equipped with a brush and cured it under LED/UV, it is almost certainly a soak-off builder gel (soft gel). If the technician sculpted extensions using a thick paste scooped out of an acrylic pot with a separate spatula, it is likely hard gel. When in doubt, consult the manufacturer INCI sheet.
2. The Histology of Nail Plate Damage: Why Scraping Ruins Keratin
A human natural nail plate (unguis) is not a solid sheet of bone or calcium; it is composed of 100 to 150 compressed layers of dead, flattened onychocyte keratin cells bonded by intercellular lipids (predominantly squalene, cholesterol, and ceramides). The plate is organized into three distinct histological layers:
- The Dorsal Layer (Top 10–15%): Hardest, high-density keratin that resists chemical exposure and mechanical trauma.
- The Intermediate Layer (Middle 75%): Softer, flexible keratin that absorbs flex and impact.
- The Ventral Layer (Bottom 10–15%): Extremely soft, vascularized base layer anchored to the nail bed.
When you peel, bite, or force a partially dissolved builder gel coating using a metal scraper, the chemical bond between the primer/gel and the dorsal keratin is stronger than the intercellular lipid bonds between the keratin layers themselves. As a result, you do not peel off just the gel—you tear away 20 to 50 layers of dorsal keratin.
This creates immediate macroscopic damage: chalky white patches (leukonychia), longitudinal splitting (onychorrhexis), hyper-flexibility, and extreme temperature sensitivity. Worse still, future manicures will inevitably lift within 48 hours because there is no smooth, intact dorsal surface left for new polymers to anchor to.
[INBODY_IMAGE]
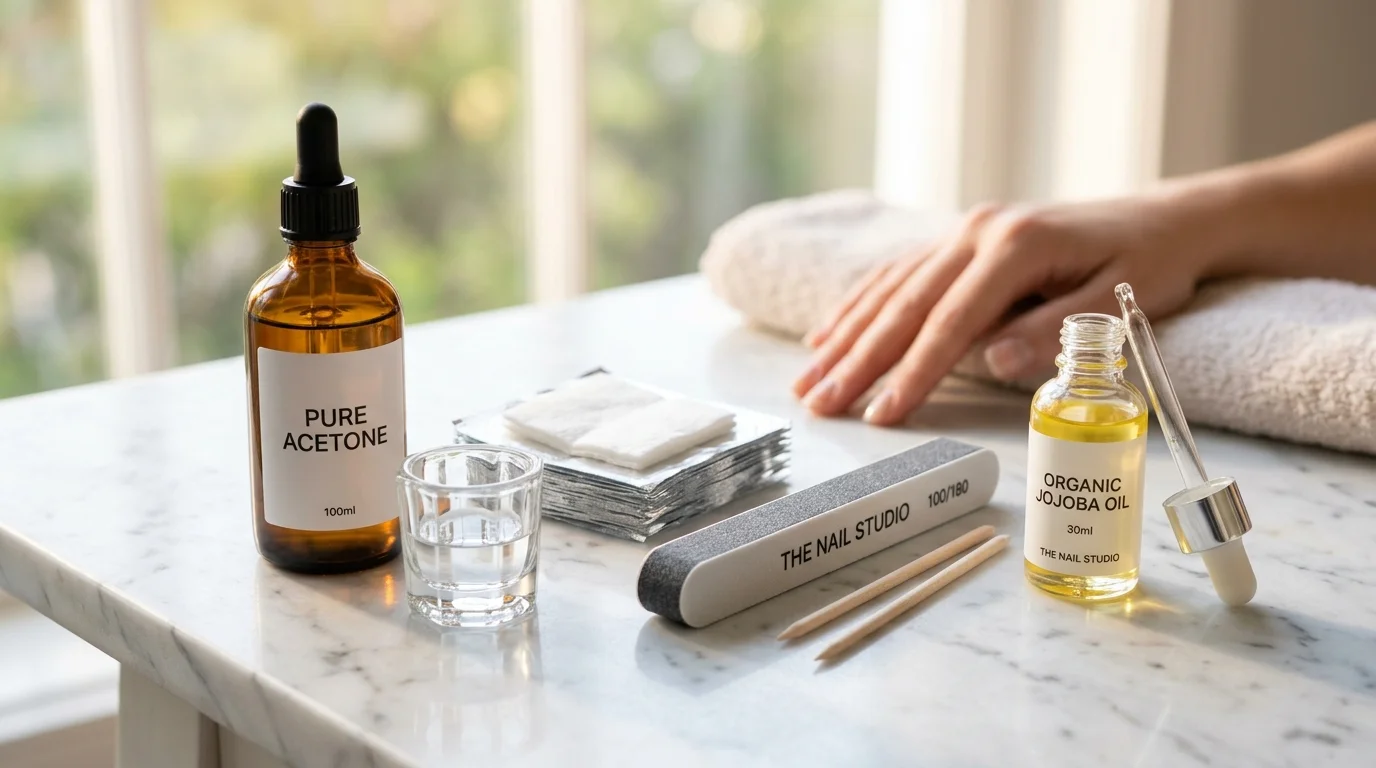
3. The Essential Safe Removal Toolkit: Chemistry & Specifications
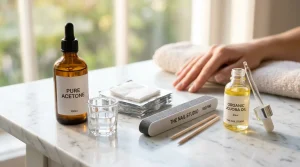
Do not attempt builder gel removal with grocery store nail polish remover. Traditional cosmetic removers contain 10–30% water, fragrances, glycerin, and low-grade ethyl acetate. While gentle for standard lacquer, they lack the osmotic potential to break down high-viscosity builder oligomers, resulting in an aborted 45-minute soak and subsequent aggressive scraping.
| Tool / Product | Ideal Specification | Clinical Function |
|---|---|---|
| 100% Pure Acetone (USP Grade) | Zero water or perfume additives | Rapidly cleaves methacrylate oligomer polymer bridges without sluggish evaporative stalling. |
| Hand File (100/180 Grit) | 150 grit for debulking, 180 for refining | Removes the cross-linked non-porous topcoat seal and reduces apex thickness by 70%. |
| Cuticle Pusher (Orangewood vs. Steel) | Beveled Orangewood Sticks | Wood has a lower Shore D hardness than natural keratin, preventing micro-gouging of the dorsal plate. |
| Encapsulation Material | Pre-cut heavy foil wraps with lint-free cotton | Locks in volatile acetone vapor and traps natural body heat to accelerate chemical dissolution. |
| Post-Removal Hydrator | 100% Cold-Pressed Golden Jojoba Oil | Smallest molecular diameter of all plant wax esters; penetrates intercellular onychocyte lipids. |
4. The 4-Phase Step-by-Step Clinical Removal Blueprint
Phase 1: Surface Debulking (The Crucial Step)
Topcoats are intentionally engineered to resist everyday solvents, household chemicals, and isopropyl alcohol. Acetone cannot penetrate a cured topcoat efficiently. If you wrap an unfiled builder gel nail in foil, the acetone will evaporate before reaching the base layer.
- Take the coarse side (150 grit) of your file and gently buff the entire shiny surface of each nail until the gloss is completely replaced by a matte, chalky texture.
- Carefully debulk the apex—the thickest center portion of the nail enhancement. Use long, parallel strokes from cuticle to free edge. Do not saw back and forth in one spot to avoid focal friction heat spikes.
- Reduce the total thickness of the builder gel by 60% to 70%. Stop filing the moment you see the natural nail plate near the cuticle line or side walls. You should still see a translucent thin veil of builder gel protecting the natural plate.
- Wipe away all airborne dust using an alcohol pad or dry lint-free wipe.
Phase 2: Acetone Saturation & Thermal Acceleration
Acetone dissolution is an endothermic-assisted reaction: heat significantly expands polymer chains and accelerates solvent penetration by up to 2.5×.
- Skin Barrier Protection: Apply a thick bead of pure petroleum jelly (Vaseline) or cold-pressed jojoba oil to the skin surrounding the nail folds and eponychium. Do not get oil onto the nail plate itself, as oil creates an hydrophobic barrier against acetone.
- Saturation: Soak a small piece of lint-free cotton pad (cut to the exact dimensions of your nail bed to minimize skin contact) in 100% pure acetone.
- Encapsulation: Place the soaked pad directly over the debulked gel and wrap tightly in heavy-gauge aluminum foil, pinching the top tip into a sealed tent to trap evaporating fumes.
- The Warm Towel Secret: Place your wrapped hands inside a warm, damp hand towel (microwaved for 20 seconds) or slip them into cotton winter gloves. The insulated warmth cuts required soak time from 30 minutes down to 12–15 minutes.
Phase 3: Controlled 45-Degree Slide-Off
After 15 minutes, remove the foil from one finger only. Do not unwrap all ten fingers at once, because exposure to air causes acetone to evaporate instantly, re-hardening the softened gel polymers within 60 seconds.
- Gently press down on the foil wrap and twist slightly as you pull it off the fingertip. A substantial portion of the softened builder gel will slide off inside the cotton pad.
- Hold an orangewood stick at a flat 45-degree angle against the nail plate. With featherlight pressure, glide the beveled wooden edge from the cuticle toward the free edge. The softened gel should crumble away like feta cheese or soft silicone.
- Resistance Rule: If you encounter resistance or a firm patch that requires force, STOP IMMEDIATELY. Never scrape, pry, or dig into the nail. Re-saturate the pad with fresh acetone, re-wrap the finger, and allow it to soak for an additional 5 to 7 minutes.
- Once all gel is cleared, buff the nail surface with an ultra-fine 240/280-grit buffer sponge for 5 seconds to smooth any residual microscopic base fibers.
Phase 4: Keratin Lipid Rehydration & Recovery Quarantine
Pure acetone completely extracts natural lipid moisture from the dorsal onychocyte layers, leaving the keratin temporarily brittle, contracted, and chalky white. Reversing this state immediately is critical to preventing post-removal cracking.
- Wash hands thoroughly with lukewarm water and a pH-balanced sulfate-free hand cleanser to remove all chemical residues. Avoid hot water, which leaches further lipids.
- Apply generous drops of 100% pure jojoba oil directly onto the nail plate, proximal nail fold, and under the free edge (hyponychium). Massage each finger for 30 seconds.
- Repeat jojoba oil application three times daily for the next 72 hours.
- The 48-Hour Quarantine: If you plan to reapply a fresh builder gel set, allow the natural nails to breathe and rehydrate with lipid serums for at least 24 to 48 hours. If applying immediately, wipe the nail plate thoroughly with 99% isopropyl alcohol to dehydrate surface oils before primer application.
5. Troubleshooting Roadblocks: What to Do When Gel Won’t Budge
Roadblock 1: The gel is gummy on top but rock-solid underneath.
Cause: Insufficient debulking during Phase 1. The top layer dissolved, but the thick apex prevented acetone from reaching the bottom layers.
Remedy: Scrape away the dissolved gummy surface with your orangewood stick, use your 180-grit file to debulk the exposed solid layer for 15 seconds, and re-wrap in foil for another 8 minutes.
Roadblock 2: The gel did not soften at all after 25 minutes.
Cause: You are wearing traditional hard gel or an acrylic overlay rather than a soak-off builder gel.
Remedy: Discontinue acetone soaking immediately. Use a 150/180 grit file to carefully file down the bulk of the gel, leaving a paper-thin barrier (approx. 0.5mm) over the natural nail. Smooth with a 240-grit buffer and let the remaining base grow out naturally.
Roadblock 3: Nails feel sore, thin, or bend backwards after removal.
Cause: Previous aggressive e-filing or peel-off trauma has stripped dorsal onychocytes.
Remedy: Trim the free edge short to eliminate leverage and mechanical stress. Apply a clinically formulated keratin treatment (such as CND RescueRXx or OPI Repair Mode) twice daily and seal with high-potency squalane oil.
6. Frequently Asked Questions (FAQ)
Does soaking in pure acetone ruin your natural nails?
No. Acetone is a volatile organic solvent that temporarily strips water and lipid content from the keratin plate, but it does not alter keratin protein structure. The dehydration is 100% reversible within 24–48 hours through topical jojoba oil replenishment. Mechanical scraping and peeling, on the other hand, cause permanent physical removal of dorsal nail layers that can only be resolved by growing an entirely new nail plate (4–6 months).
Can I use a bowl of acetone instead of foil wraps?
Yes, but the double-bowl warm water method is recommended over direct soaking. Place pure acetone in a small glass bowl, and set that bowl inside a larger bowl of warm (not boiling) tap water. Submerge only the fingertips. Never microwave acetone, as it is extremely flammable. While bowl soaking is faster (10–12 minutes), it exposes more skin surface area to solvent dehydration compared to targeted foil wraps.
Why should I use orangewood sticks instead of metal pushers?
Wet, acetone-soaked keratin is up to 30% softer than dry keratin. Stainless steel tools have a significantly higher hardness score than softened keratin and can easily gouge ridges or gouge off healthy dorsal cells. Soft orangewood has a gentle tensile flex that gives way before natural nail keratin is compromised.
How long should I wait before applying a new set of builder gel?
If your natural nails are healthy and undamaged, you can reapply builder gel immediately following proper nail prep (dehydrating with 99% isopropyl alcohol). However, if you notice any thinning, white spots, or peeling from previous wear, a 14-day resting period focused on keratin conditioners and lipid oils is strongly advised.
Editorial Disclosure: Britany Marshall Beauty is an independent digital beauty publication. All product names, registered trademarks, and formulation analyses are property of their respective owners and referenced under fair use for educational and comparative safety evaluation. Always conduct patch testing prior to solvent exposure.
Get our latest guides, news, and insights highlighted in your Google Search & AI Overviews.